Back to 3D Printers
Our MakerBot is from 2011 and no longer in regular use. Use one of our newer 3D printers instead. The information below is kept for archival purposes.
How to use the MakerBot 3D Printer
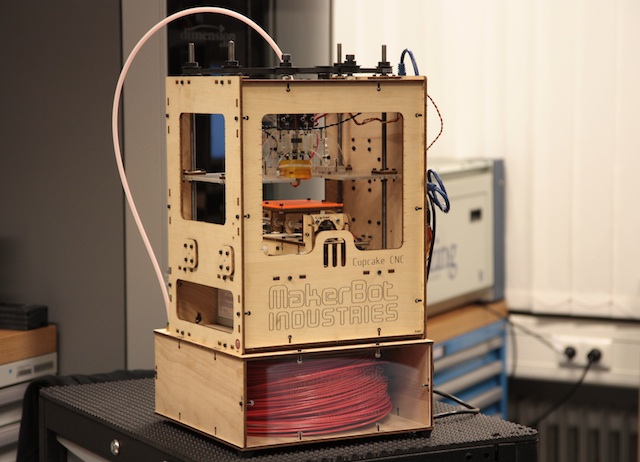
We have a CupCake CNC 3D printer from MakerBot Industries. The experts for this device are René Bohne as the Fab Lab Master, our current Mechanical Engineering expert Jan Zimmermann, Hendrik Kolvenbach, our Hiwi from Mechanical Engineering who tuned the device, and Jan Borchers who originally assembled the unit in early 2011.
If you would like to use the printer, please talk to René Bohne first.
The printer uses ABS plastic. We currently have rolls in white (ivory), red, and black. We also have a roll of transparent PLA which has a harder, smoother surface, while ABS is more flexible and less prone to breaking.
To operate the printer (these instructions assume you're using Mac OS X):
- Install ReplicatorG (version 0033 from google code, newer versions do not produce gcode compatible with the non-stepped extruder). ReplicatorG takes STL files (3D model files independent of a particular printer) and creates a GCode file from it (assembler-like, printer-specific instructions how to move the print head and when to extrude plastic). It is also used to send that file to the printer, and to control the printer manually for test extrusions, changing plastics, etc.
- Check if you have the latest FTDI drivers installed: http://www.ftdichip.com/FTDrivers.htm
- Install Pleasant 3D, which is a very fast 3D viewer for Mac OS X you can use to preview your STL model file, and to scale and center the object if needed.
- Use our turtle, our turtle with raft, or download an STL file from, e.g., Thingiverse. For your first attempts, we recommend to limit yourself to a project that mentions that it was designed with the MakerBot in mind on the project web site. Alternatively, you can create your own 3D model using a software such as Blender (free), OpenSCAD (free, programming language based), AutoCAD (free for students), or Google SketchUp (free, STL files are sometimes a bit buggy).
- Plug in and switch on power supply on the rear of the MakerBot.
- Switch on MakerBot RepRap motherboard using the on-board switch. Green LEDs should light up.
- Plug in USB cable to your Mac.
- Launch ReplicatorG.
- If this is your first connection with the printer: be sure, that your computer is connected to the internet!
- Open your STL or gcode file from inside ReplicatorG
- In the Machine menu, select Cupcake Basic for the Driver, and check that the /dev/tty.usbserial-... port is selected under Serial Port.
- Click the Connect toolbar icon (the one with the plug on it).
- From the Machine menu, open the Control Panel.
- Click on Stepper Motor Controls - Disable.
- Move the build platform in X and Y directions by hand so it's centered under the print head.
- Move the printhead down by turning the front black wheel on top until the print nozzle is .5 mm above the surface.
- Click on Make Current Position Zero.
- Click on Stepper Motor Controls - Enable.
- Close the Control Panel.
- From the menubar, select GCode - Choose GCode Generator - Skeinforge 35.
- If you have an STL file, click on Generate GCode in ReplicatorG main window.
- In the popup window, select SF35 - cupcake-HBP, and leave Use raft selected. Deselect "Use print-O-Matic" and select "Use default start/end gcode". Click Generate GCode.
- Click on the Build icon in the ReplicatorG window (first icon from the left).
- If you used an STL file, or a gcode file with included test extrusion, the printer will run a test extrusion now. This will take several minutes because it needs to heat up the print head. After the test extrusion has completed, click "Yes" in the dialog that has popped up.
- Watch your model being built.
- If the print head seems to dig into the existing layers, move it up manually by carefully turning the top black front wheel a bit.
- If the extrusion stops, tighten the black thumb screw on the side of the print head a bit until it grips the ABS again. Also make sure that the ABS can roll easily from the spool and is not jammed anywhere.
- To change ABS, NEVER try to pull it out of the printhead when it's cold. You will BREAK the machine that way. Instead, open the Control Panel, enter 225 into the Target Temperature box, press TAB to confirm the value, and wait until the two lines in the diagram below are on that temperature. Then enter 255 into Motor Speed (PWM), click on Motor Control - Reverse, and gently pull on the ABS until it comes free of the print head. Stop the Motor Control. Insert the new filament, and feed it in while running Motor Control - Forward. Wait until the extrusion has pushed all the old molten material out and you see only the new ABS color coming out. Then stop the motor control, and close the control panel.
For more details, see the official MakerBot Cupcake pages.
Frostruder
We have a frostruder mk2 for the makerbot. See this page if you want to learn how to use it.
Electronics
Our Cupcake CNC uses Gen3 electronics and has a relay board with two relays.
Always connect the RJ45 cable from the extruder controller board to the RJ45 jack of the mainboard. Use the jack closest to the SD card slot.
If you want to use the Plastruder (ABS/PLA extruder) then connect the B-/B+ outputs of the extruder controller board to one input of the relay board and connect the output of the relay to the hotend. Connect the motor to the 1A/1B outputs of the extruder controller board. Connect the thermistor to the THERMISTOR input of the extruder controller board.
If you want to use the Frostruder then connect A-/A+ outputs of the extruder controller board to the relieve valve and connect the C-/C+ outputs of the extruder controller board to the pressure valve.
The following picture shows the extruder controller board:

If you use the relay board, make sure that the power supply cables are connected!
Firmware
Mainboard uses firmware 3.0
Extruder Controller Board uses firmware 3.0 w/relays. This is a firmware that does not use PWM for the relay channel.
ReplicatorG
Since the Cupcake now uses firmware 3.0, you need to use ReplicatorG version 0026 or later and select "Cupcake Basic" if you want to use the Plastruder.
Special G-Codes and M-Codes
Some Codes that are good to know...
| Code | description | comments |
|---|---|---|
| M101 | start extruding | LED6 (middle) turns on, Extruder Controller Board Port B |
| M103 | stop extruding | LED6 (middle) turns off, Extruder Controller Board Port B |
| M106 | frostruder pressure valve open | LED7 (right) turns on, Extruder Controller Board Port C |
| M107 | frostruder pressure valve closed | LED7 (right) turns off, Extruder Controller Board Port C |
| M126 | frostruder relieve valve open | LED5 (left) turns on, Extruder Controller Board Port A |
| M127 | frostruder relieve valve closed | LED5 (left) turns off, Extruder Controller Board Port A |
Options
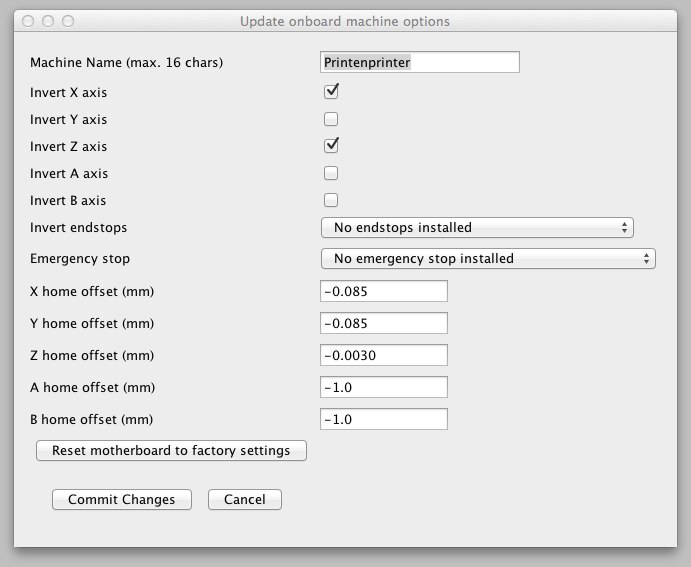
Motherboard options:
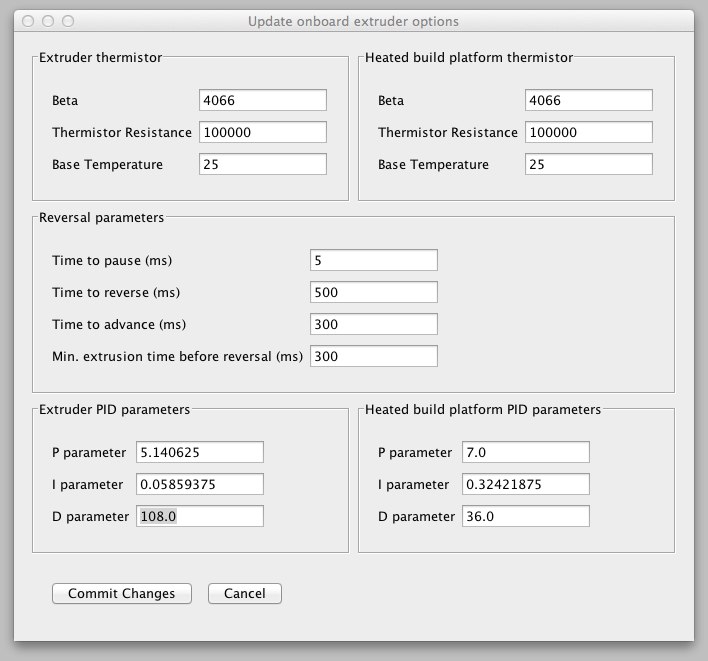
Extruder options: