3D Printing with OpenSCAD and the Dimension Elite Printer
OpenSCAD is a free program you can use to create 3D models.Installing OpenSCAD
Learning OpenSCAD
Using the FabLab Printer
Installing OpenSCAD
1. Go to the openSCAD website. Scroll down to "Download Releases".- For mac, select the link for "latest pre compiled OS X binaries".
- For windows, select the link for "latest pre compiled Windows binaries".
2. Download and install the program.
3. To start the program, click on the OpenSCAD icon.
The OpenSCAD icon
Learning OpenSCAD
Using the Interface
With openSCAD open, type in the following code:cube();
Now you should compile. Do this by pressing F5, or clicking on Design in the menu bar, and then selecting Compile.
A shape should appear in window on the top right, as depicted in the image below.
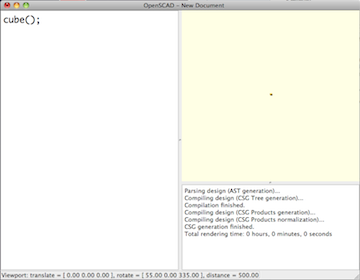
It is very hard to see the cube! In addition, it is at a weird angle. Changing the viewing angle/position:
- To zoom in or out, use the scroll button on the mouse
- To view the shape from a different angle, click and drag the mouse. Alternatively, click on View in the menu bar, and then choose from the orientations listed (top, bottom...).
- To change the placement of the shape, right click and drag the mouse. You can reorient yourself by clicking View in the menu bar, and then Show Axis (this way, you can see your shape in relation to the XYZ axis).
An Example
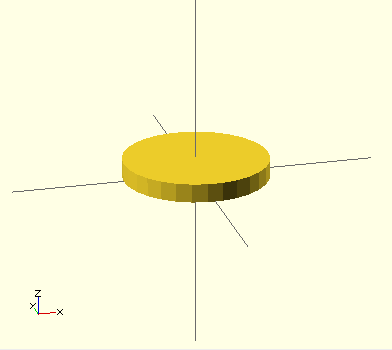
In this example, we will go through the steps to make a button.1. Create the starting shape by typing the following into the left window:
cylinder(h = 5, r = 20);When you compile (by pressing F5), you should see the following image appear in the top right window.
2. No we need to make the holes in the button. To do this, we use the difference function. What it does is subtract the second shape from the first shape. We will make a second, thinner cylinder, and subtract it from the larger cylinder. Type in the following code:
difference(){


cylinder(h = 5, r = 20);


cylinder(h = 5, r = 4);


}
When you compile, you should see
 (Note that I've zoomed in. How did I do that? CORRECT! The scroll button on the mouse!)
3. We need to make two holes, and have them off center. To do this, we use the translate command (think of this as the move command). The following command will move our hole over to the right.
difference(){


cylinder(h = 5, r = 20);


translate(v = 10, 0, 0) {  //v = x, y, z
	cylinder(h = 5, r = 4);


	}


}
You might notice that there seems to be some extra material covering the top and bottom of the whole. This is because we have subtracted a cylinder of the exact same height of our larger cylinder. To solve this, we will make the subtracted cylinder 2 units taller, and move it down one unit.
Modify your code so that it looks like the following:
difference(){


cylinder(h = 5, r = 20);


translate(v = 10, 0, -1) {


	cylinder(h = 7, r = 4);


	}


}
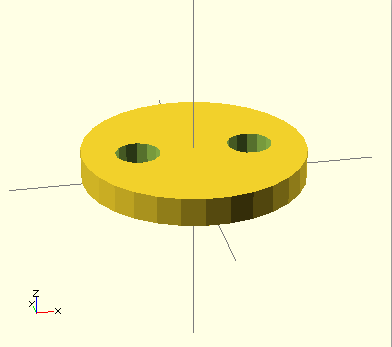
Now, for the second hole: we can add another cylinder in the difference command, and translate it to the left this time.
Your final code will be:
difference(){


cylinder(h = 5, r = 20);


translate(v = 10, 0, -1) {


	cylinder(h = 7, r = 4);


	}


translate(v = -10, 0, -1) {


	cylinder(h = 7, r = 4);


	}


}
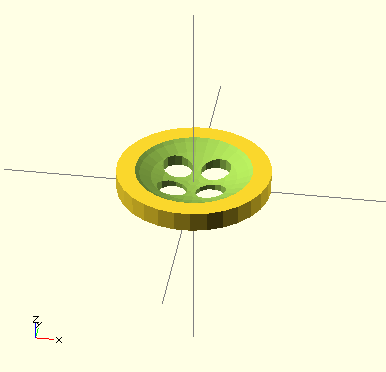
The final button looks like this:
A slightly more advanced version:
 Can you make this button?
Hint: subtract the bottom of a sphere from your cylinder to get the slope.
Exporting your File
1. Compile and Render (F6 or go to Design in the menu bar and select Compile and Render)2. Export as STL (go to Design in the menu bar and select Export as STL). Save the file when it tells you to.
Using the Dimension Elite 3D printer
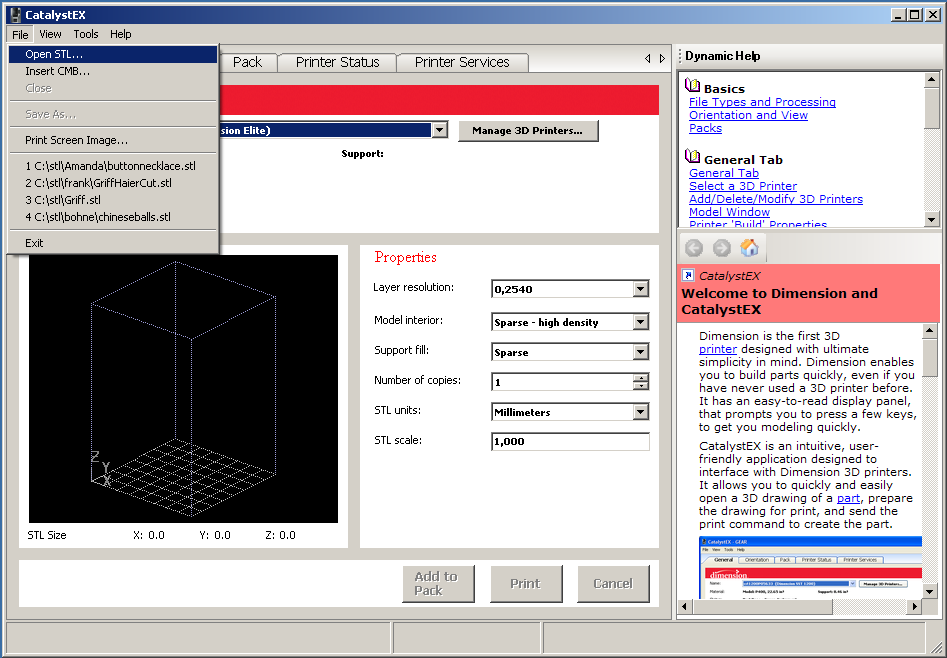
1. Once you have your file in .stl format, go to the computer by the laser cutter. Open the Windows parallel desktop, and copy your code into a folder with your last name using the following path: My Computer/ C / stl / your_name.2. Open the program following the path Programs/ Dimension / CatalystEX 4.0 / CatalystEX
3. We will be using three tabs: the general tab, the orientation tab, and the pack tab
- In the general tab, open your design by going to file and selecting Open STL. Go to the directory where you file is and click open. You can scale your image in this tab.
- In the orientation tab, you can position your model the way you want it to be printed. Once you are satisfied, click Add to Pack. After doing this, you can view your model layer by layer using the level viewing options.

- In the pack tab, you can move your model around to where you want it to be on the plate. Go look at the platform and find a non scuffed spot (that hasn't been printed on before). Drag your model on the computer to where you want it to be printed (top right of the computer model corresponds to the top right corner if you are facing the platform with the handle pointed up). Here you can figure out the price of the material: sum up the model material and support material used and multiply it by .3. (There is an additional fixed cost of 10 Euros for the platform). When everything is in place, click Print.

4. Go over to the printer and make sure the platform is in place. The two knobs in front should be pointed upwards.
5. Press Start Model and watch your creation grow!
6. When your model is finished printing, take the platform out of the printer. Bend the platform until you can get your model off. Peel away as much extra material as you can, and look away so it doesn't chip off and go into your eye and make you blind forever. Now turn on both switches of the vat of base (to the right of the laser cutter) and throw in your model. Wait a few hours, then take it out (wear the gloves or your hands will blister and burn like the face Two Face). Hooray!