Back to Tools
| FabScan - 3D Laser Scanner | ||||
| About | News | Hardware | Software | Contact |
Hardware
This place contains all the information that allows you to built your own FabScan.
Note: Due to the nature of iteratively changing and improving the architecture there are multiple versions of the FabScan out there now. Obviously this situation is not very helpful for me as the developer since ideally I would have to support all available versions. Luckily the structure of the FabScan is modular so you can upgrade and downgrade between the different versions with little effort. In the long run I want to provide support for all the versions and make it easier to change the different parameters. That being said, this guide is currently for the FabScan CUBE which is a successor of the FabScan100 which is the successor of the FabScan.
BOM - Bill of Materials - for the FabscanCUBE
- 4x sheets of wood or MDF size 600mm x 300mm - 5mm thick
- 1x http://www.watterott.com/de/Arduino-FabScan-Shield
- 1x http://www.watterott.com/de/Pololu-A4988-Schrittmotortreiber or this one if you like black better: http://www.watterott.com/de/A4988-Schrittmotortreiber-Black-Edition
- 1x http://www.watterott.com/de/5mW-Linienlaser-rot
- 1x http://www.watterott.com/de/Schrittmotor-Unipolar/Bipolar-200-Steps/Rev-42x48mm-40V-1200mA-NEMA-17
- 1x http://www.watterott.com/de/Arduino-Uno
- 1x 12V power supply, e.g.: http://www.watterott.com/en/Power-Supply-3-12V-1A new and more powerful: http://www.watterott.com/de/Netzteil-3-12V-15A
- 1x logitech c270 webcam
- 20x Socket Head Hex Screw M3x16mm
- 11x Flat Head Cross Screw M3x16mm
- 2x Pan Head Slotted Screw M2x10mm
- 27x Nut No.1 (leaving out) M3
- 4x Nut No.2 M2
Laser Cutter Parts
In Europe, you can buy pre-cut parts here: http://shop.mariolukas.de and here: http://www.watterott.com
If you are from the USA, have a look at this reseller: http://www.3dotmatrix.com/
After you have bought the MDF, you can start laser cutting. You find the latest files here:
FabScan Cube: http://hci.rwth-aachen.de/fabscanCUBE (most recent)
Please, also have a look at the new front plate and the new camera mount.
Previous model: https://github.com/francisengelmann/FabScan100/tree/master/lasercutter
Arduino FabScan Shield
The FabScan Arduino Shield is the result of a cooperation between multiple enthusiasts, among them René Bohne and the Watterot Team.
For the FabScan100 we only need one stepper-motor-driver, nevertheless the shield provides support for up to three stepper-motor-drivers. This allows it to be used for any other device that incorporates multiples stepper-engines such as 3D printers.
Here is a nice video of the manufacturing :)
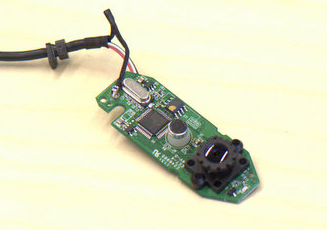
Preparing the Logitech c270
To use the webcam with the scanner, we need to disassemble it. If you are a little careful this process will not harm the camera and you can put it back together at all time.
See this link for disassembly guidance.
Assembly Instructions
As soon as you have all the parts together, you can start assembling your FabScan.
This guide will show you how to assemble the previous FabScan: AssemblyInstructions.pdf.
A guide for the new FabScanCUBE will be available soon.
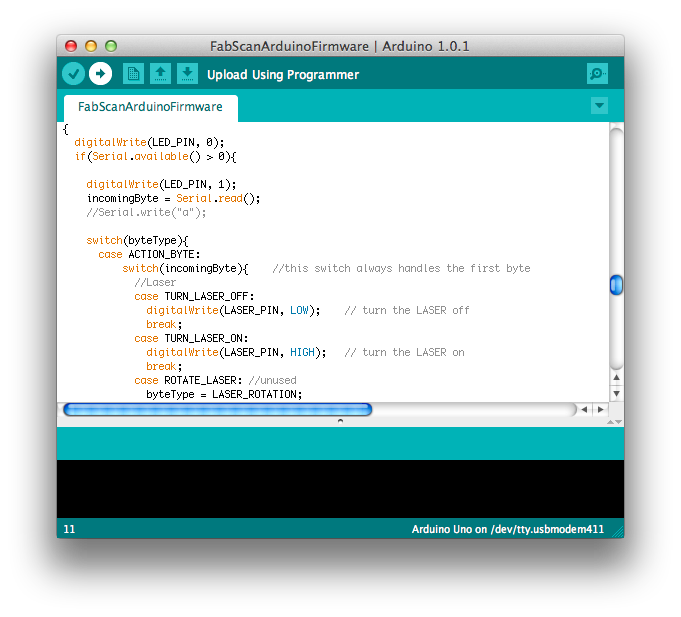
Upload Sketch to Arduino
Now we need to program the Arduino for the FabScan.
First, if you don't already did so, you need to download the Arduino Software from here: http://arduino.cc/en/Main/Software
Then, simply attach the Arduino over USB to your computer.
Open the sketch (FabScanArduinoFirmware.ino) in the Arduino software
Upload the Sketch to the Arduino by pressing the Upload button.