Bambulab A1 Mini
Machine status: Ready to use, no 0,2 Nozzle available at the moment
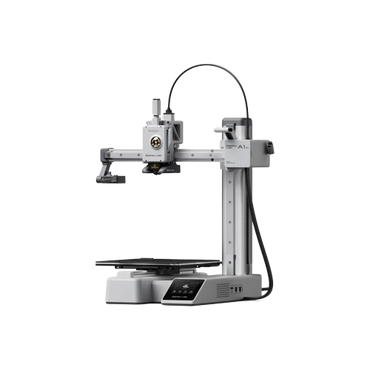
Our Bambulab A1 Mini is a compact yet versatile FDM 3D printer designed for precision and convenience. Despite its smaller size, it includes the powerful Automatic Material System (AMS) for easy multi-material printing and automated filament switching. With its efficient footprint, the A1 Mini is ideal for detailed prototypes and smaller-scale production.
This printer, along with the Bambulab X1E, joined our lab in 2024.
Looking for an example of what our printers can create? Check out our Miniatures Printing page.
From our set of filaments available at the lab, only use PLA, PETG, and TPU on the A1 mini. It is not suited for filaments like PLA CF, PAHT CF, or ABS! For these, we have the BambuLab X1E printer. See below for details on how to print.
How to Print
We only use original Bambulab materials with this printer. This ensures optimal performance and simplifies material setup in the Bambu Studio slicer.
Members of our lab with Fab Lab access can print via network: Connect to our i10 WiFi and install the Bambu Studio slicer. To connect to the printer, you must log in with your Fab Lab account. The printer will then appear automatically in the slicer. Select the material(s) to use and send your print job directly from Bambu Studio on your computer. Please name the print job like <your name>_<description>, e.g. Julian_PyBadge-Case, so that if other people see a print failing, they know who to contact.
You can monitor progress via the built-in camera in the Bambu Handy app or directly check the printer in the Fab Lab. Note that Fab Lab access is required to check on and pick up your print.
How to Print TPU
If you want to print TPU, you need to be a bit more careful. Currently, we have two types of TPU available: one made to be used with the AMS (this is clearly labeled as "TPU for AMS") and one that is not (any TPU that is not labeled "TPU for AMS"). Both types are stored in a closed box in our lab. Please only take them out of the box if you intend to use them immediately. After printing with them, put them back into the box immediately. TPU is way more hydrophile than PLA and PETG, so leaving them in the open over a longer time than necessary will damage it!
Printing the TPU for AMS is like printing PLA or PETG. You can just load it into the AMS lite, make sure it is correctly detected via the RFID tag in the spool, and send your print job. However, the TPU for the AMS is not as soft as the other TPU. So, if you want to create rubber-like prints, you might want to print with TPU that is not made for the AMS.
Printing with a TPU spool that is not made for the AMS is a bit more complicated because you need to use the external spool holder. First, disconnect one of the four PTFE tubes at the top of the print head, by pressing the black ring around it downwards (you can use your fingers or pliers for this) and gently pulling on the tube.
Then, insert the loose PTFE tube of the external spool holder (on the back right side of the printer) into the place where you just removed the other tube. Make sure it is fixed in place.
Then, on the screen of the A1 mini, go to the filaments, click on "External spool" in the top right, and enter the exact type of filament you want to print with.
Now, get the TPU spool out of the drying box and put it onto the external spool holder in the back right of the printer. On the A1 mini, click on loading the TPU. Now, you manually need to insert the filament into the extra PTFE tube until it reaches the extruder. The printer now should create a small blob of TPU. If that is the case, you are good to go!
After printing unload the TPU spool and put it back into the drying box. Also, remember to detach the PTFE tube of the external spool and reattach the tube of the AMS.
How to Change the Nozzle
For the A1 mini we have two different nozzles available: 0.4mm and 0.2mm. Most of the time we use the 0.4mm nozzle. Only use the 0.2mm nozzle if your print has many small details, for example, if you want to print a miniature. Using the smaller nozzle greatly increases the printing duration.
Before you try to change the nozzle, please make sure that is cold enough! This video shows you how to then change the nozzle. After following all the steps in this video, please enter into the printer that you have changed the nozzle. For that, on the display of the A1 mini, go to Setting, then on the second page to Maintenance, then Nozzle and then select the Stainless Steel 0.2mm or Stainless Steel 0.4mm nozzle. The nozzle that is not installed in the printer is stored on a small holder in front of it. Please always put the nozzle in there after switching it!
If you have any problems with switching the nozzle or do not feel comfortable switching it on your own, do not hesitate to reach out to any of the Fab Lab HiWis!