Emergency Video Crash Course
You don't have time to read the equipment page? Let's get you up and running, then.
Jump to recording sound, recording video, video cupboard, or editing.
Recording Sound
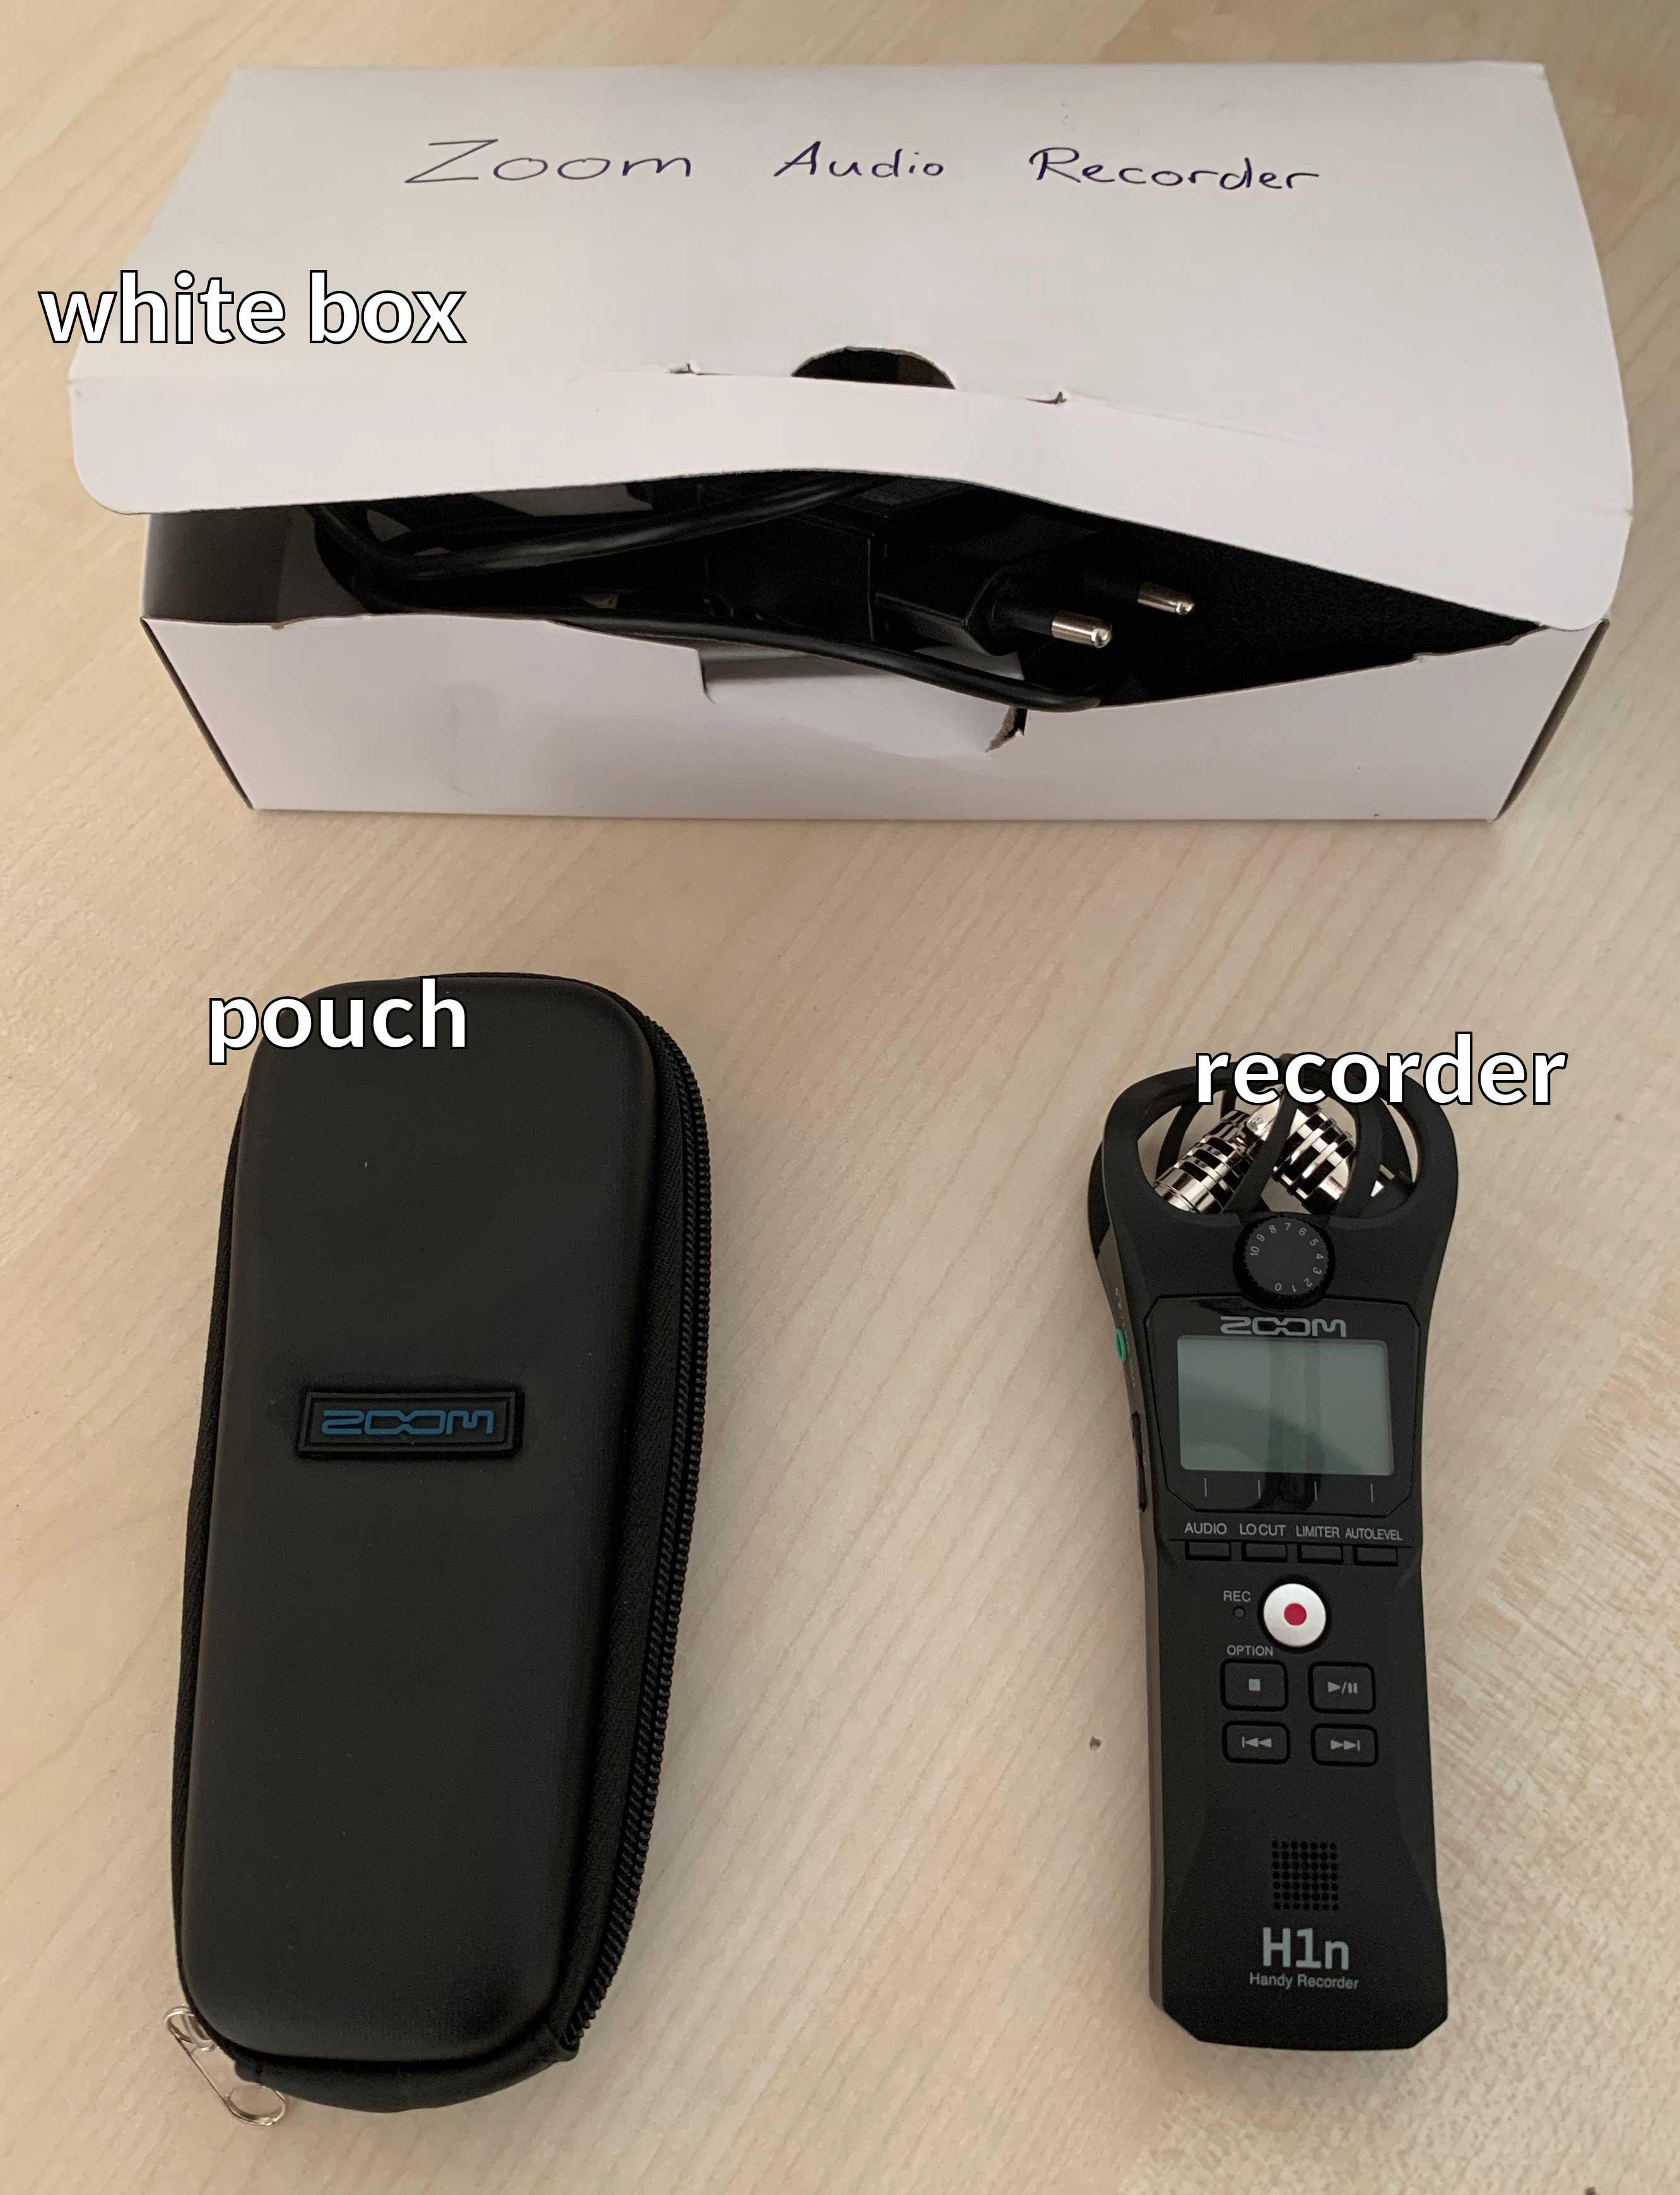
Get it: The audio recorder is in the video cupboard. It's stored in a white box with accessories, inside a pouch.
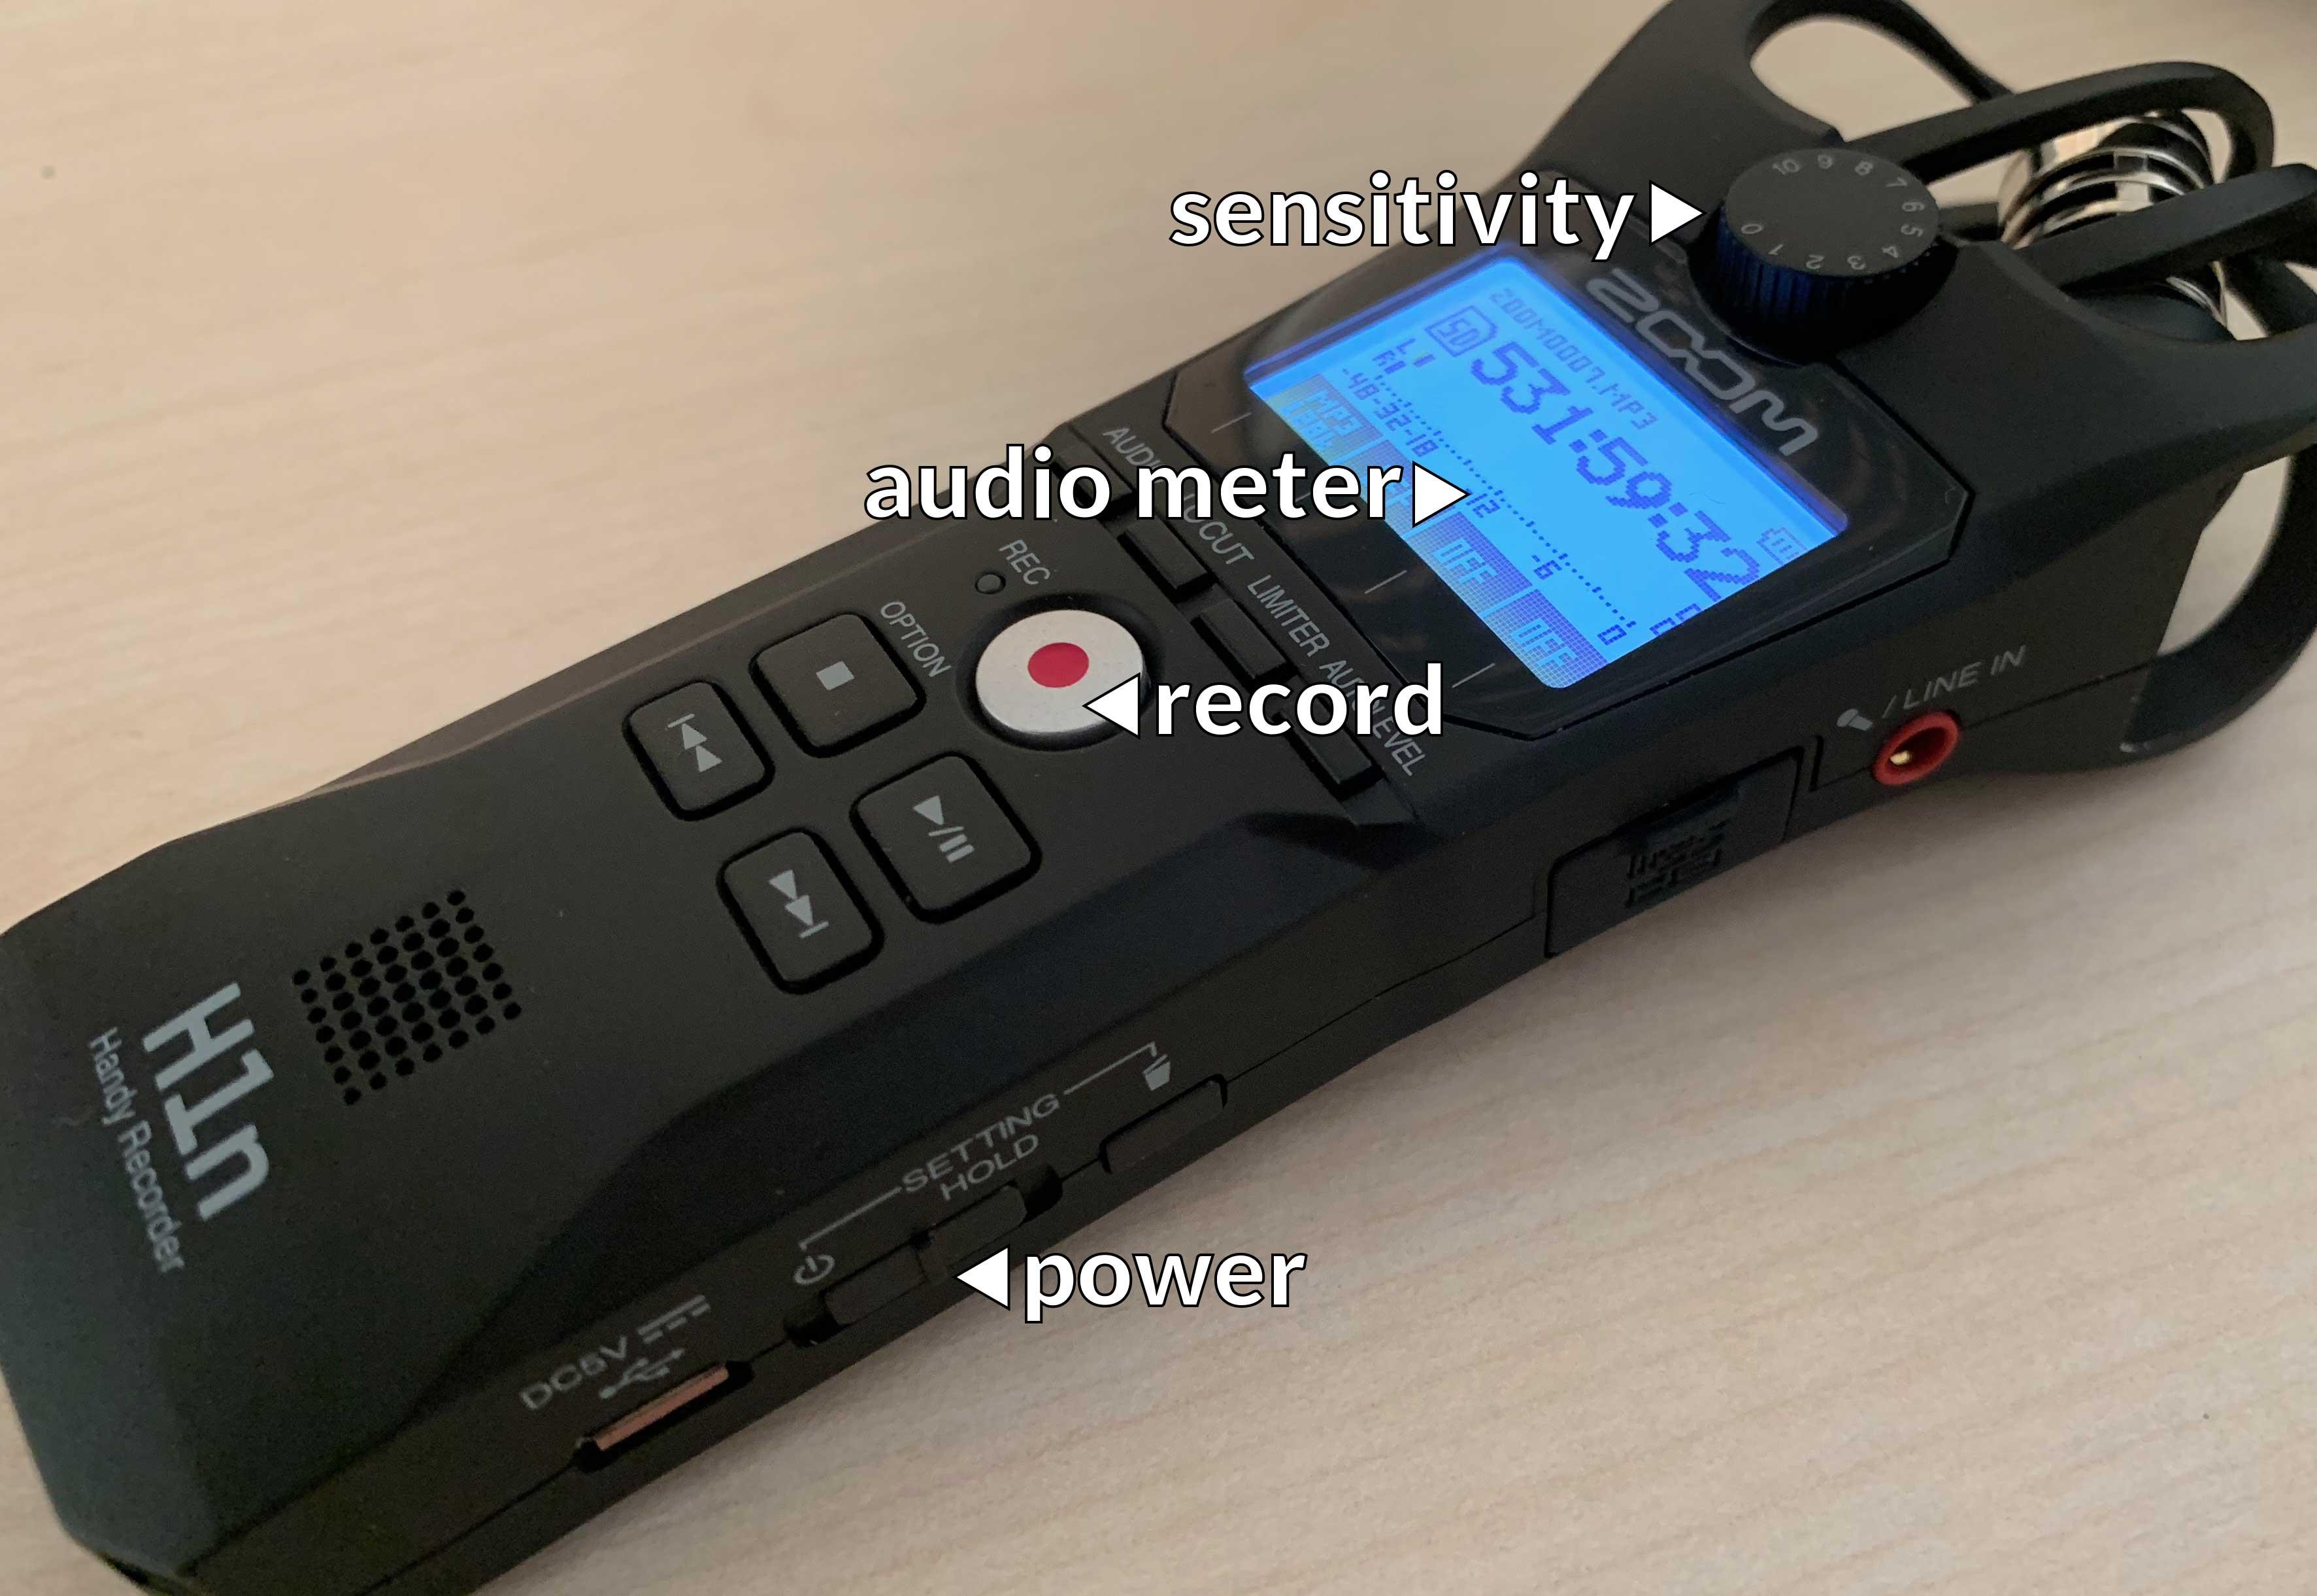
Use it:
- Turn it on by pulling down and holding the switch on the side.
- Press the red button to start recording.
- Adjust the recording sensitivity with the knob at the top. (The audio meter should not hit the top. Aim for the bar to bounce around -12 dB.)
No power? The recorder runs on two AAA batteries. You can find replacements in the seminar room at the speaker's desk in a holder marked with a fully charged battery.
Alternatively, you can power it from a power outlet using the cable and socket adapter.
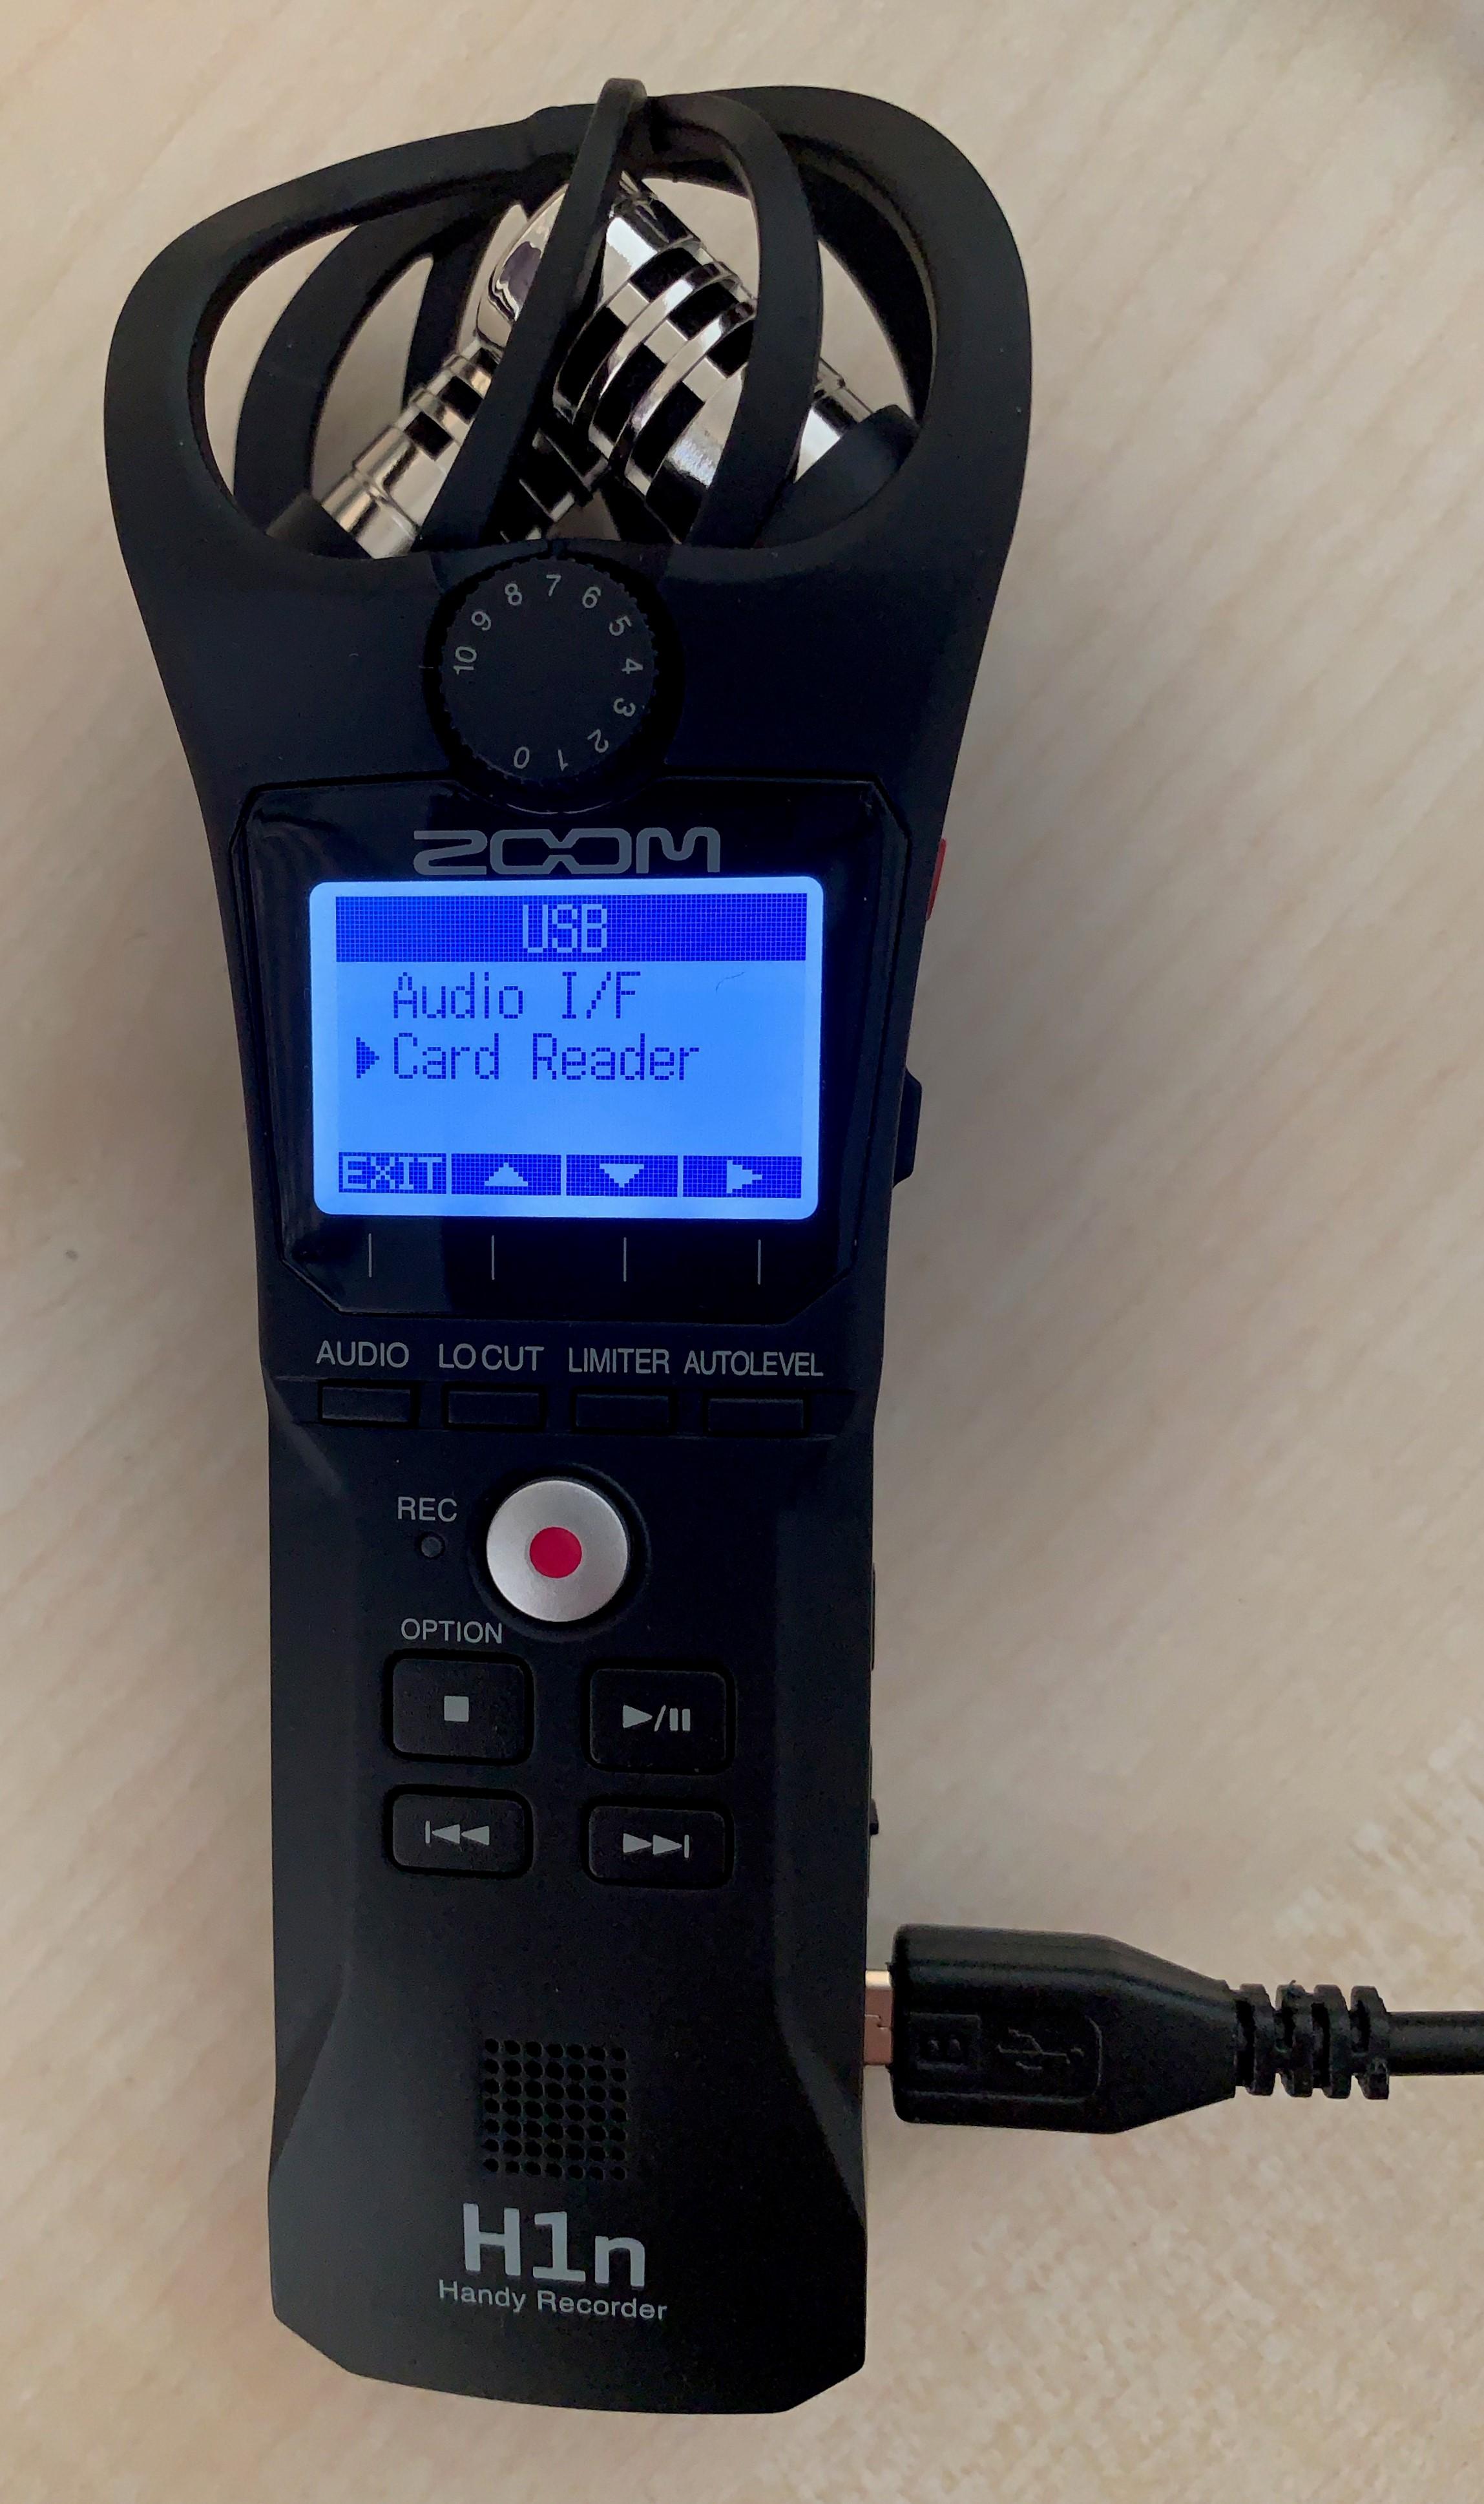
Retrieve the recordings: Either pull out the microSD card, or use the USB cable and connect it to a computer. If using the cable, after connecting select "Card reader" on the recorder. (The other option connects it as a microphone.) After you've copied the files, please delete them from the card to make space for the next person.
Recording Video
It is simplest to use the video iPhone. If needed, you can use the Sony camera.
iPhone
Get it: The video iPhone is charging in the HiWi room, besides the video Mac near the window.
Use it:
- Unlock the iPhone. (No code needed.)
- Open the camera app.
- Start recording.
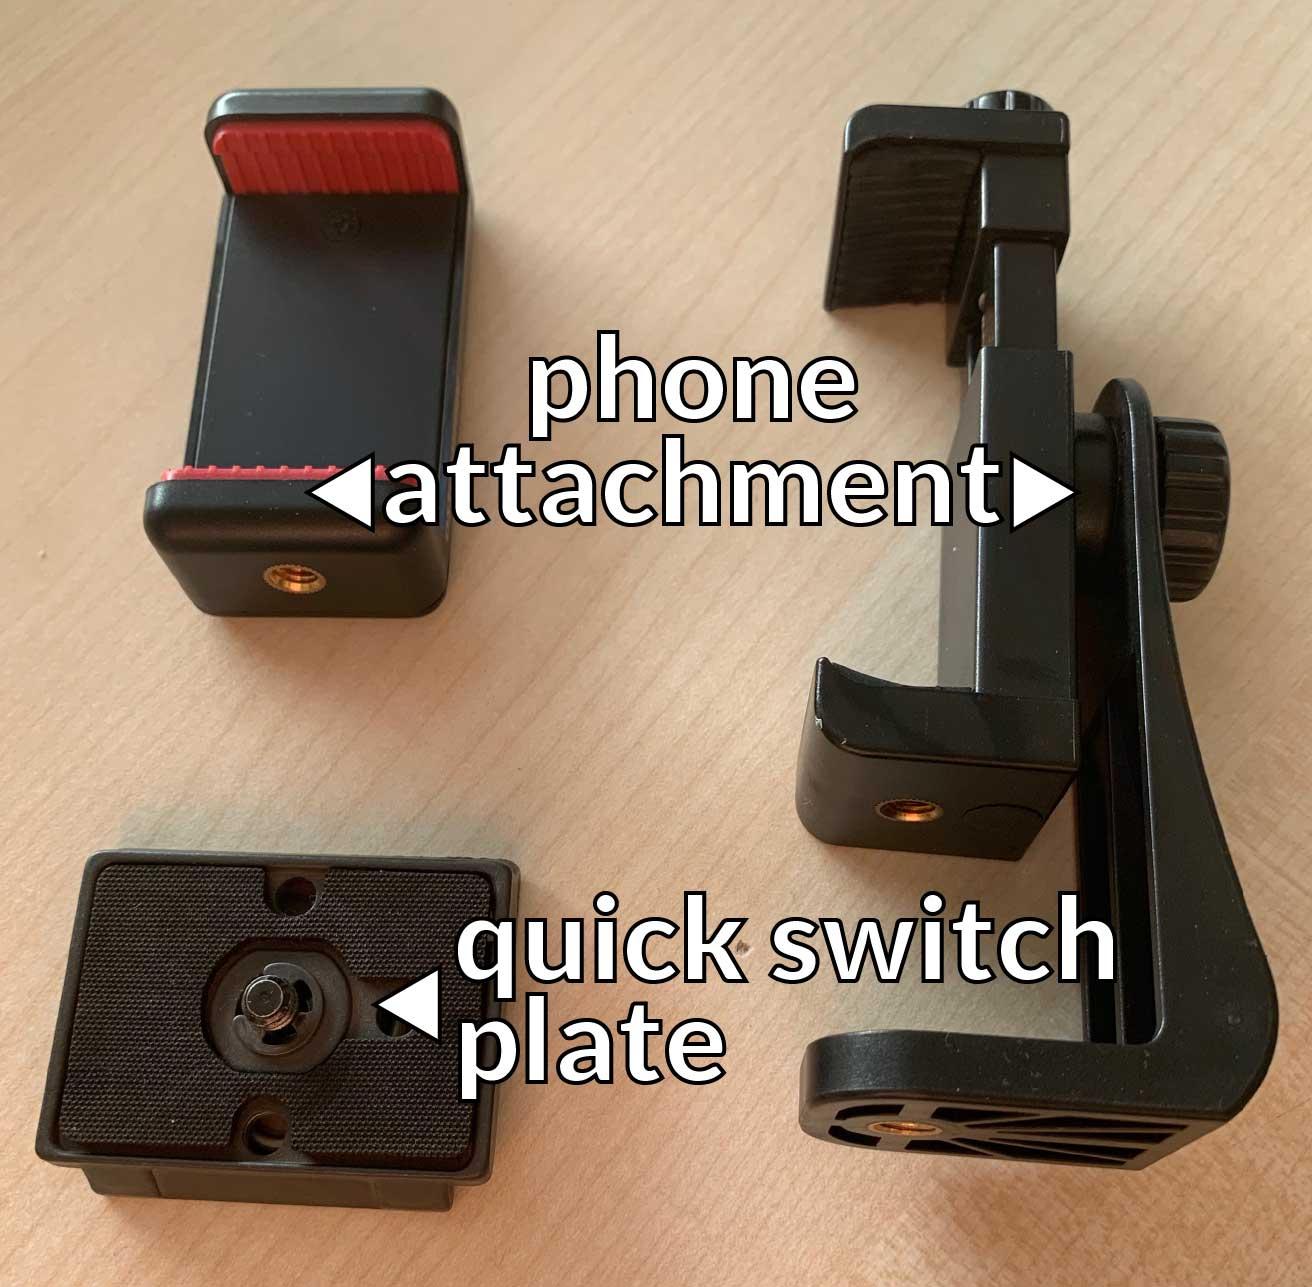
If you want to use a tripod, you can find it and a phone attachement and a quick switch plate in the video cupboard. The phone is held by the attachement, which is screwed onto the plate, which is mounted on the tripod.
Retrieve the recordings:
- Connect the iPhone to a Mac.
- Open the Photos app on the Mac.
- Copy the videos on the Mac.
- Delete the copied videos from the iPhone to make space for the next person.
Sony Camera
Get it: The camera is in a big bag in the video cupboard.
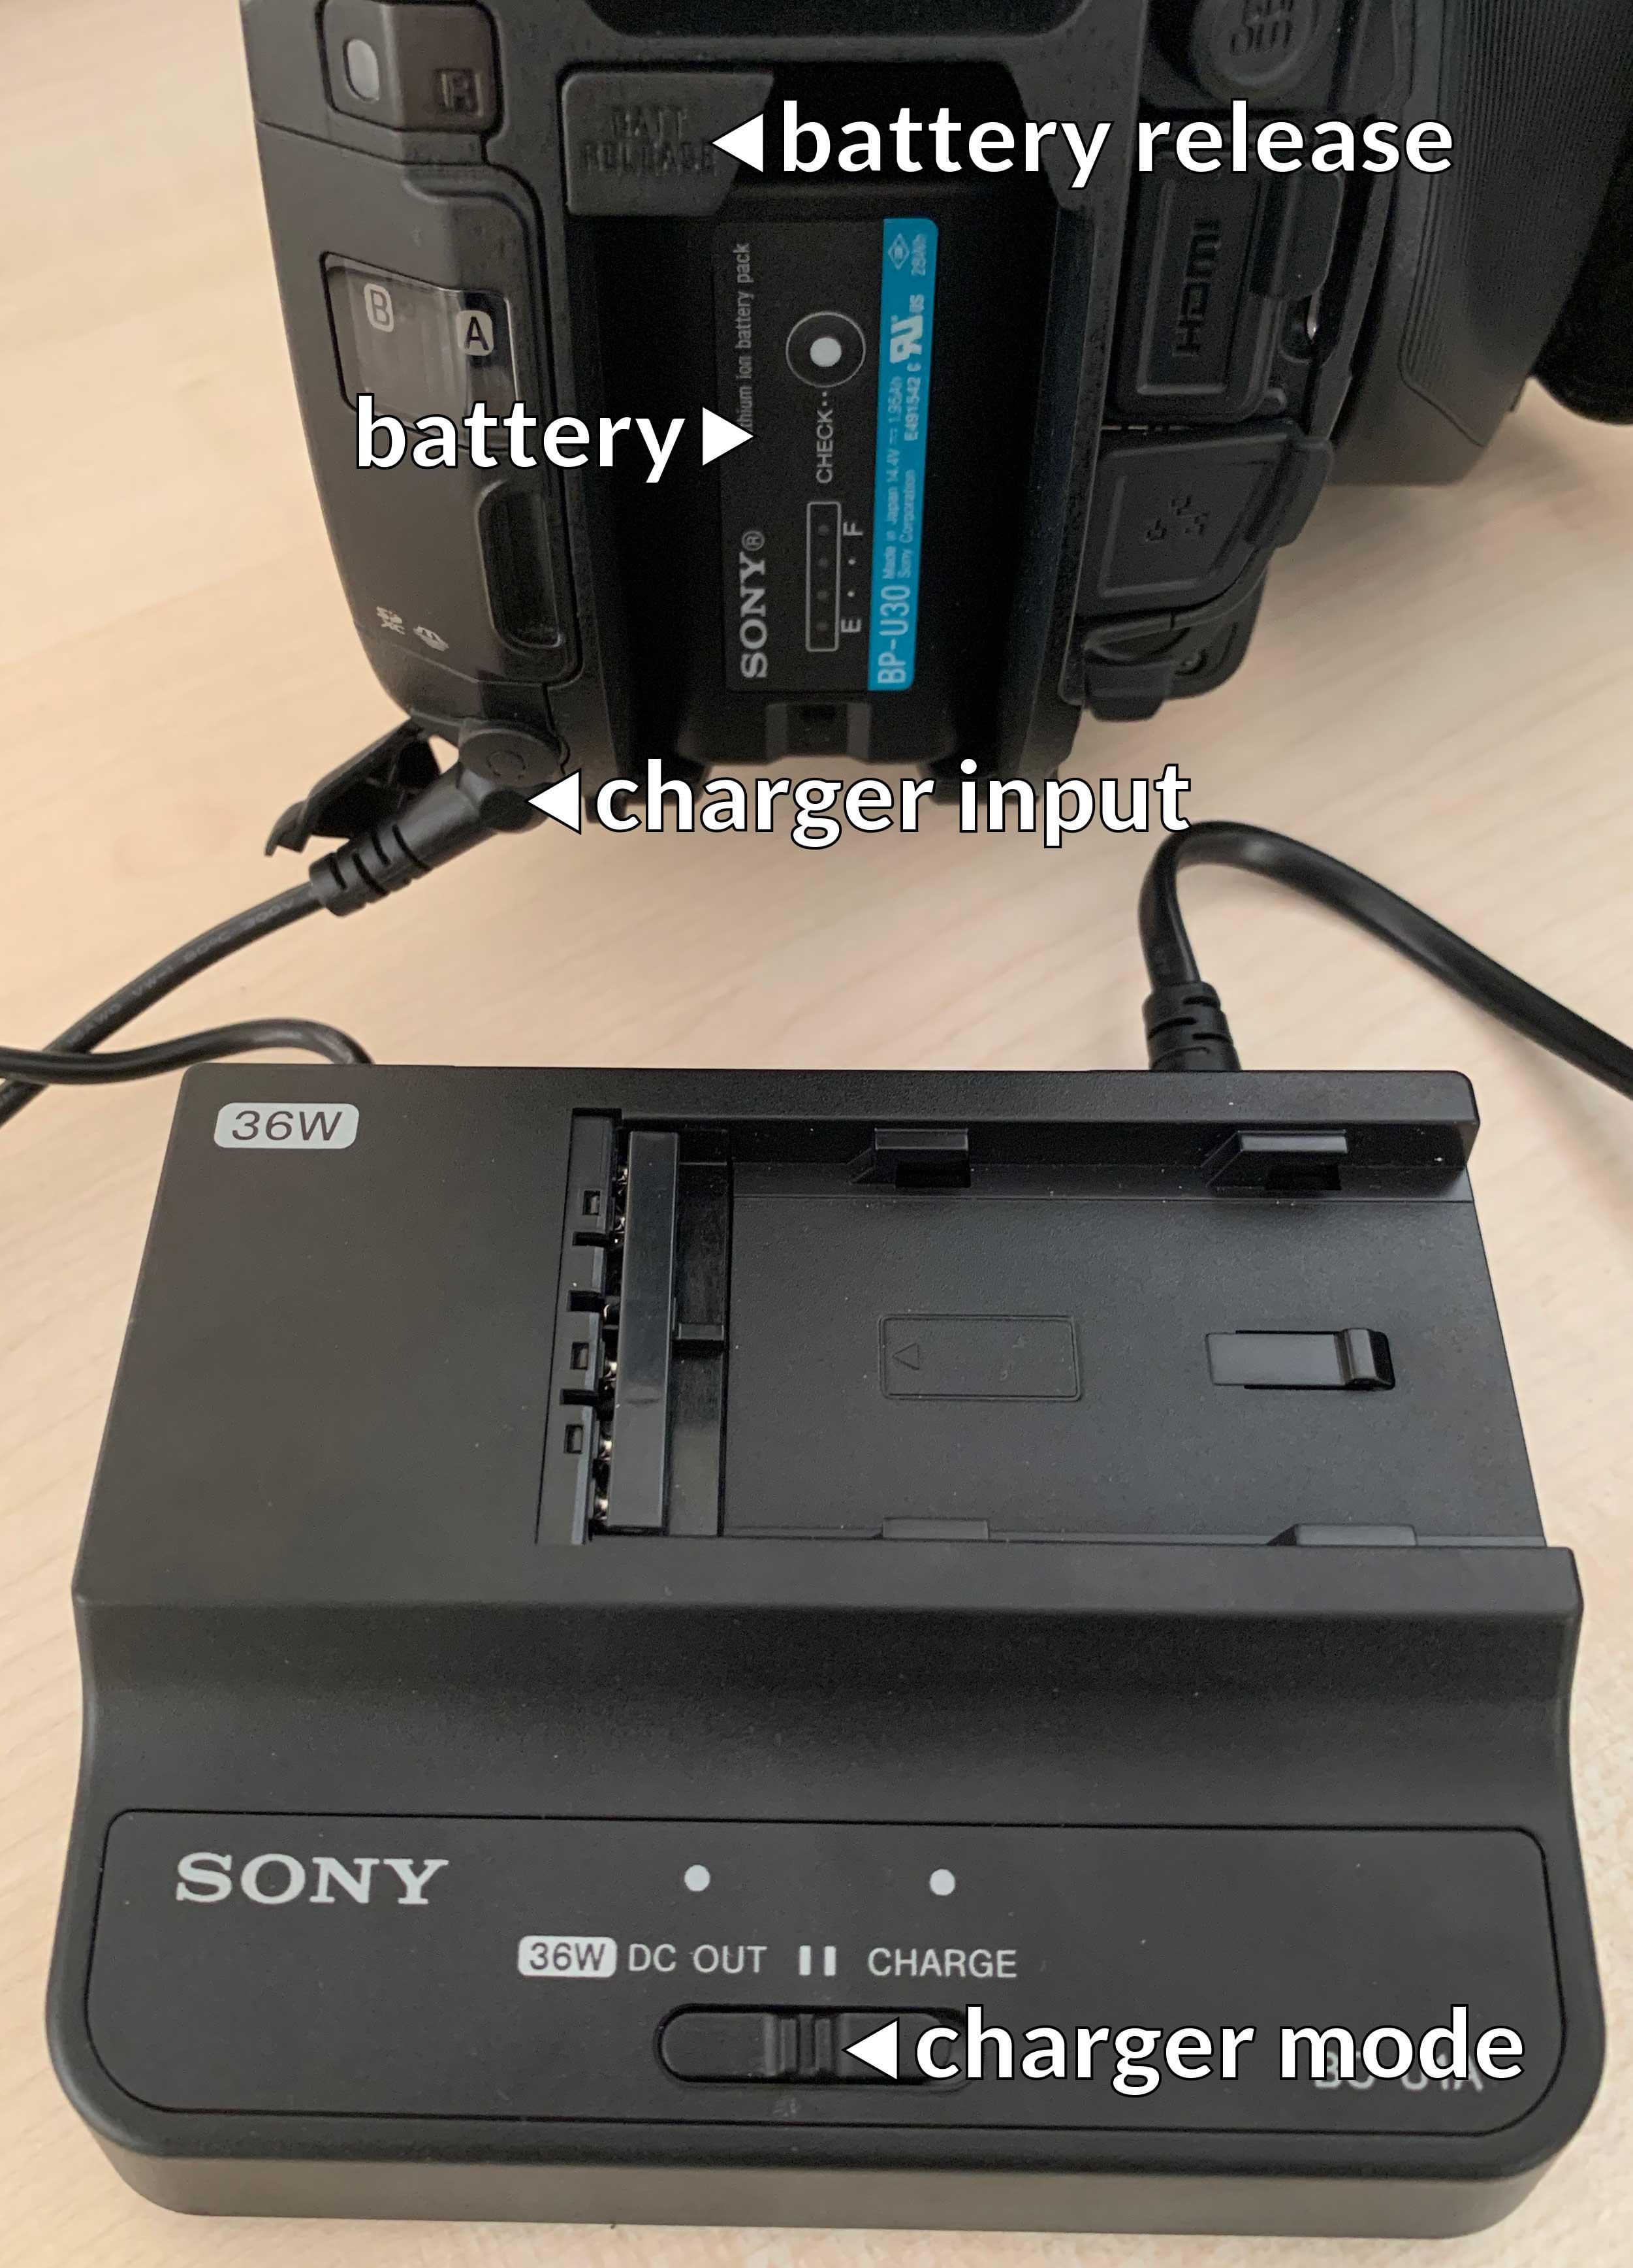
Use it: We only have one battery for the camera. Therefore prefer to plug it into a power socket. Use the battery charger and ensure it is set to "DC OUT".
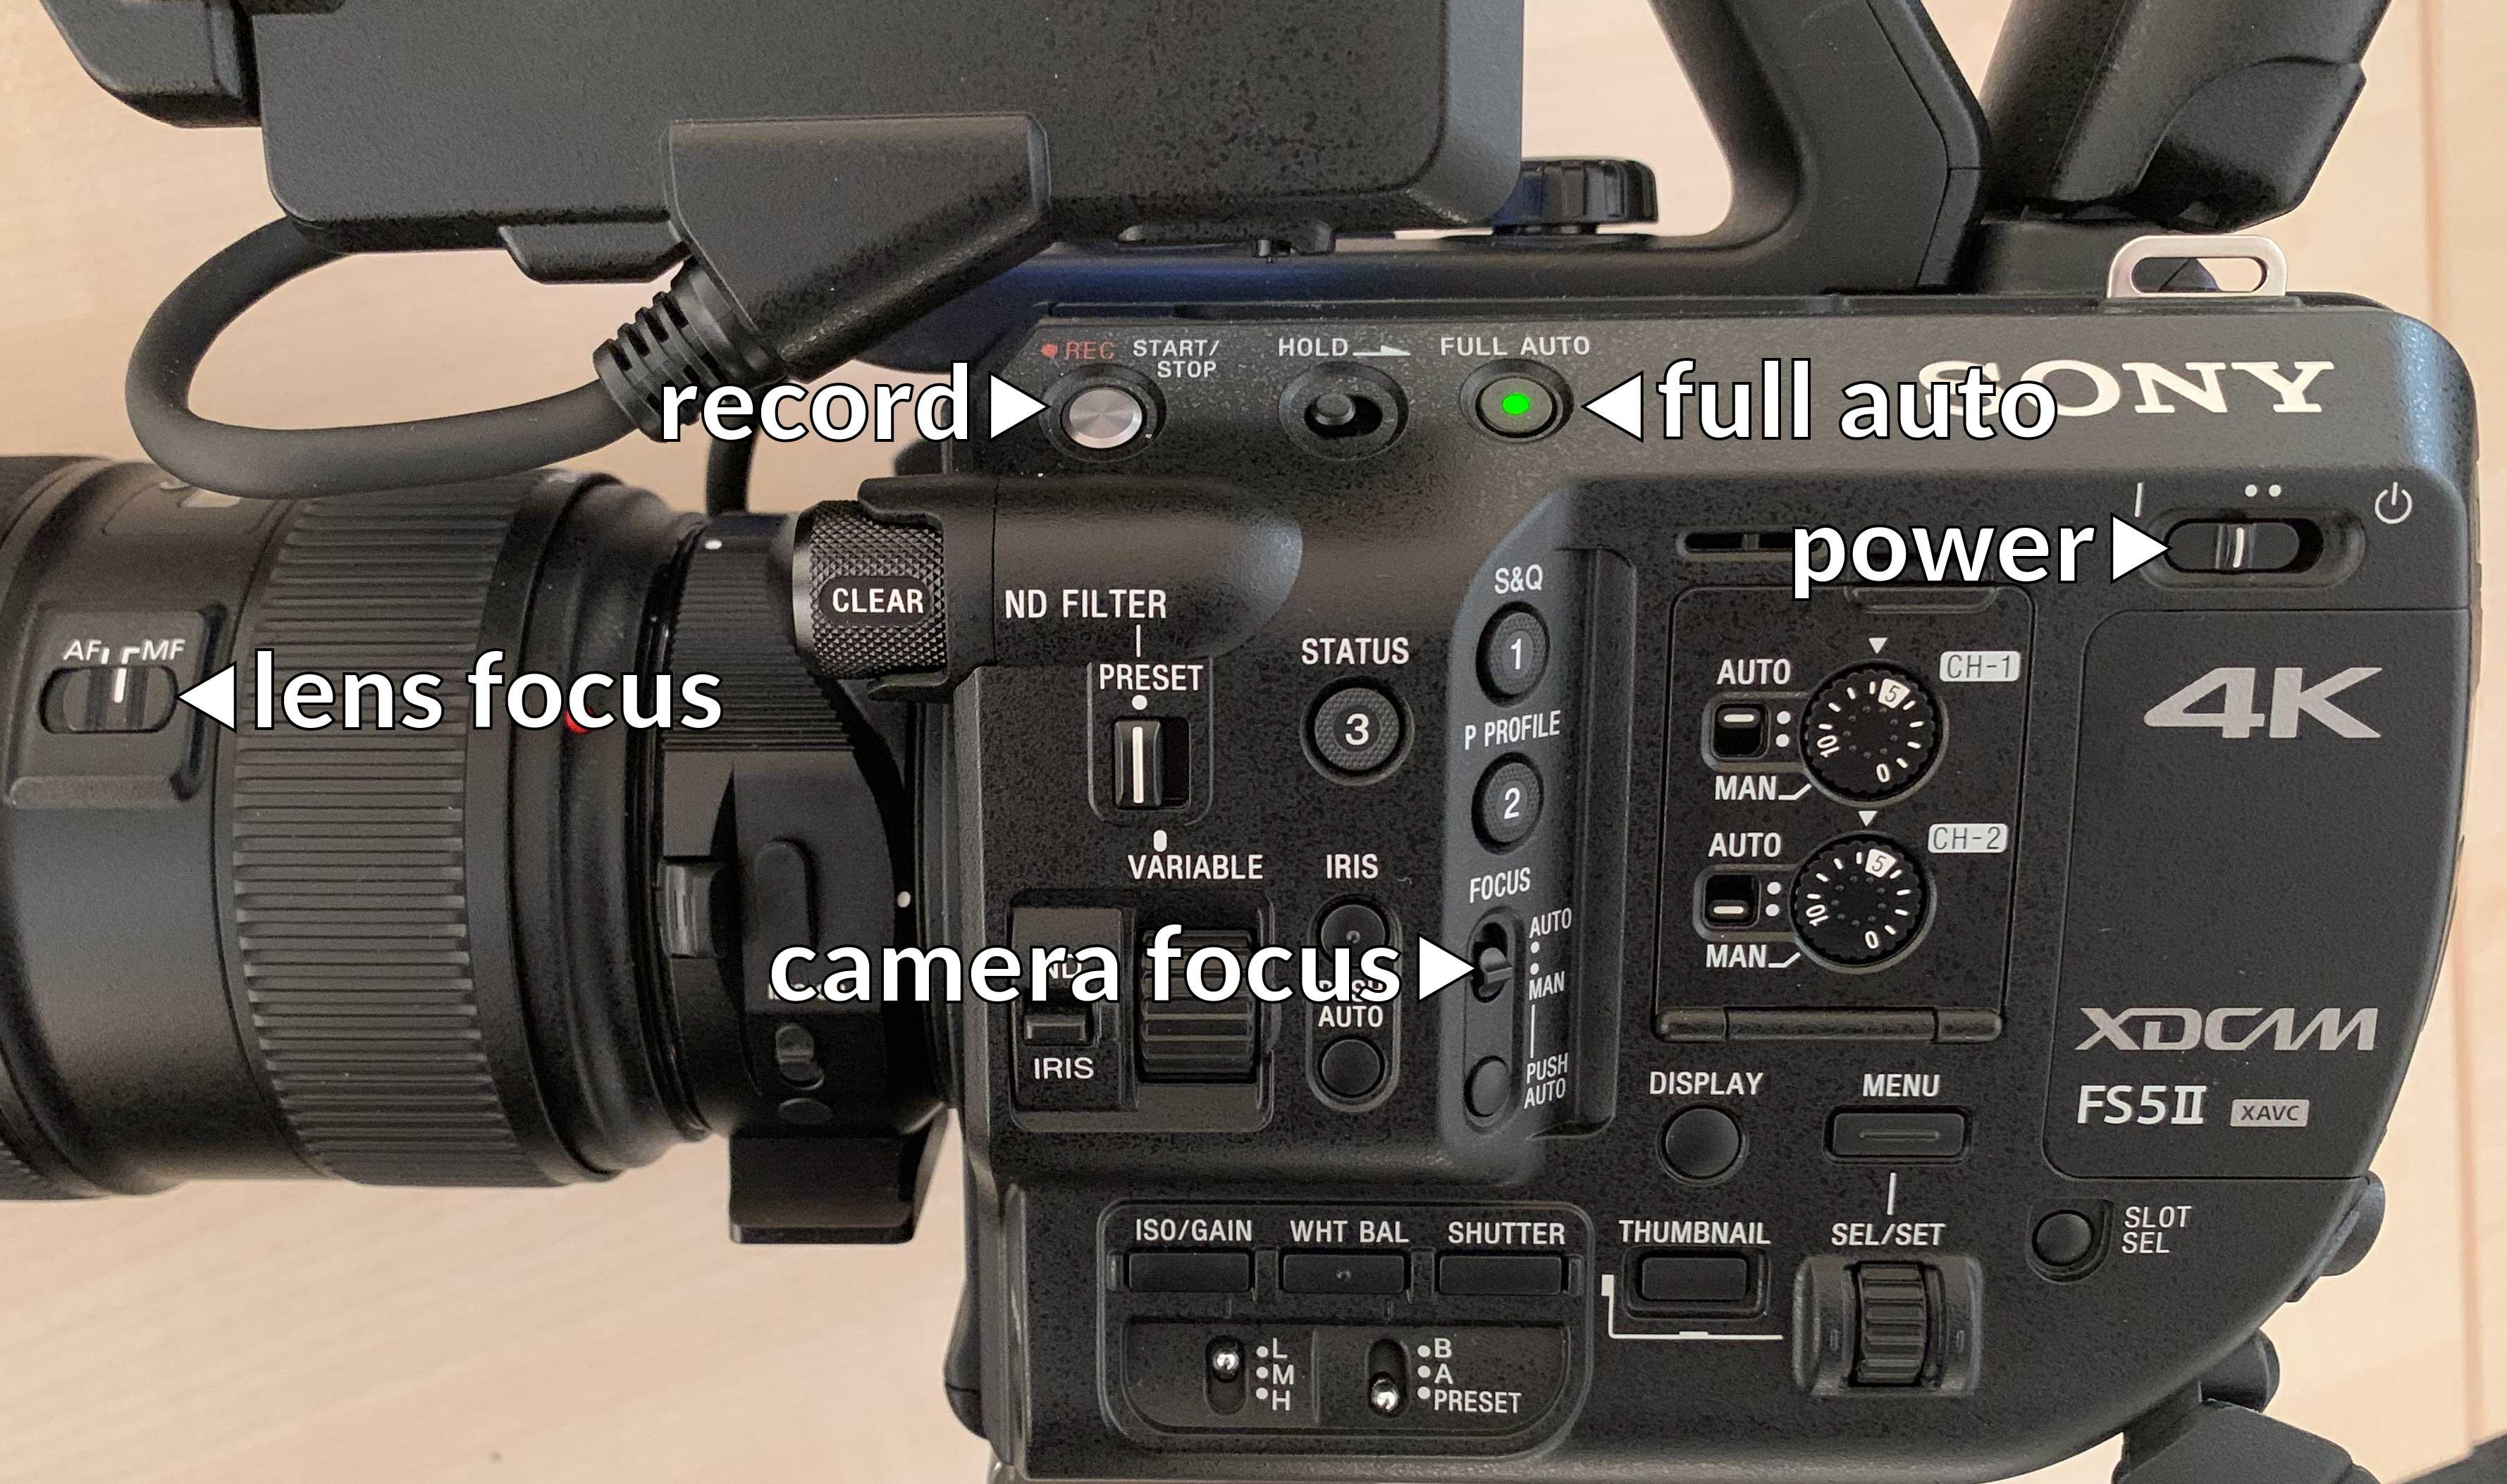
- Turn it on with the switch on the side with all the buttons.
- Make sure the lens cap is taken off.
- Put it in "Full Auto" mode. The button's light should be on. ("Full Auto" will take control of the shutter, iris, and white balance, so the picture will be exposed correctly. No manual control is possible when "Full Auto" is active.)
- The autofocus is not very good. But if you want to activate it, make sure the lens is set to "AF" and the camera's "FOCUS" switch is also on "AF." (I recommend pulling focus manually by setting everything to "MF" and turning the focus ring on the lens.)
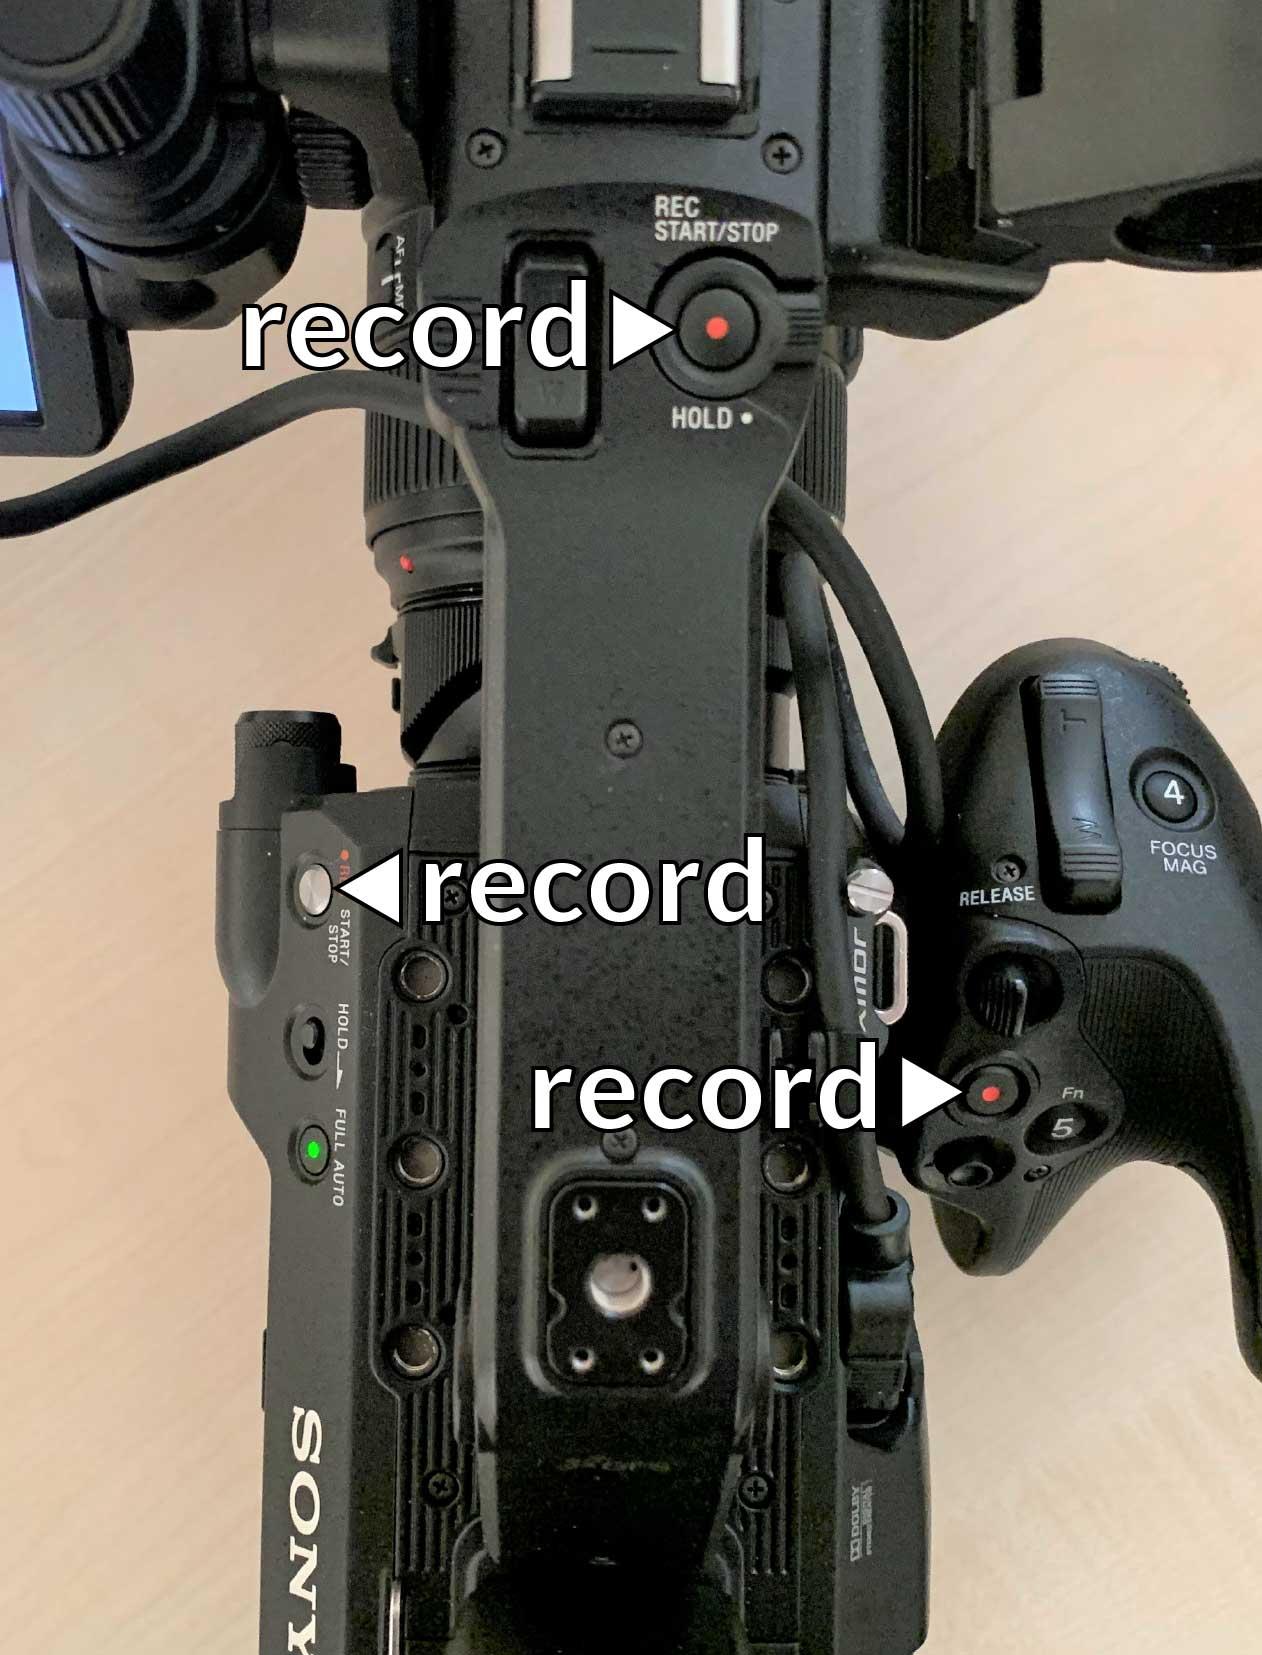
- Start and stop recording using the button on the side, on the top grip, or the side grip.
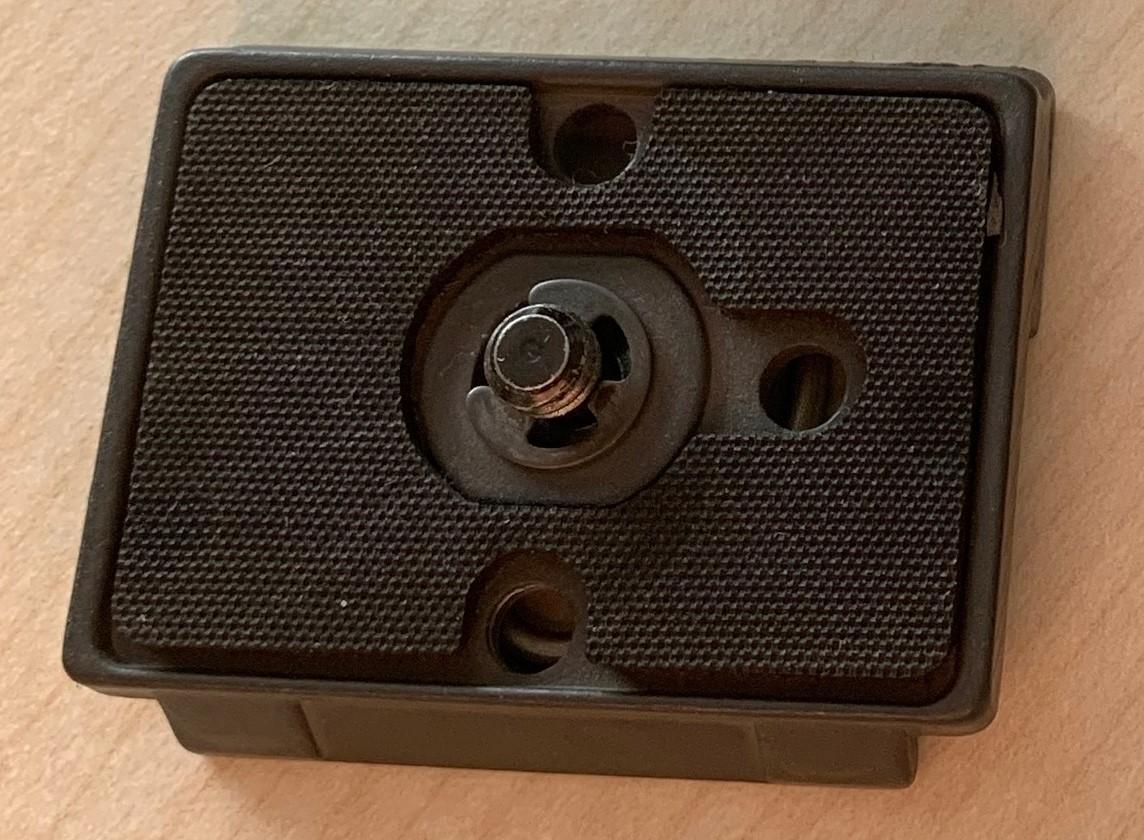
A tripod is available in the video cupboard. Make sure you grab the quick switch plate as well, which is screwed into the bottom of the camera. It can then be mounted on the tripod.
Retrieve the recordings:
- Take out either one of the cards. (Video files are mirrored on both cards for safety.)
- Connect the card to a Mac.
- Import individual clips from the AVCHD package:
- Either open the package in QuickTime, pick a clip, and use "Save as",
- or open Final Cut which can deal with AVCHD packages in its "Import" dialog.
- If you know that all recordings on the cards have been backed up, format each card in the camera by pressing the "Menu" button, going to "System/Media Format" and pressing the "SEL/SET" dial. You need to format each card individually.
Video Cupboard
The video cupboard is on your left after entering the seminar room.
It is locked. The video HiWi (see the overview page) has one key, and another is in the secretary's office, labeled "Seminarraum rechts."
Editing
For places to get free music, photos, or videos, look at the lists on the video editing considerations page. Make sure to give attribution where the license requires it!
As editing software, use whatever you know best. At the chair we have Final Cut Pro installed on a Mac in the HiWi room; ask the video HiWi (see the overview page) for the credentials to log in. If you do not have access to that Mac, I recommend DaVinci Resolve as it is free and has everything you need, but it can be a little overwhelming at first. Most importantly you should know that it has different "pages" for tasks like importing footage, editing, audio, export, and more, which are accessible via tabs at the bottom.
To create subtitles, you can upload your finished video to YouTube as unlisted and use the subtitle editor there. DaVinci Resolve also support creating subtitles manually and exporting them to a separate file or burning them into the video.
If you have large video files, you might want to compress them. Download Handbrake and use this preset ![]() Handbrake-Screencast-Preset.zip, which is good for videos without much movement, like screencasts. If you have a different kind of video, you can adapt the quality by setting the "Constant Quality" slider in the "Video" tab to a lower number (which is higher quality) like 25 instead of 30.
Handbrake-Screencast-Preset.zip, which is good for videos without much movement, like screencasts. If you have a different kind of video, you can adapt the quality by setting the "Constant Quality" slider in the "Video" tab to a lower number (which is higher quality) like 25 instead of 30.

