Webcasting Guide for Fab Academy Recitations and other live online lectures (Jan Borchers 2018)
This guide details the technical setup for giving lectures that are broadcast live to a large online audience with video and audio recording, with the speaker sitting in a studio-like setup by himself (almost). It was first created by Jan for his Fab Academy 2018 recitation on "How To Make Almost Anything Usable" on Feb 5, 2018.
Overall concept
- Slides: Run Keynote locally on two screens: on the MacBook with Presenter Notes visible, on the external screen showing just the presentation
- Audio: Talk into wireless headset microphone, push that through Audio Hijack to improve sound quality, and from there through the Loopback virtual audio device into the Bluejeans video conferencing app
- Video: Use the built-in camera on a MacBook Pro feeding into the Bluejeans app
- Screen sharing: For Fab Academy, use Google Hangouts (setup by Neil Gershenfeld) in collaboration with Neil's screensharing software (http://screen.academany.org) to share the external screen display. Alternatively, use Keynote's built-in "Live" feature to share the slides via an iCloud URL for browser access by multiple people (tested successfully with around 15 participants).
- Since Bluejeans needs to run on the MacBook to use the camera, but is hidden behind Keynote during presentation, open a second Bluejeans app on the iPad Pro (mute its speakers, microphone, and camera) to see the other participants while presenting.
- As presenter, you'll need someone for setup support and someone to assist during the webcast.
Setup Support
- A few days before the event, find a student, ideally the current Video Hiwi, to help set up the room, find the equipment, test, and debug the audio/video/screensharing setup with you (Lukas helped Jan the first time).
The Presenter's Assistant
- On the day of the event, have a second person who know about the topic with their MacBook sitting next to you starting an hour before the class (Anke helped Jan the first time). Their tasks:
- To have a reality-check view of what other participants are seeing and hearing.
- To monitor the chat backchannel during presentation
- To queue up audience polls when you get to them
- To run out and get stuff (extra batteries, etc.) in case something goes wrong
- The assistant should wear headphones, and should mute their microphone and camera, so there are no feedback problems during the presentation.
- The assistant should remain fairly quiet during the presentation, since they could be picked up by your headset microphone.
- Remember that during presentation, muting your wireless transmitter is only effective if there's no other Bluejeans session with an open mike within earshot (like on the assistant's MacBook).
Room
- Use the Media Space because of good acoustics. If Video Lab (Room 2221) is available, could use that instead, possibly without curtain.
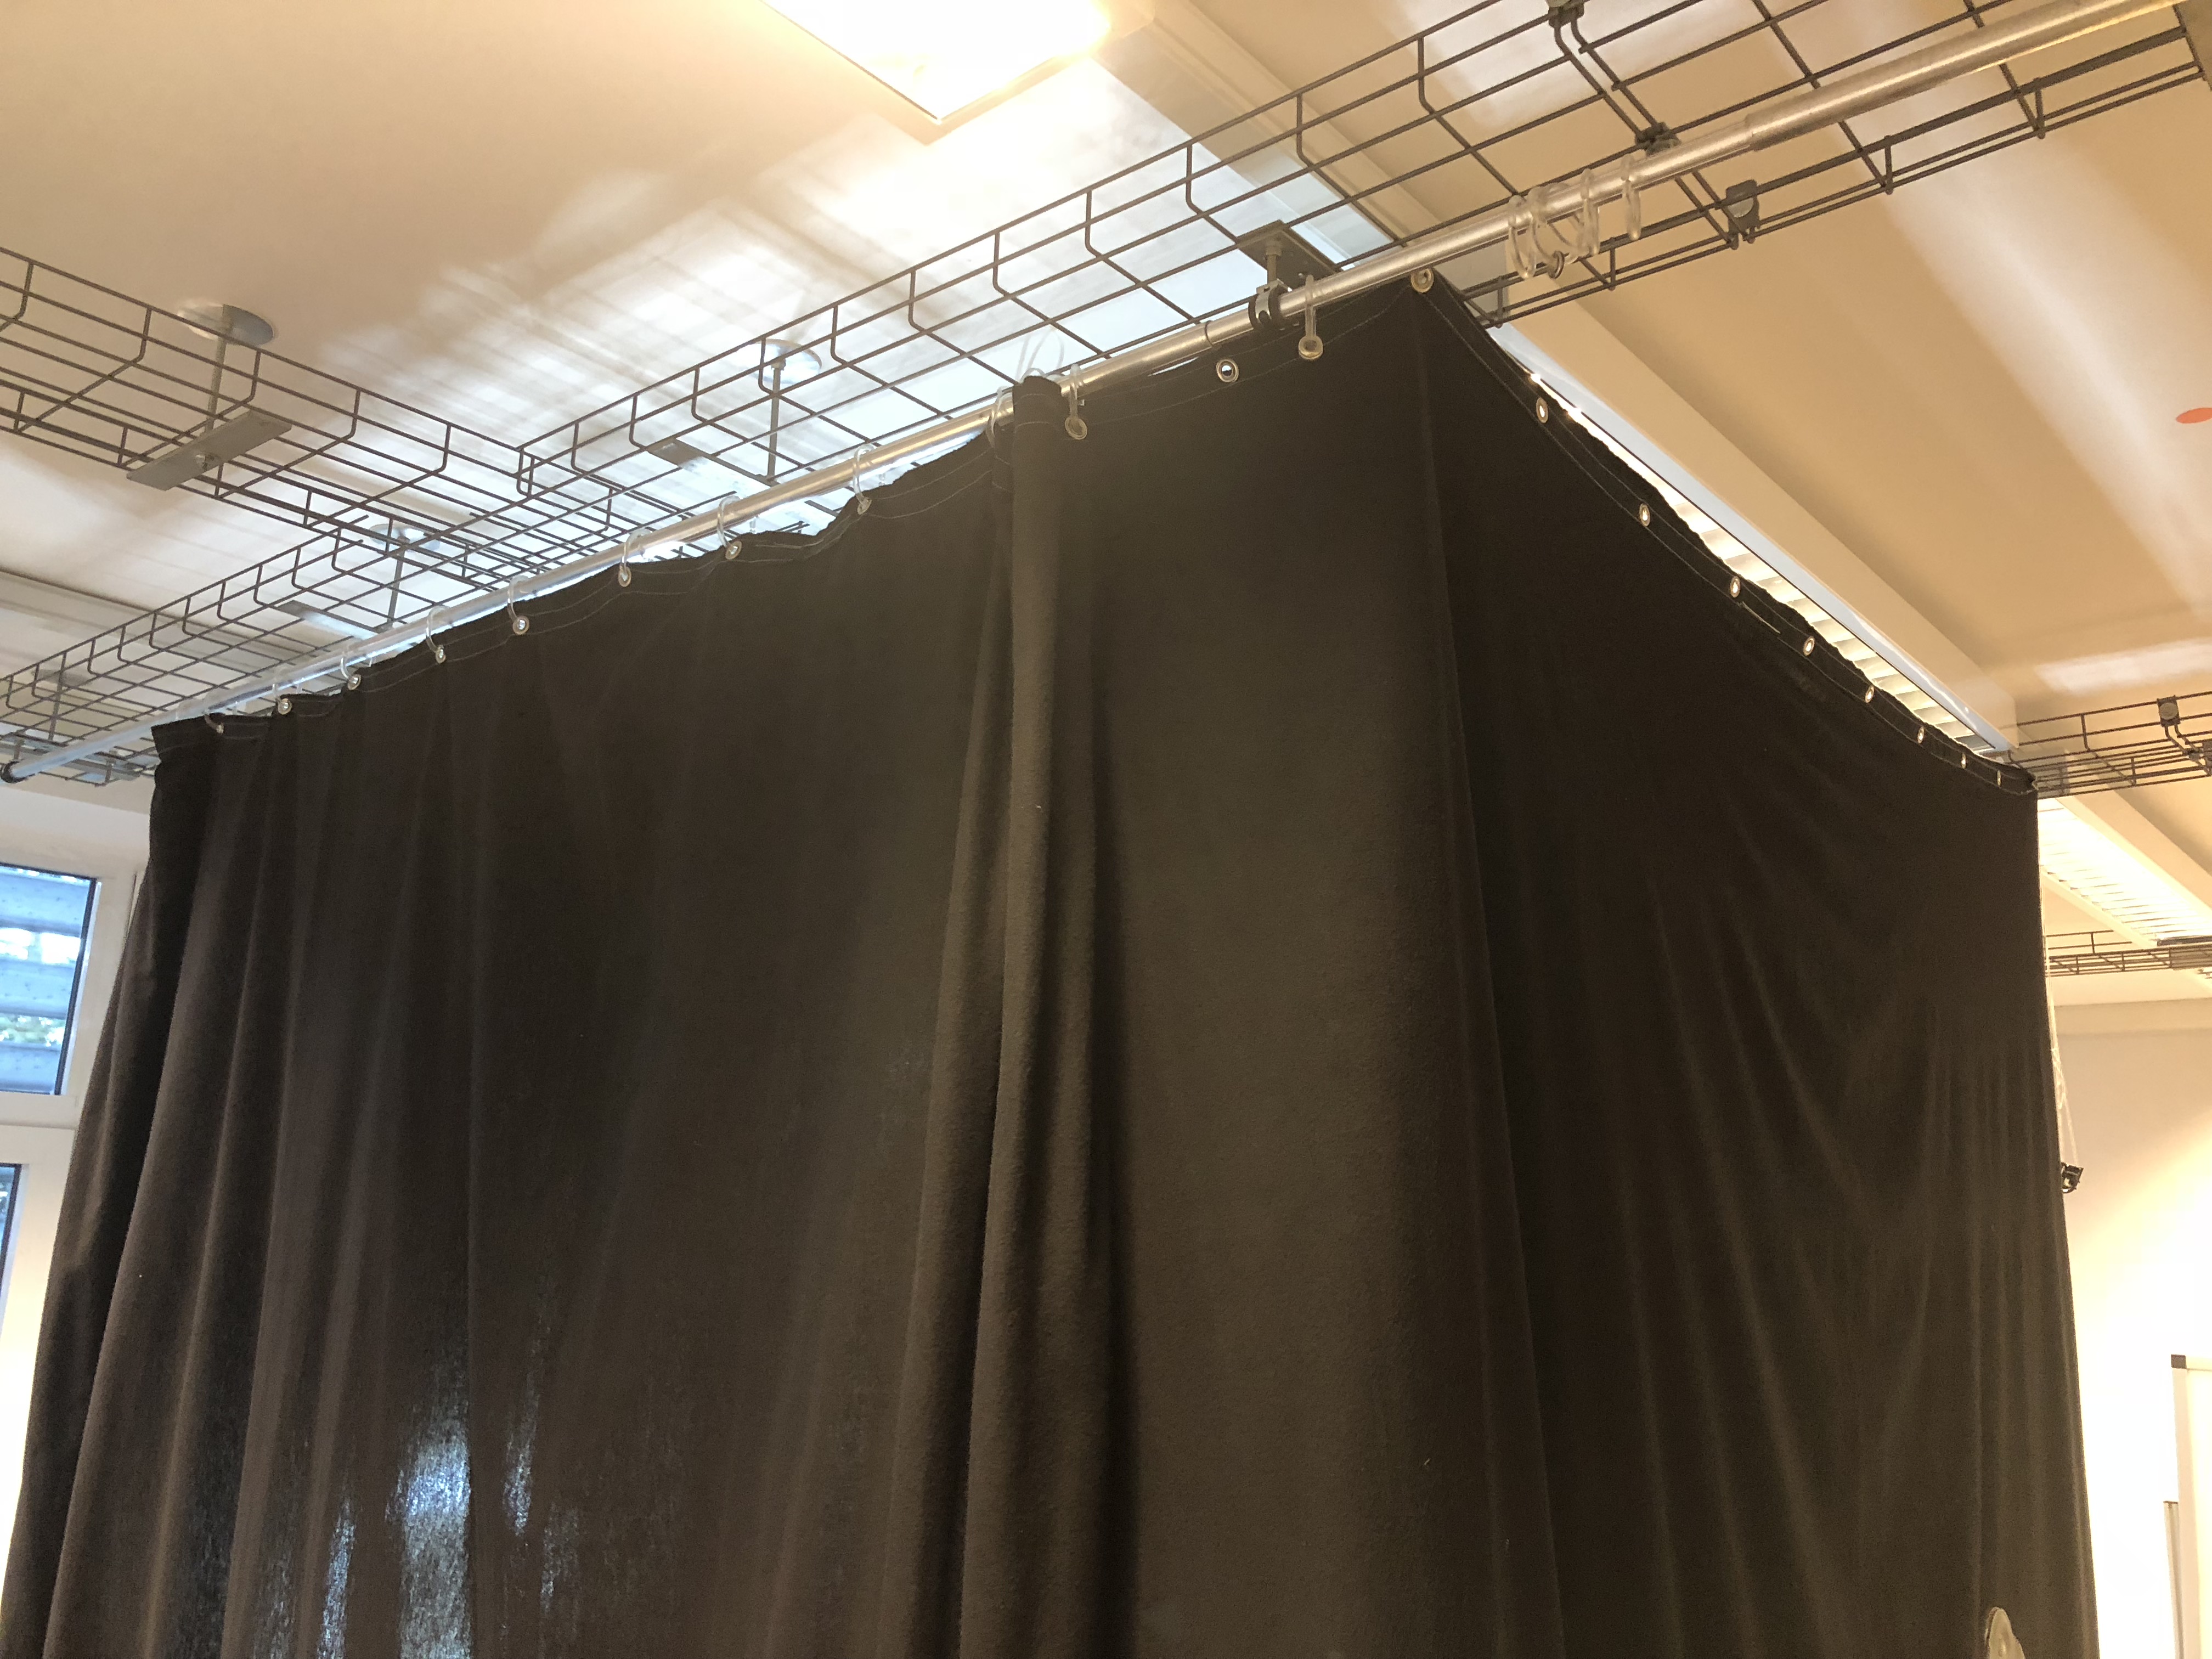
- Take black Molton curtain from Project Space and hang it here to create a roughly 2x2m recording "box" (width=1 ceiling grid) that blocks sound reflections from three walls. Set up near window for frontal daylight. Include the first and second row of ceiling lights so box gets lit up in the back. Mount "curtain rod" to the ceiling grid to use quick-mount plastic IKEA curtain holder rings, at least on one side, for easy opening.

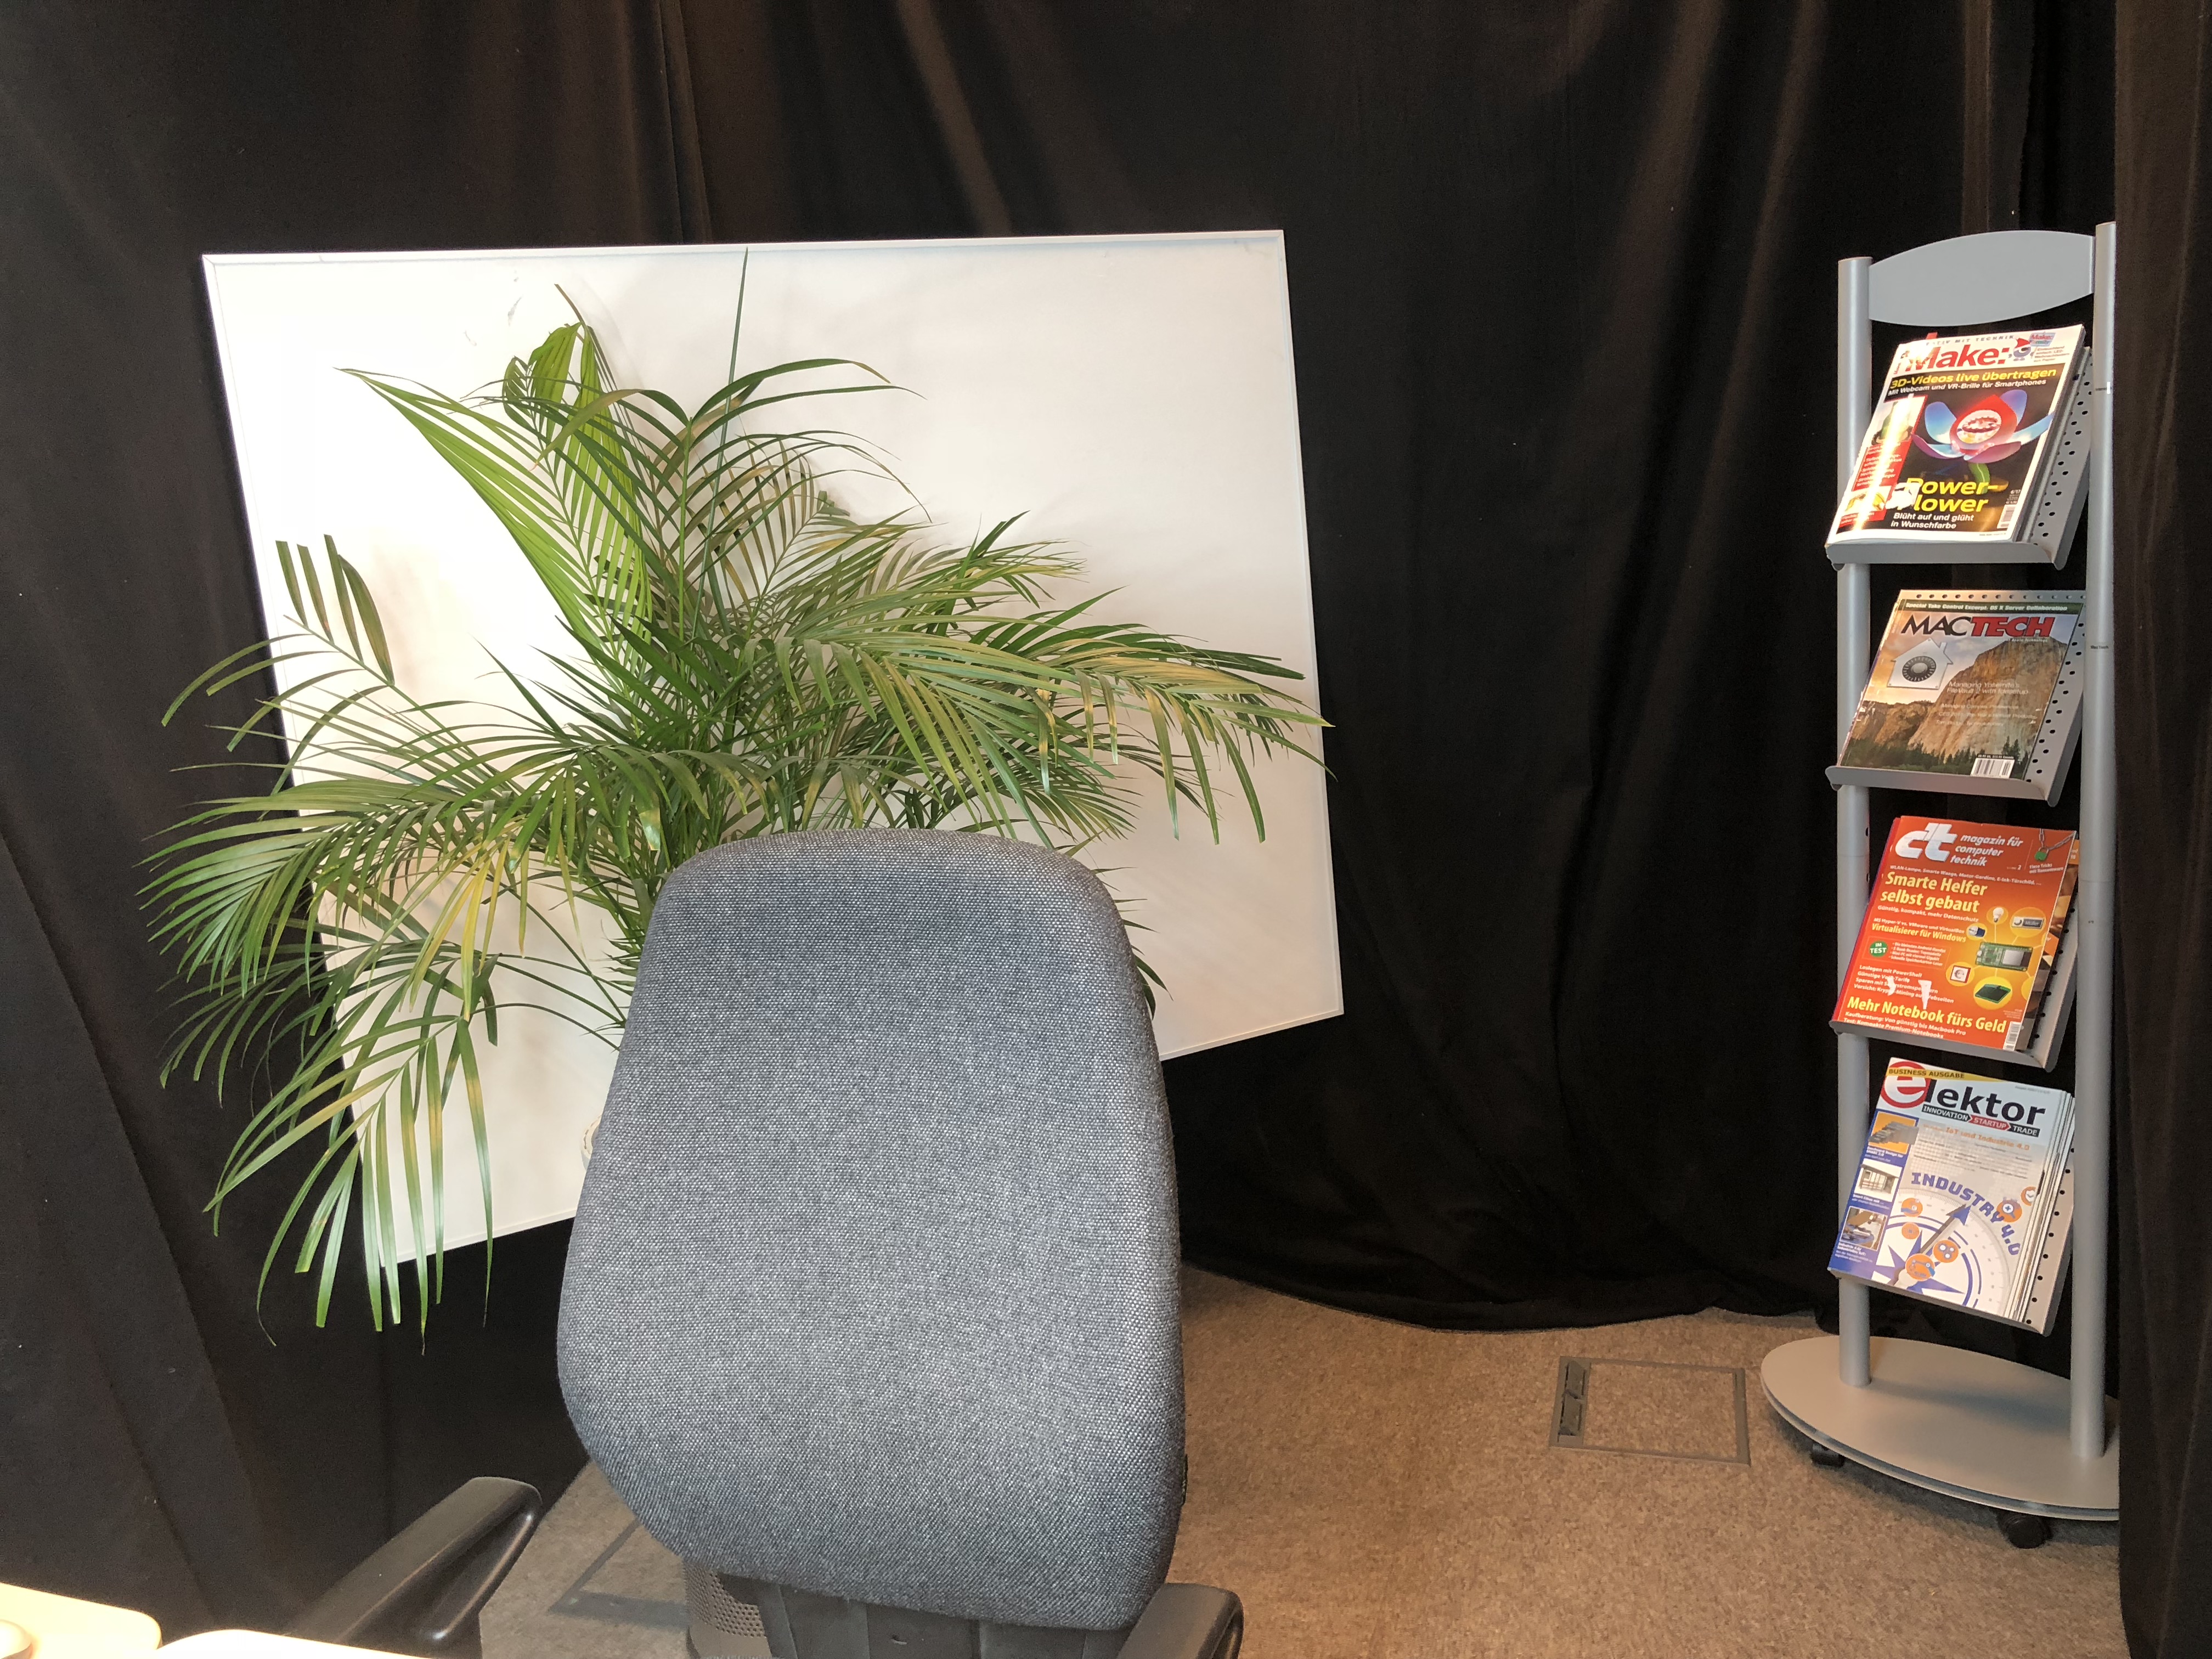

- Put magazine stand, palm tree on trash can, and white spare acoustic panel on white IKEA LACK table against the rear wall inside the box to create a brighter and friendlier-looking environment. The ladder on the outside keeps the acoustic panel on the inside from falling over.
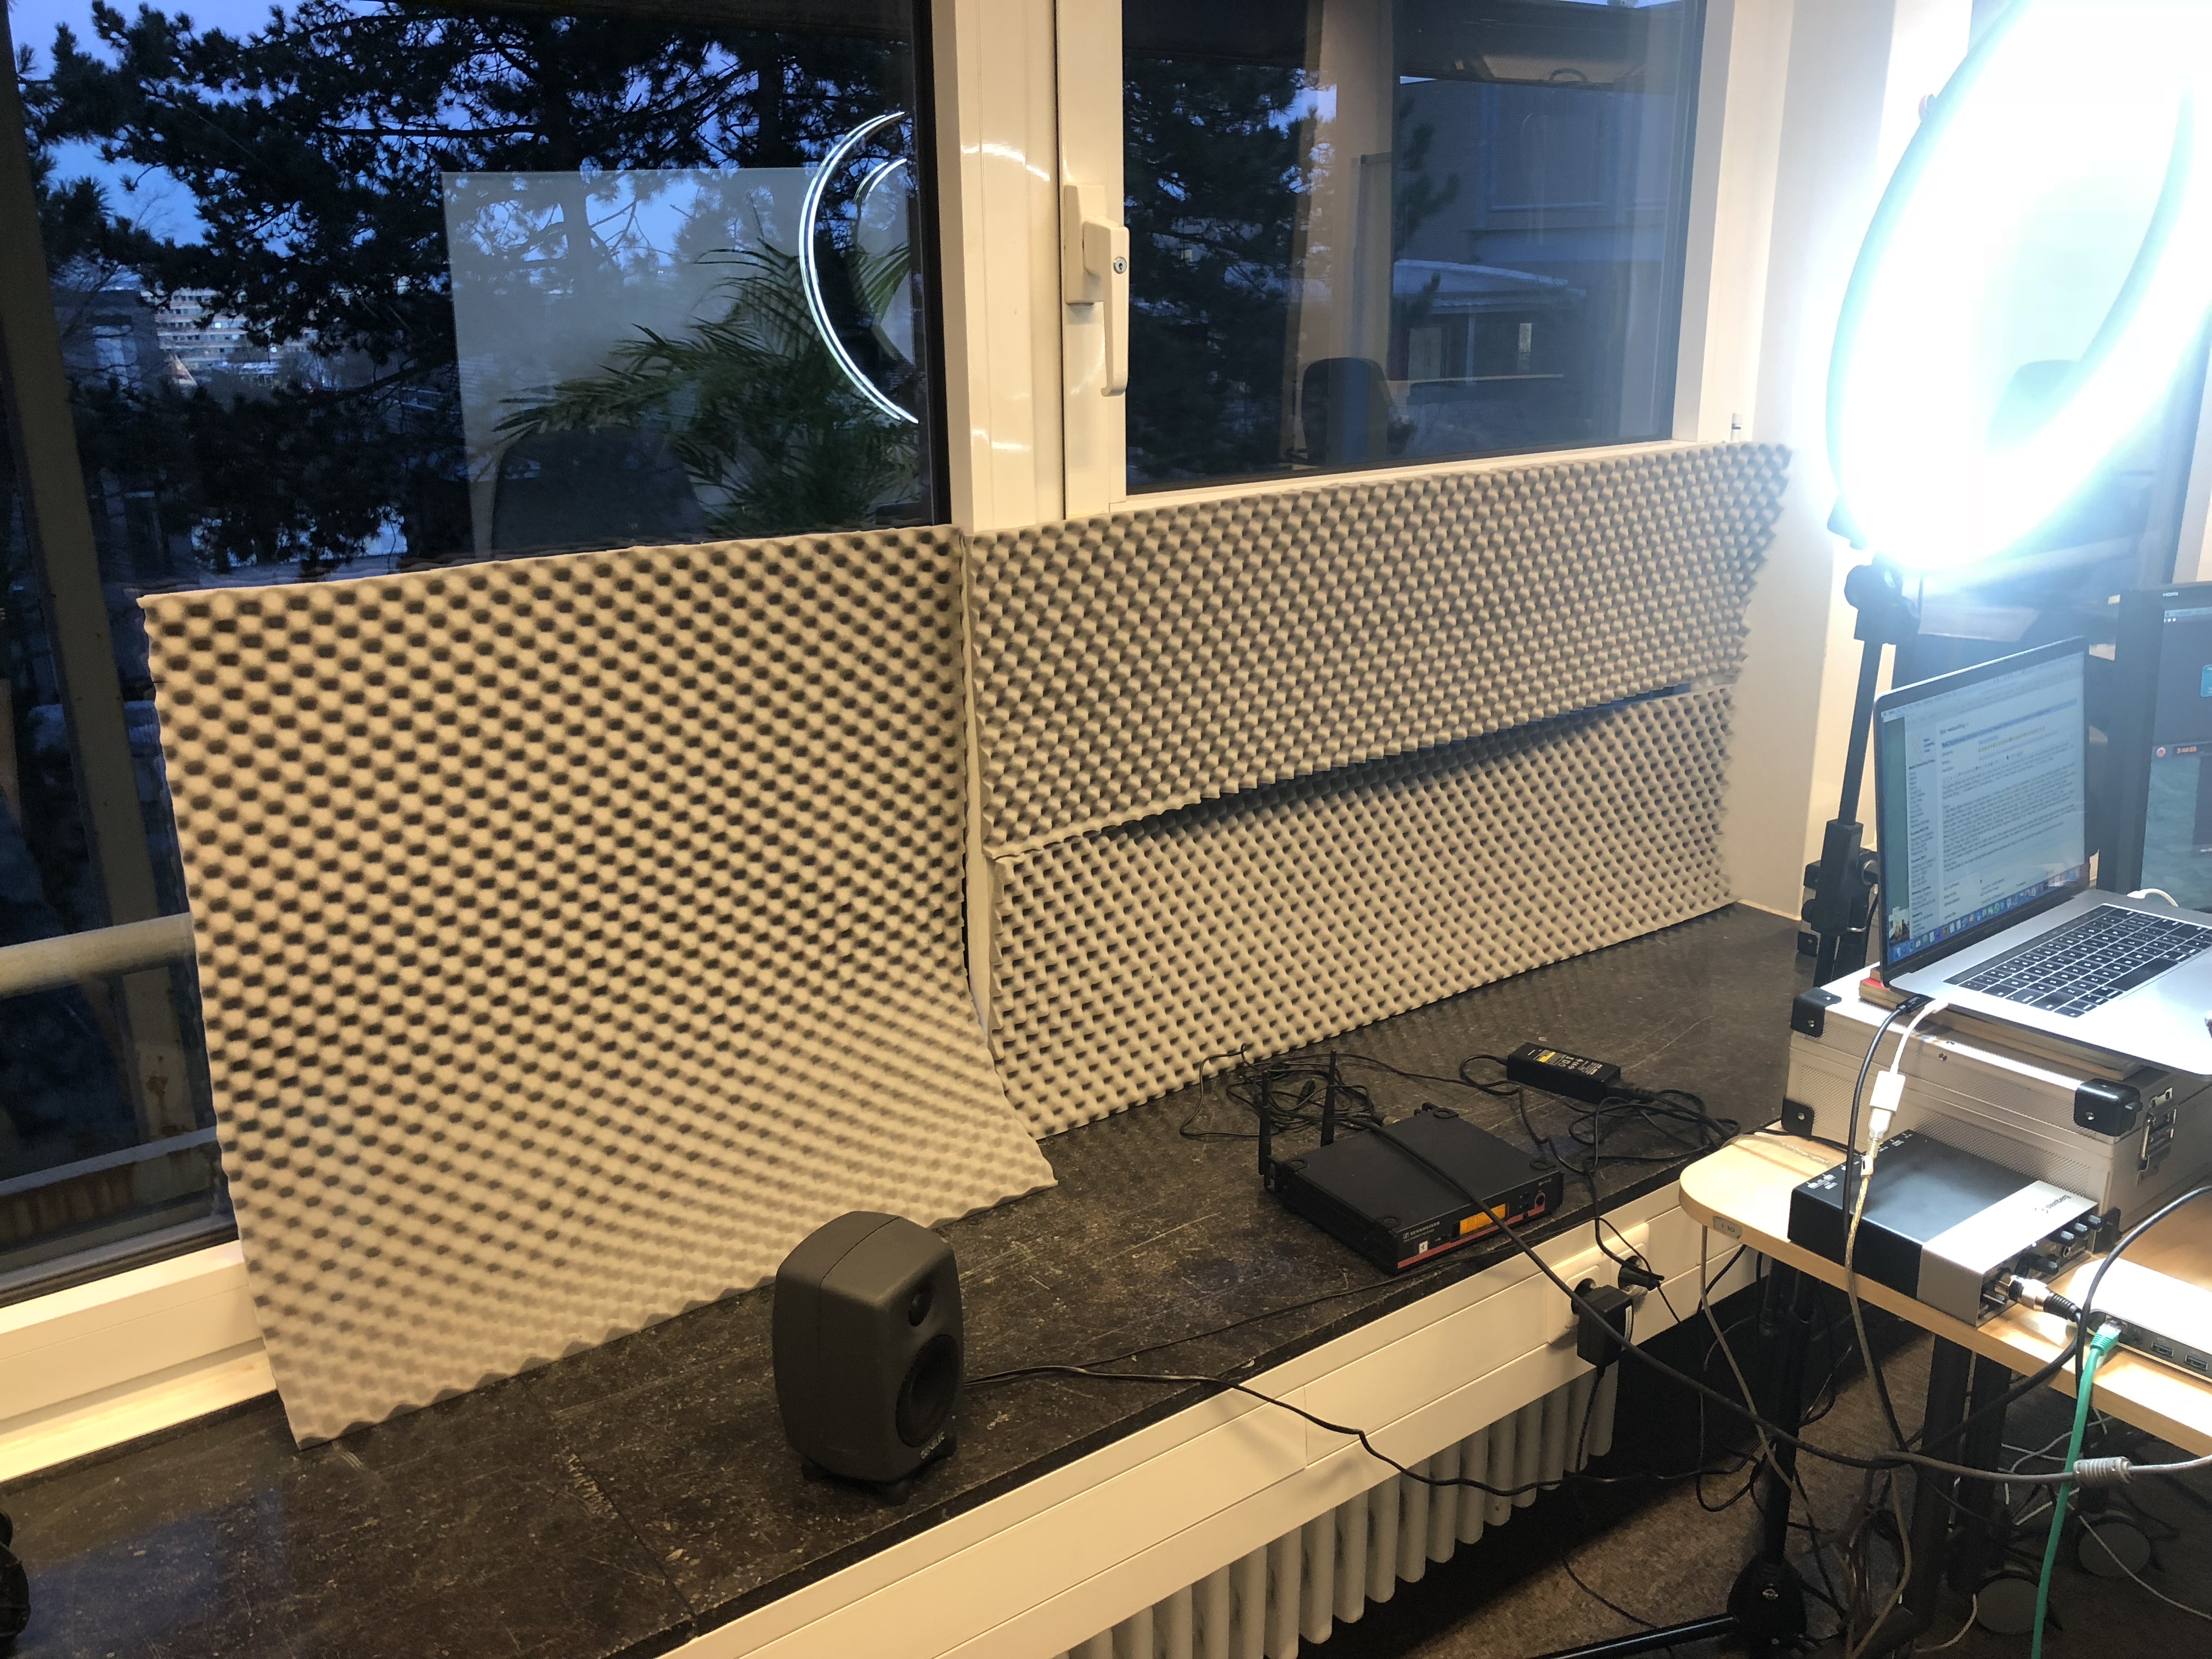
- Put two small or one large rolling table against the window sill, next to a floor tank with access to Ethernet and power.
- Cover lower windows in front of tables with soft gray acoustic foam strips to avoid reflections from the front.

Light
- Turn on ceiling lights.
- Set up our ring LED light at full brightness behind left small table to light up speaker's face.
Audio
- Connect our Sennheiser HSP 4 EW-3 headset (look at the page for the user manual before adjusting it) to one of our Sennheiser EW100-G3 wireless transmitters. (Wired would be better, but this headset only plugs into our wireless transmitters. However, our wireless sound system is good enough for professional musicians, so nothing to worry about.)
- Connect our Steinberg UR22mkII USB audio interface (currently on loan from Norbert Gerhards, we're waiting for our own) to its power adapter, and slide the switch on the back towards the power adapter (not towards USB), because the interface works more reliably with an external power adapter. Turn 48V phantom power OFF.
- Connect our Sennheiser EW100-G3 wireless receiver with an XLR cable to the left input on the front of the audio interface.
- Connect the audio interface via USB and a USB-C adapter to the laptop (in this case Jan's 2016 MacBook Pro).
- On the audio interface, set the left knob "Input 1 Gain" to the 10 o'clock setting (that's level 3 out of 10, starting at 0). Turn all other knobs (Input 2 Gain, Mix, Phones, Output) to 0. Note: After the first class Jan found this recording level was too high, leading to distortion, because you tend to speak more loudly when you're presenting for real than during testing. So try to simulate a real short lecture recording to determine audio levels, and continue monitoring this during class, e.g., by the assistant listening for distortion.
- Connect the laptop audio output via a stereo-jack-to-2x-Cinch adapter to Jan's small office Genelec monitor speakers (or rather use the larger Genelecs if they're not needed elsewhere).
- 15 minutes before class, insert 2 freshly charged AA eneloop batteries into the wireless transmitter, and have a spare charged set on the table for emergencies.
Computers, tablets, displays
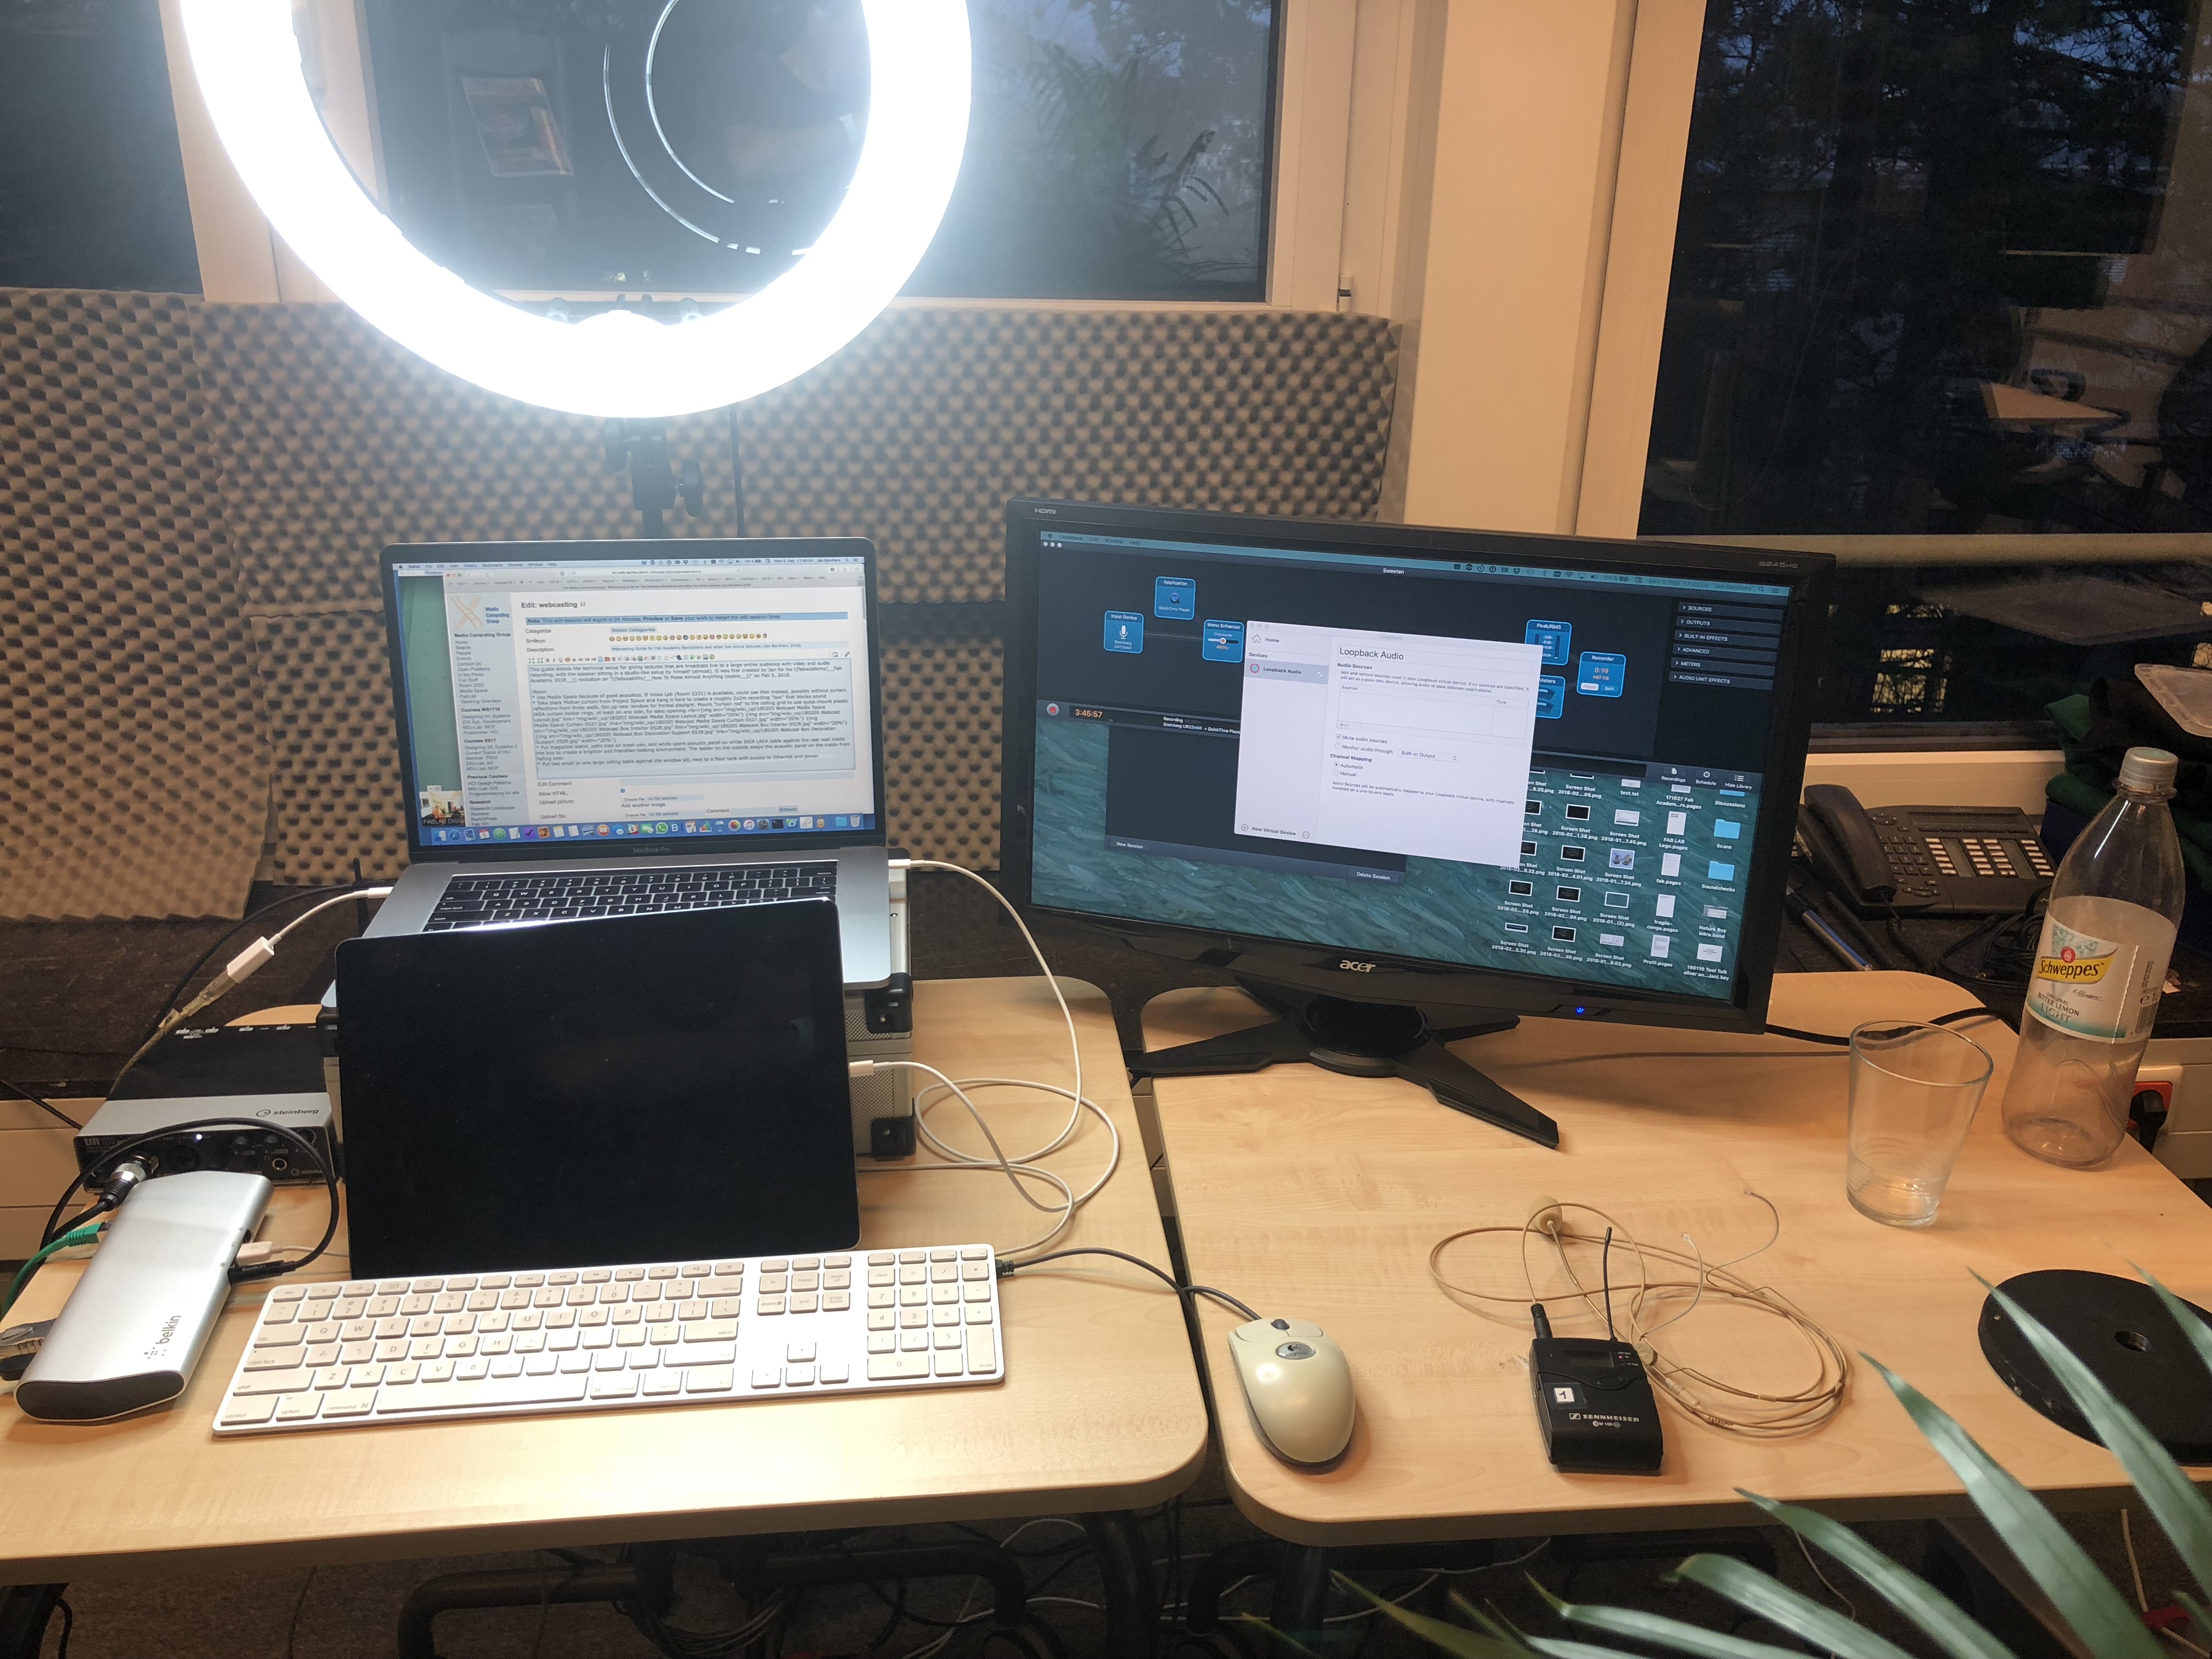
- Put the computer (2016 MacBook Pro) on a stand (we're using an empty aluminum box and a few magazines) to raise it 15 cm above the table
- Connect the MacBook via a Belkin USB-C dock (Jan used the one from his office) to ethernet, to an external aluminum Apple US Extended keyboard and from there to a Logitech mouse
- Plug in a USB-C power adapter for the MacBook
- Connect an external display like our black acer G245HQ monitor via an HDMI cable to the Belkin dock. This screen is only needed to put the MacBook into two-display mode which lets you see the Presenter Notes during presentation mode in Keynote.
- Connect an iPad Pro via a USB-C/Lightning cable to the MacBook (for charging). Ideally, it should be situated above the MacBook screen with a stand, but we had to put it on the table and lean it against the front of the raised MacBook keyboard instead. This made for an awkward angle when trying to see yourself to demonstrate something in front of the videoconference camera. In these situations, it's better to lean the iPad against the MacBook screen itself, covering the screen temporarily, to align it with the MacBook camera.
Software
- Install Loopback and Audio Hijack on the MacBook. Both need to be licensed (Jan has licenses), otherwise they will stop working after about 20 minutes, which could be very embarrassing during webcasting, so do it now.
- Install the Bluejeans app on the MacBook
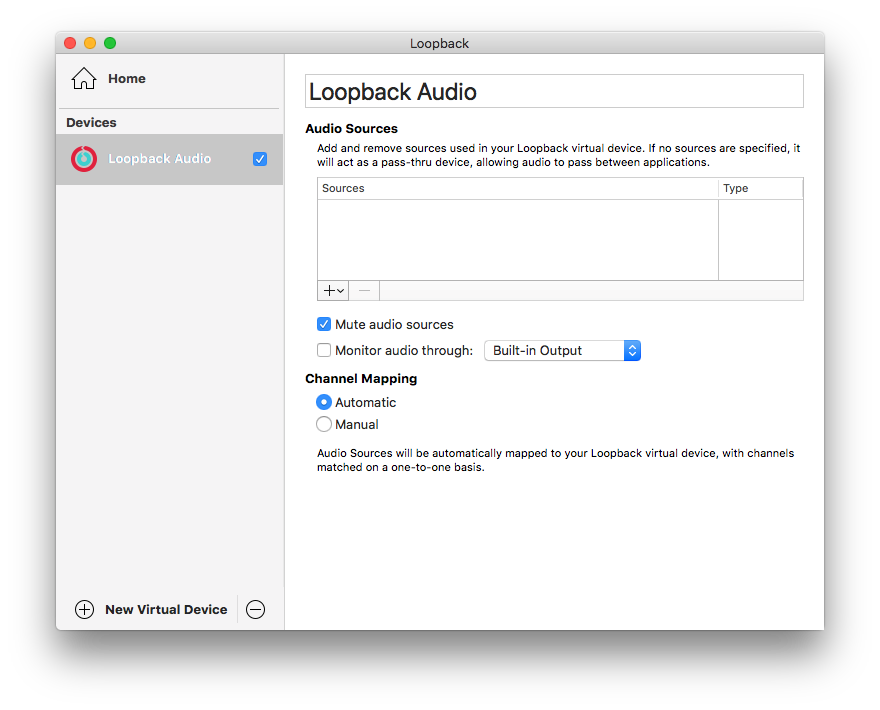
- Launch Loopback, let it install its audio component, and set it up in its most basic way as a passthrough audio device.
- Then launch Audio Hijack, import this Sennheiser Headset Booster setup, select the Steinberg interface as audio input, and the Loopback Audio virtual device as Output Device.
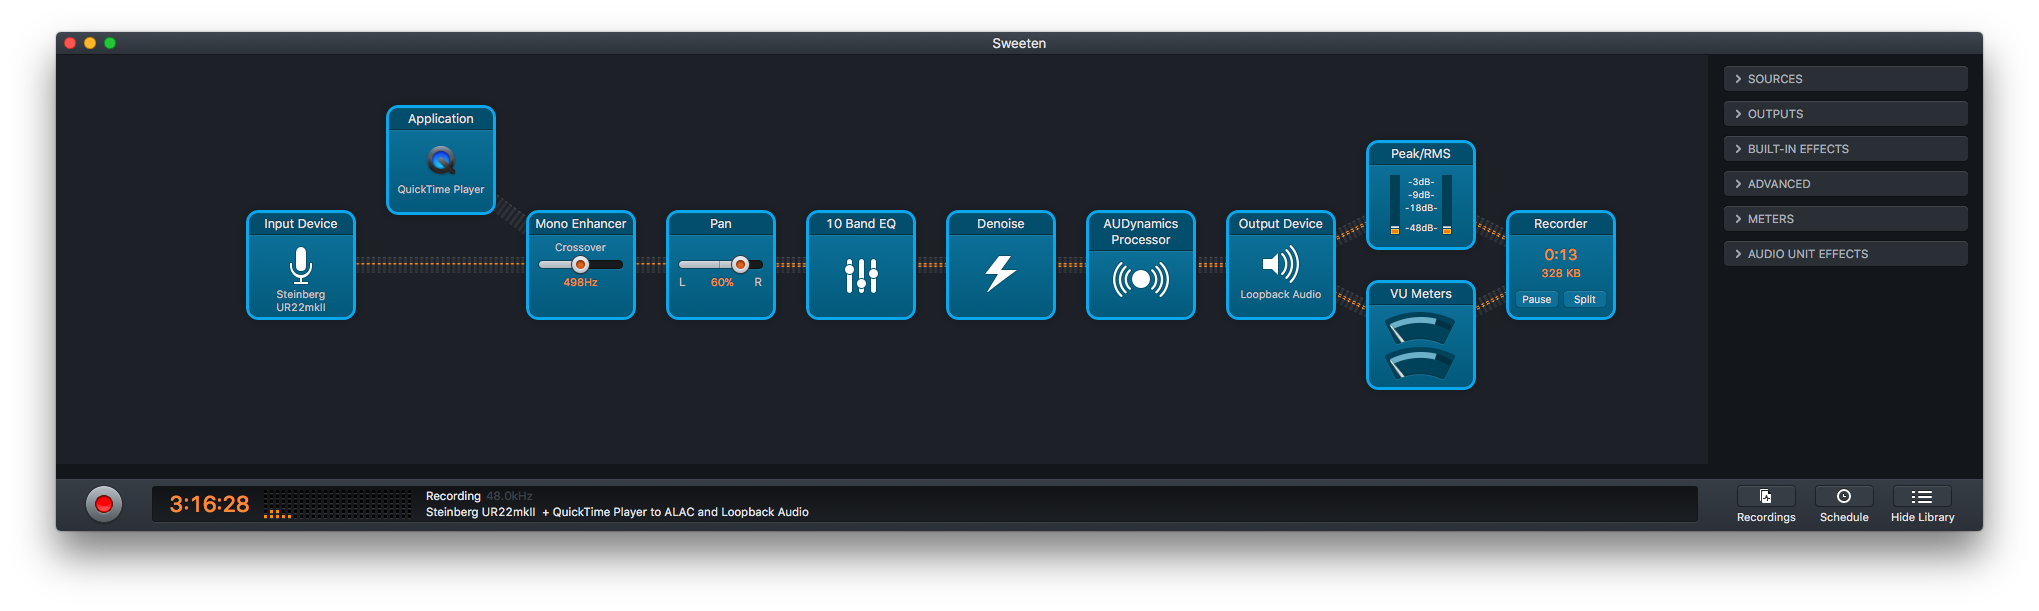
- Press the red button in the lower left of the Audio Hijack window to turn on the entire signal chain. The signal flow will be visible in orange along the chain, and react to audio input if everything is set up correctly.
- The Audio Hijack setup uses a chain of processing nodes to merge the left-channel-only audio signal from the microphone onto both stereo channels, to raise bass and treble for a better voice presence (think radio moderator), to remove background noise, and to avoid clipping. It will also capture a local audio recording if you launch the Recorder on the right end of the signal chain. Hit "Split" when you're done to store the recording as a time-stamped file in ~/Music/Audio Hijack/. Make sure to test that there's no oversaturation and distortion (see note under "Audio" above).
- (Optional: The QuickTime Player source in Audio Hijack is there in case you want to take plain recordings made with your microphone and feed them into the signal chain repeatedly (put QT Player in loop mode) while you're tweaking the audio settings. For this you'll have to select the headphone port in the Output Device node towards the right.)
Web Page
- Create a minimal wiki page with the title, abstract, and bio for your talk.
- Also upload a PDF version of your slides here in case anything goes wrong during the presentation, or for people who'd like to have the slides offline (make sure they're not infringing any copyrights).
- Example: How To Make Almost Anything Usable
Audience Polls (with Assistant)
- Create polls on easypolls.net ahead of time (pay for the polls to avoid the ugly ads). Can't use built-in Bluejeans polls because they're only available for Events, their separate, asymmetrical service for 1000's of viewers with a single presenter.
- Create short URLs via shoutkey.com (if it works!) or tinyurl.com, to post into the Chat channel during the presentation. For Fab Academy, http://tinyurl.com/fab001 etc. worked fine.
- The assistant should have an eye on the polls and provide real-time views of results on their laptop.
- Open up the audience chat channel on the iPad to have the backchannel in front of you.
An hour before the start of your presentation
- Launch the Bluejeans videoconference - the easiest way is to bookmark the conference URL which encodes the PIN, and to open that URL to launch the Bluejeans app and log in automatically.
- In Bluejeans, join the videoconference and select the Loopback Audio device as audio input
- Unmute and check that others (like Neil) can hear you.
- Ideally, listen to yourself speaking on the assistant's headphones (there will be enough delay to hear yourself).
- Launch Keynote
- If doing a Fab Academy recitation, open the Google Hangout link from Neil
- Close all apps except Safari, Bluejeans, Keynote, Loopback, and Audio Hijack. Turn off Notifications. This avoids broadcasting other content (like your email inbox) accidentally.
- In Google Hangout, start sharing the screen of the external display
- Start a local presentation in Keynote, with Presenter Notes on the MacBook, and the fullscreen slide on the external display. This will cover the Bluejeans window.
- On the iPad, connect to the same Bluejeans conference to see the others while presenting. Mute speaker, microphone, and video on the iPad.
- Move through the presentation using the external keyboard to make sure it works.
- 15 minutes before start, swap your wireless transmitter batteries for fresh ones (see above).
- Otherwise, leave this setup open and untouched until the webcast actually starts.
After the webcast
- After a Fab Academy recitation, plan to be online for up to another hour for Q&A
- Stop the local audio recording in Audio Hijack, and put the file on oliver if needed.
- Review the chat channel for open questions and poll results.
- A few days later, get a copy of the video webcast (for Fab Academy, from their main Fab Academy Class website).