Wearable Computing Tutorials - LED Strip Matrix
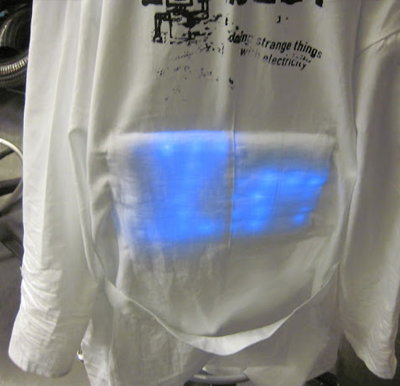
| With the addressable LED strips you can make a simple display and attach it to a flexible surface like a shirt or a jacket. Here we will put together an 8 by 8 display on a jacket. |
Materials
Tools
Tips
|
Instructions Cut 8 pieces of LED strip with 8 LED's each. There are two types of joints in the led strip. According to the type of joint, it needs specific steps. Cut 8 pieces of LED strip with 8 LED's each. There are two types of joints in the led strip. According to the type of joint, it needs specific steps. Type 1 - Soldered Joint
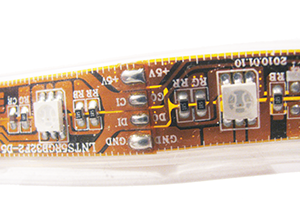
You can recognize the soldered joints by the fact that it only has one of the two pads as can be seen in the picture below. There is only one since it has been previously cut and rejoined. This type of joint appears every 1 meter (16 LEDs).
 For this type of join you need to cut the isolation rubber around it and desolder the pads. If you have a thin tip and not one that covers all 4 connections, you need to use a solder wick first to losen up the connection.  After that the strips can be separated by pushing the tip between the two strips. 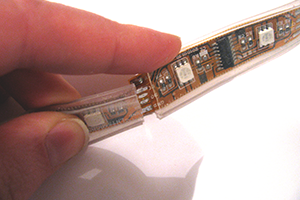 Type 2 - Normal Joint
Normal joints have both pads.
In the end you should have 8 led strips with 8 LEDs each and a 4 pad connection on each side.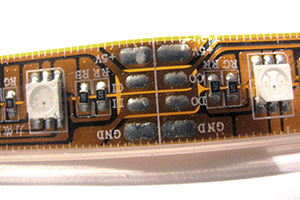 To split the strip here all you have to do is cut the strip between the two pads. 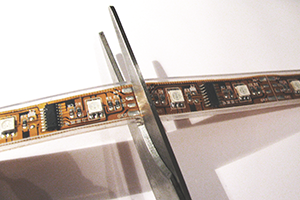 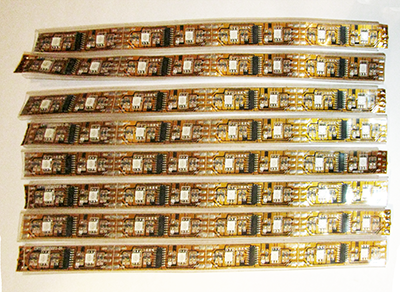 Measure and cut the ribbons needed for connecting the strips together. I used 7 pieces of 8 cm lengths. Measure and cut the ribbons needed for connecting the strips together. I used 7 pieces of 8 cm lengths.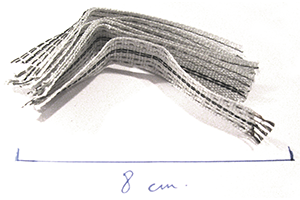 Seal each cut piece with a lighter against fraying. It will also be useful when soldering it to the strip. 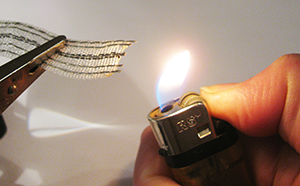 If you have more than 4 conductive traces in the ribbon, pull out the excess traces with a tweezer. 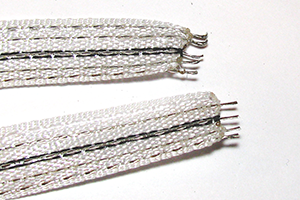 Solder the conductive ribbon pieces to the cut strips. Solder the conductive ribbon pieces to the cut strips.Take two of the 8 led strips and align them, making sure the pads match. 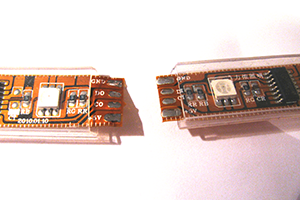 Tin both sides with solder. 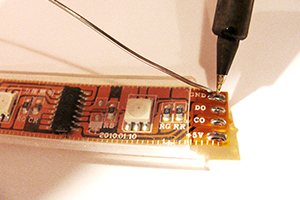
Pull the wires out, making sure they do not slip out from the other end. Twist each conductive wire to make sure the strands do not make contact to other pads then solder them one by one to one of the strips. 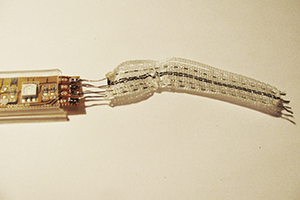 Pull the isolation back and do the same on the other end making sure the connections match. 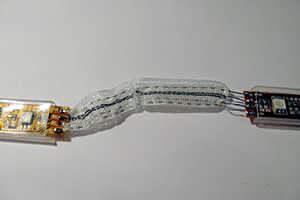 Continue for the whole strip. 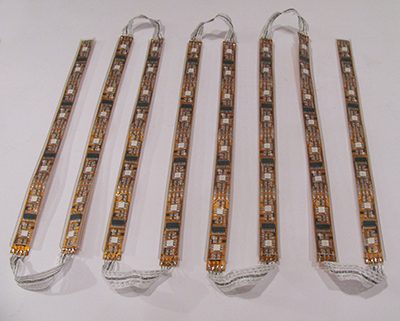 Isolate the conductive ribbon part. Isolate the conductive ribbon part.Measure and cut the isolating ribbon to match the conductive ribbon. I cut 14 pieces of around 9cm each. 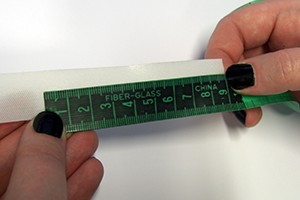 Iron it around the conductive ribbon, both sides at the same time.  Make sure to push the remaining isolation inside the conductive strip isolation. 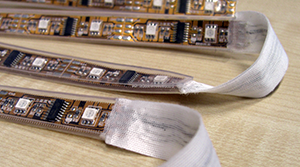 Connect the First strip to a longer ribbon according to your needs (length required to reach the controller) and solder and isolate it like the smaller ones. Isolate the cut strips. I used non toxic silicone to fill up the ends of the strip to protect it from dust and moisture.Here is how it looks after it was added to a lab coat. Connect the First strip to a longer ribbon according to your needs (length required to reach the controller) and solder and isolate it like the smaller ones. Isolate the cut strips. I used non toxic silicone to fill up the ends of the strip to protect it from dust and moisture.Here is how it looks after it was added to a lab coat.
- - The end - -
|