Quick start Tutorial - Laser Engraving with the Epilog Fusion M2
🔺 Read the safety instructions before use! 🔺 Fire hazard - never leave the laser cutter unattended!
|
Step |
Action |
|
1 |
Turn the machine ON →Main switch on the right side of the laser cutter.
click an image to enlarge!
|
|
2 |
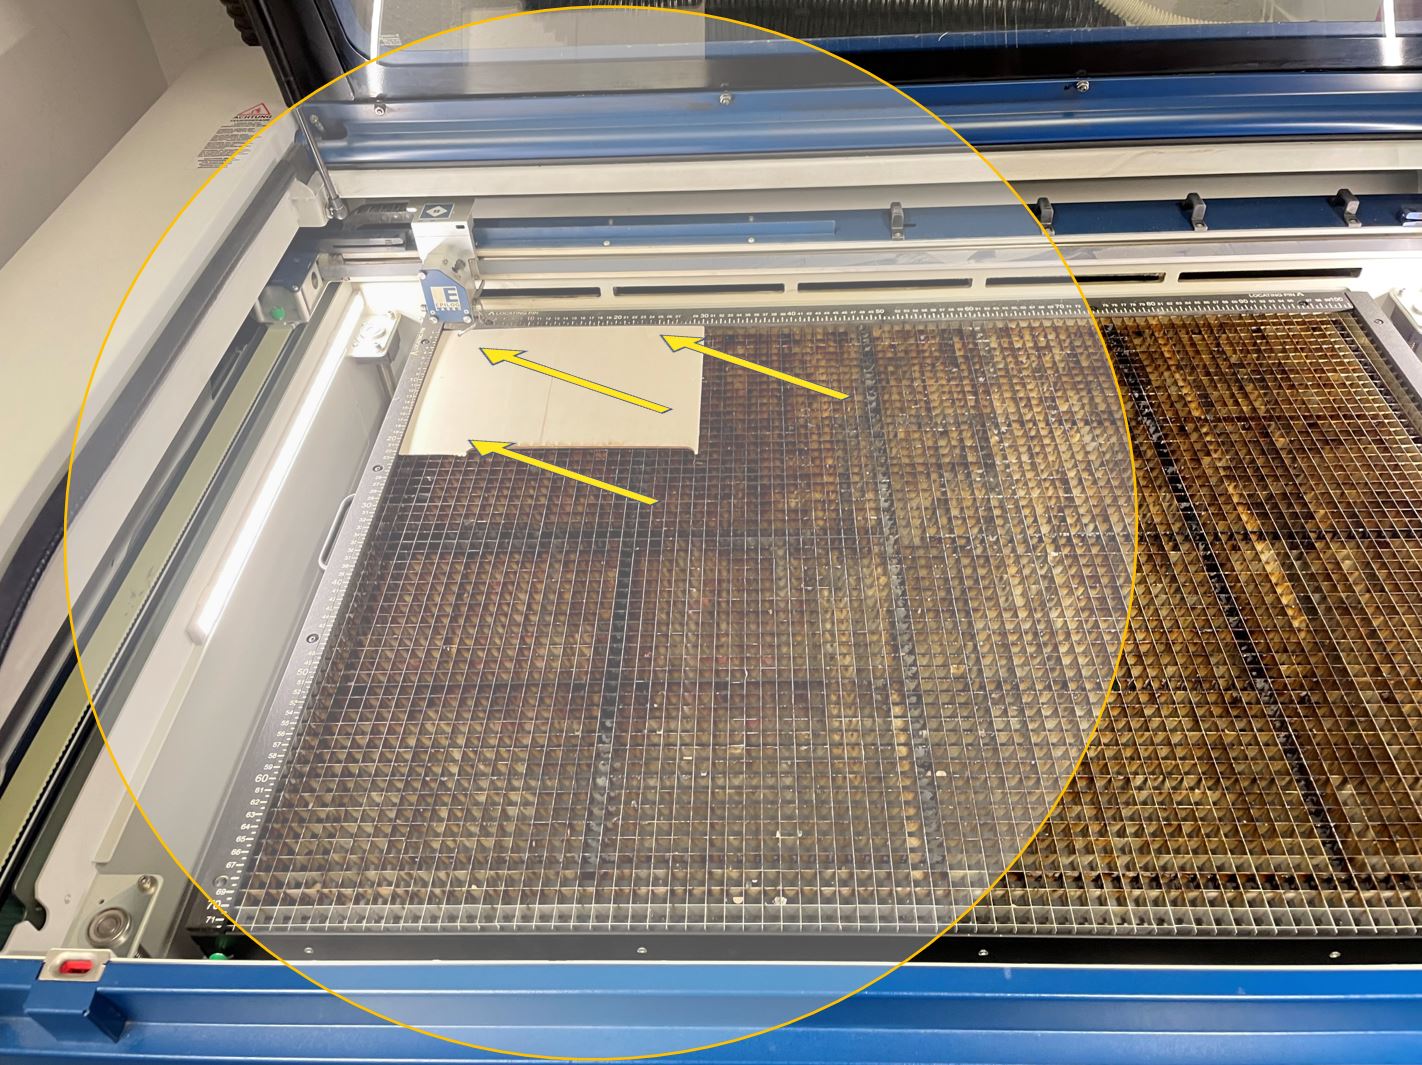
Load your material on the machine bed align it to the zero position on the Ruler (or any other coordinate corresponding
|
|
3 |
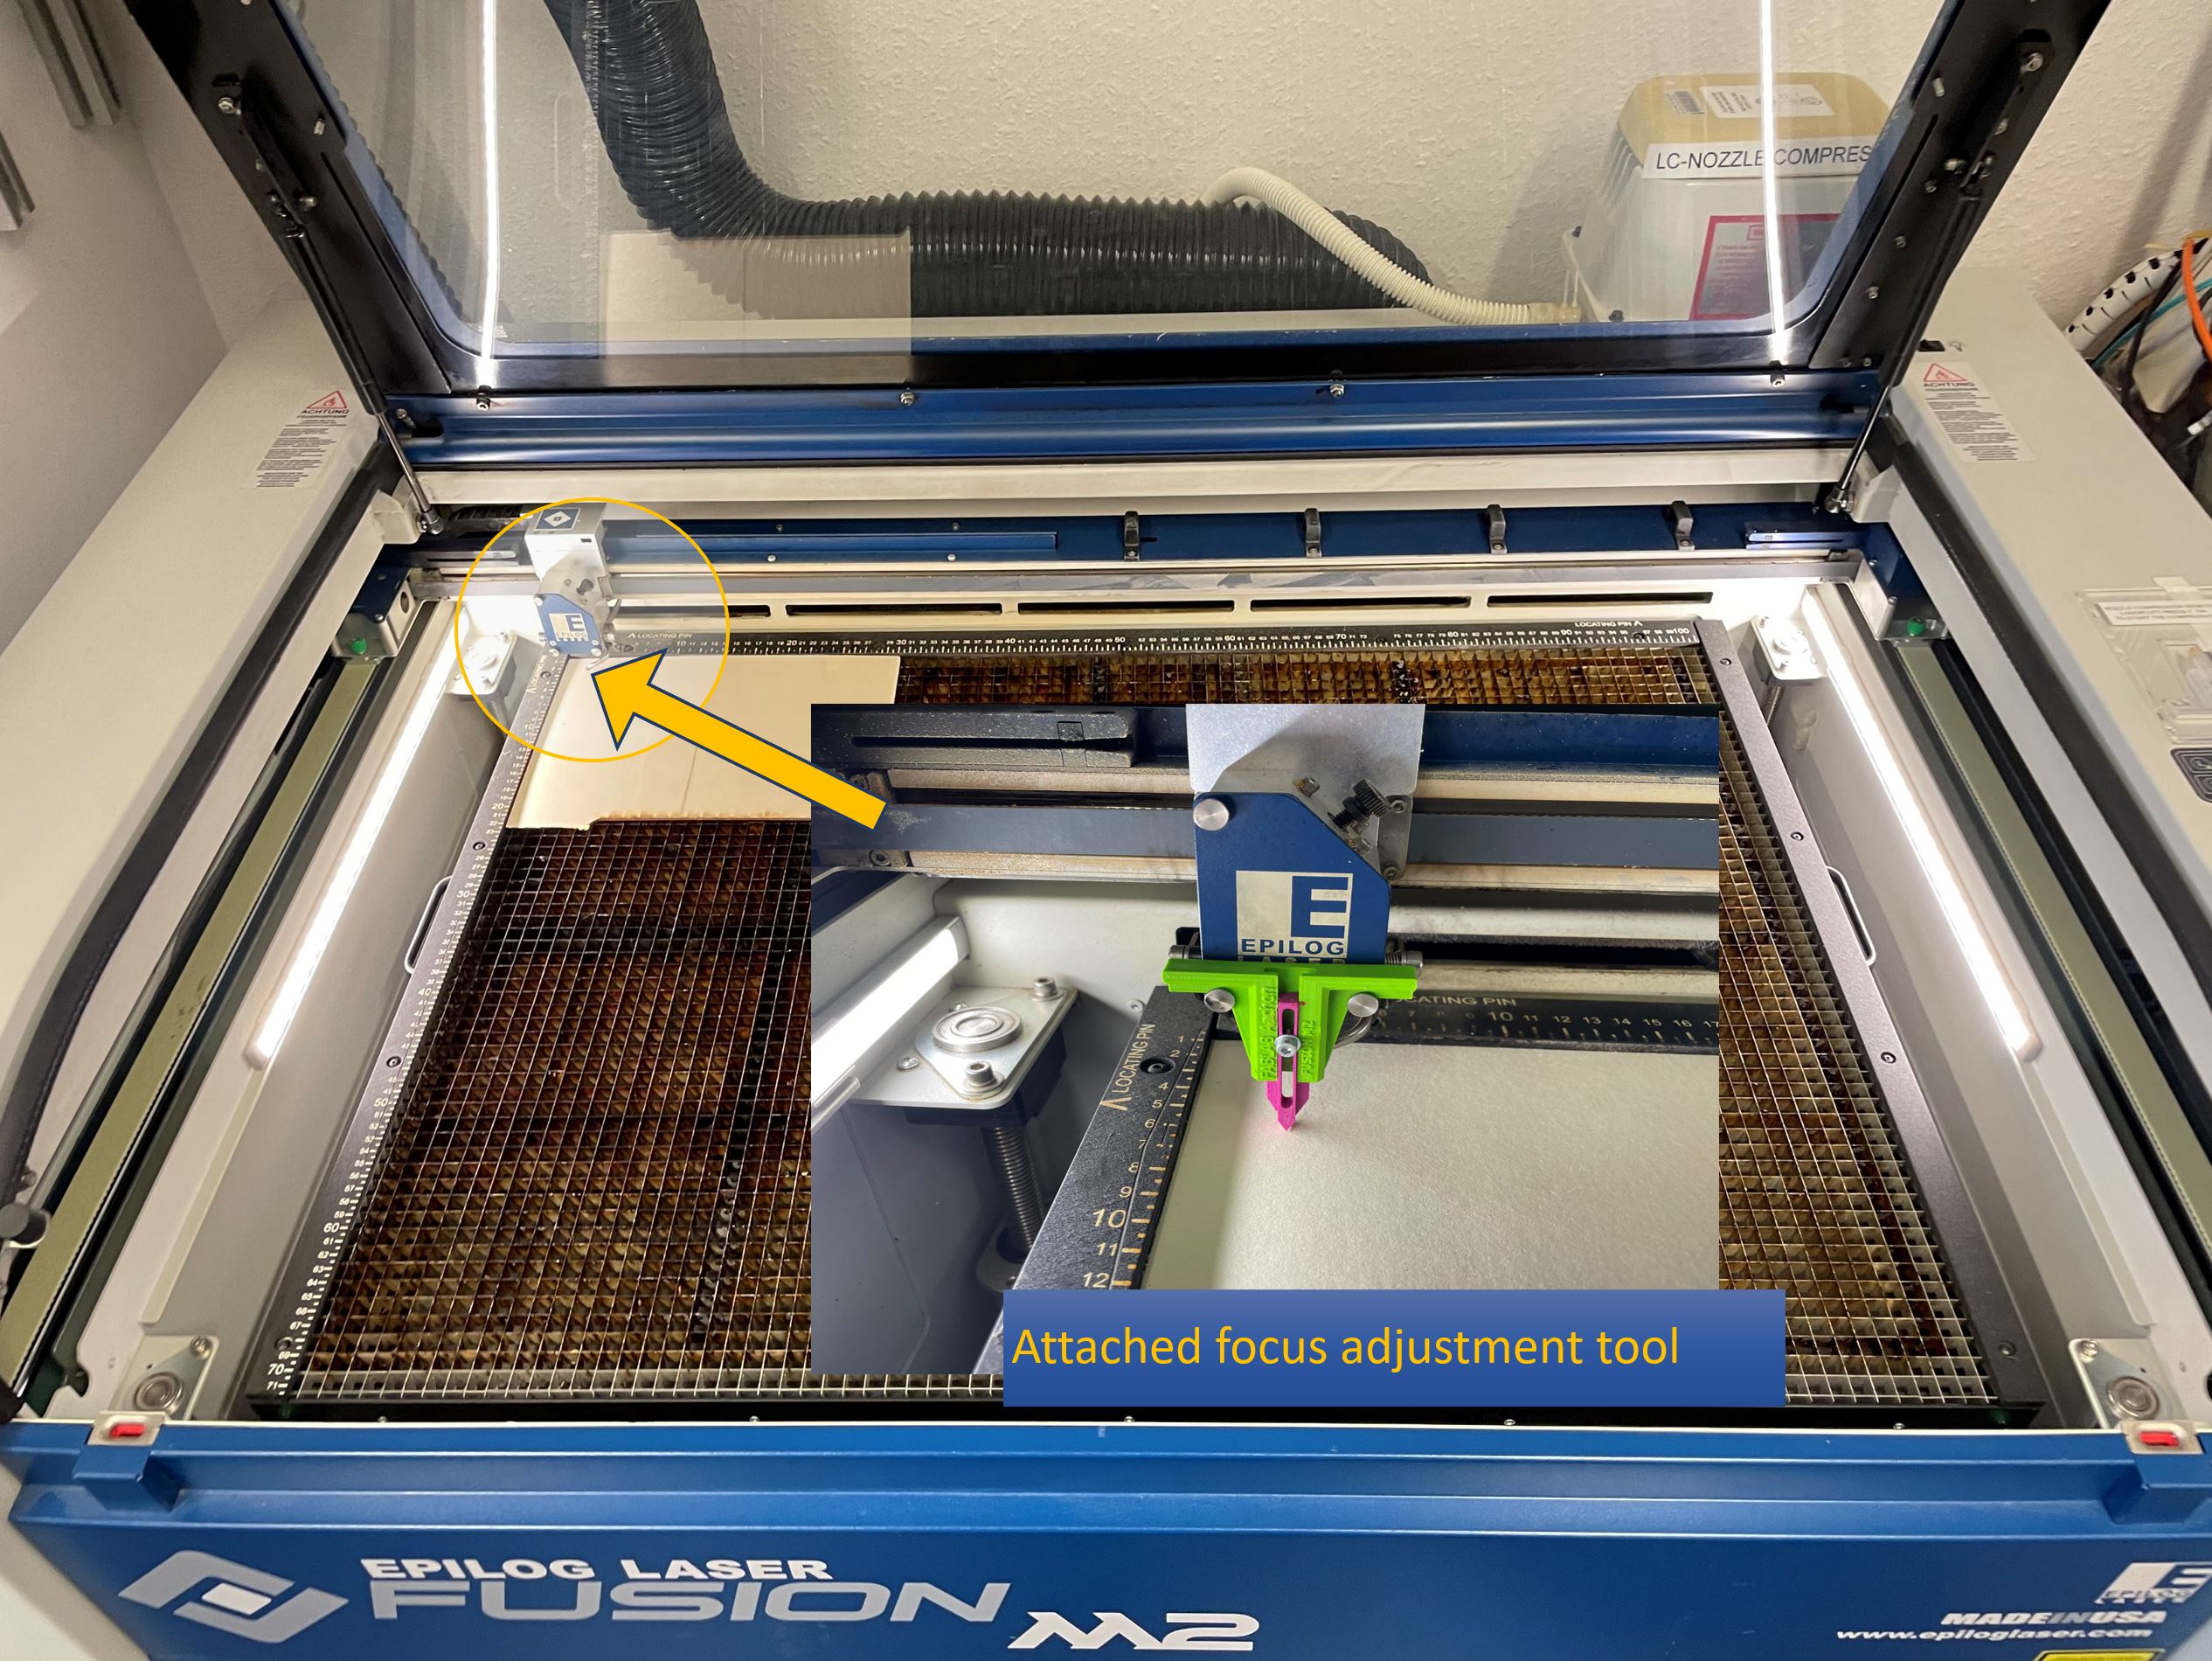
Adjust the focus height: Use the focusing tool and attach it to the laser head. Select the focus in the laser cutter Remove the focus tool.
|
|
4a |
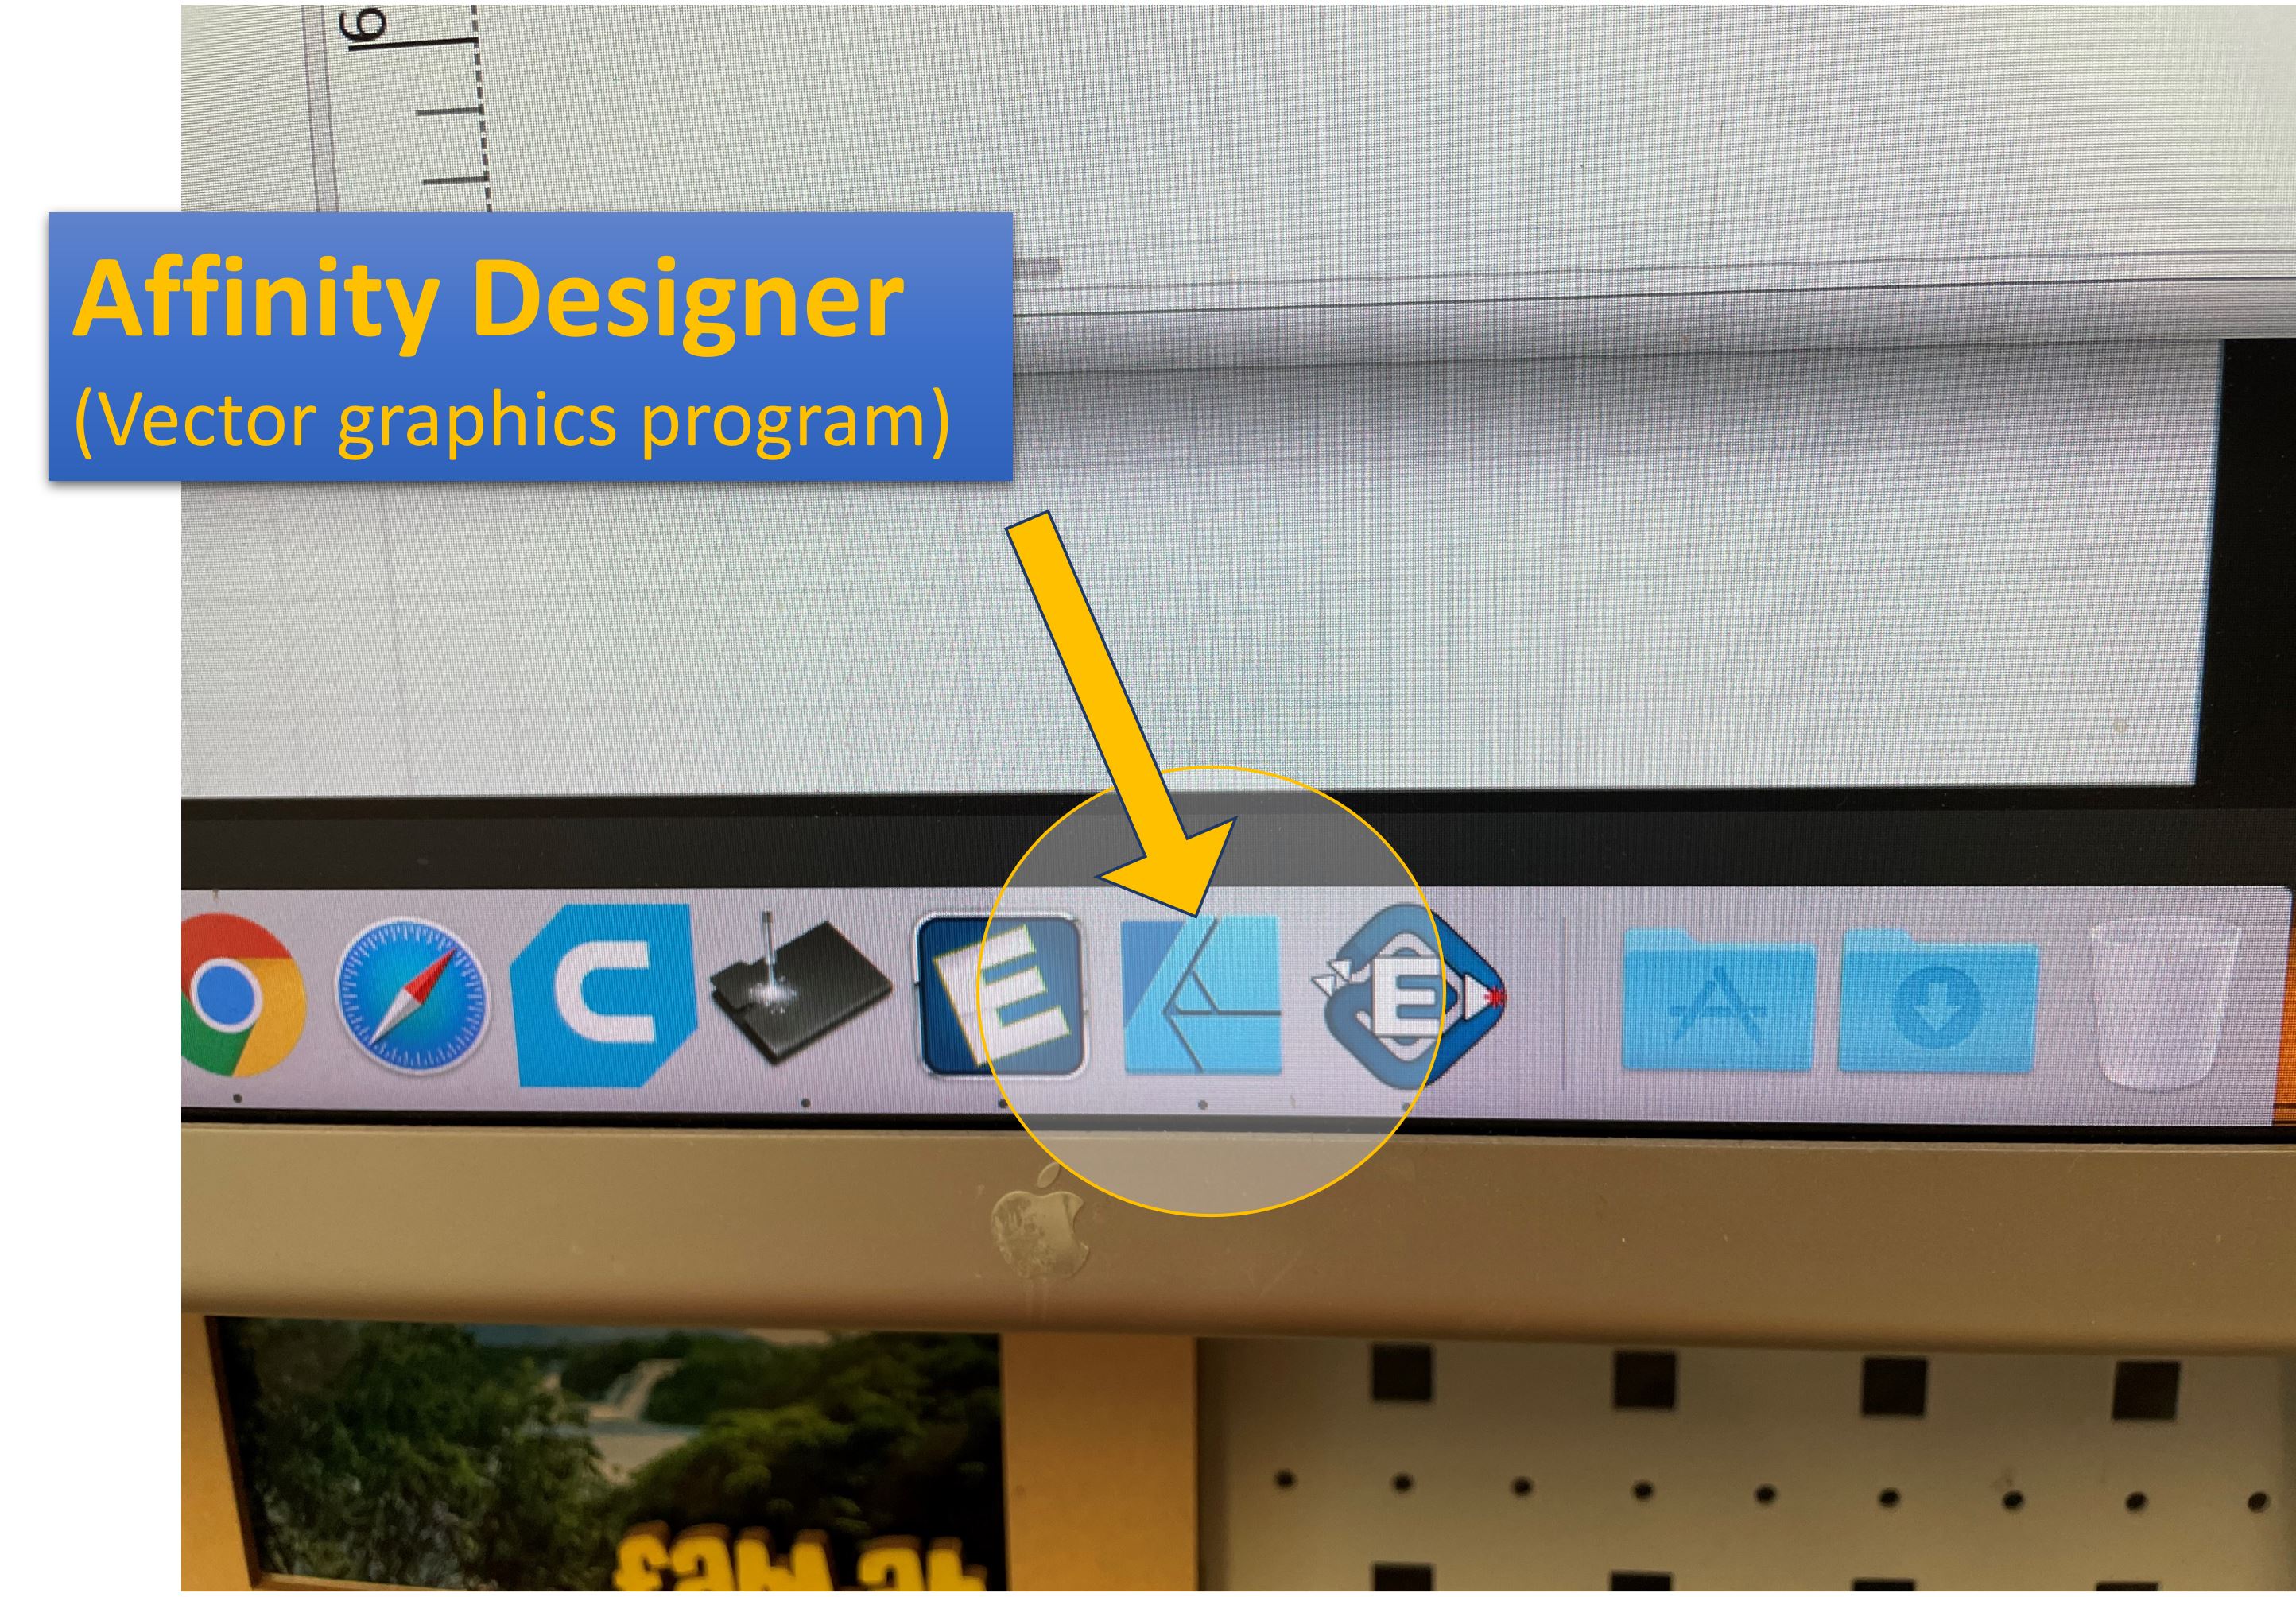
On the computer for the laser cutter control (the Mac mini right beside): Open Affinity Designer. Your lasercut job must be
|
|
4b |
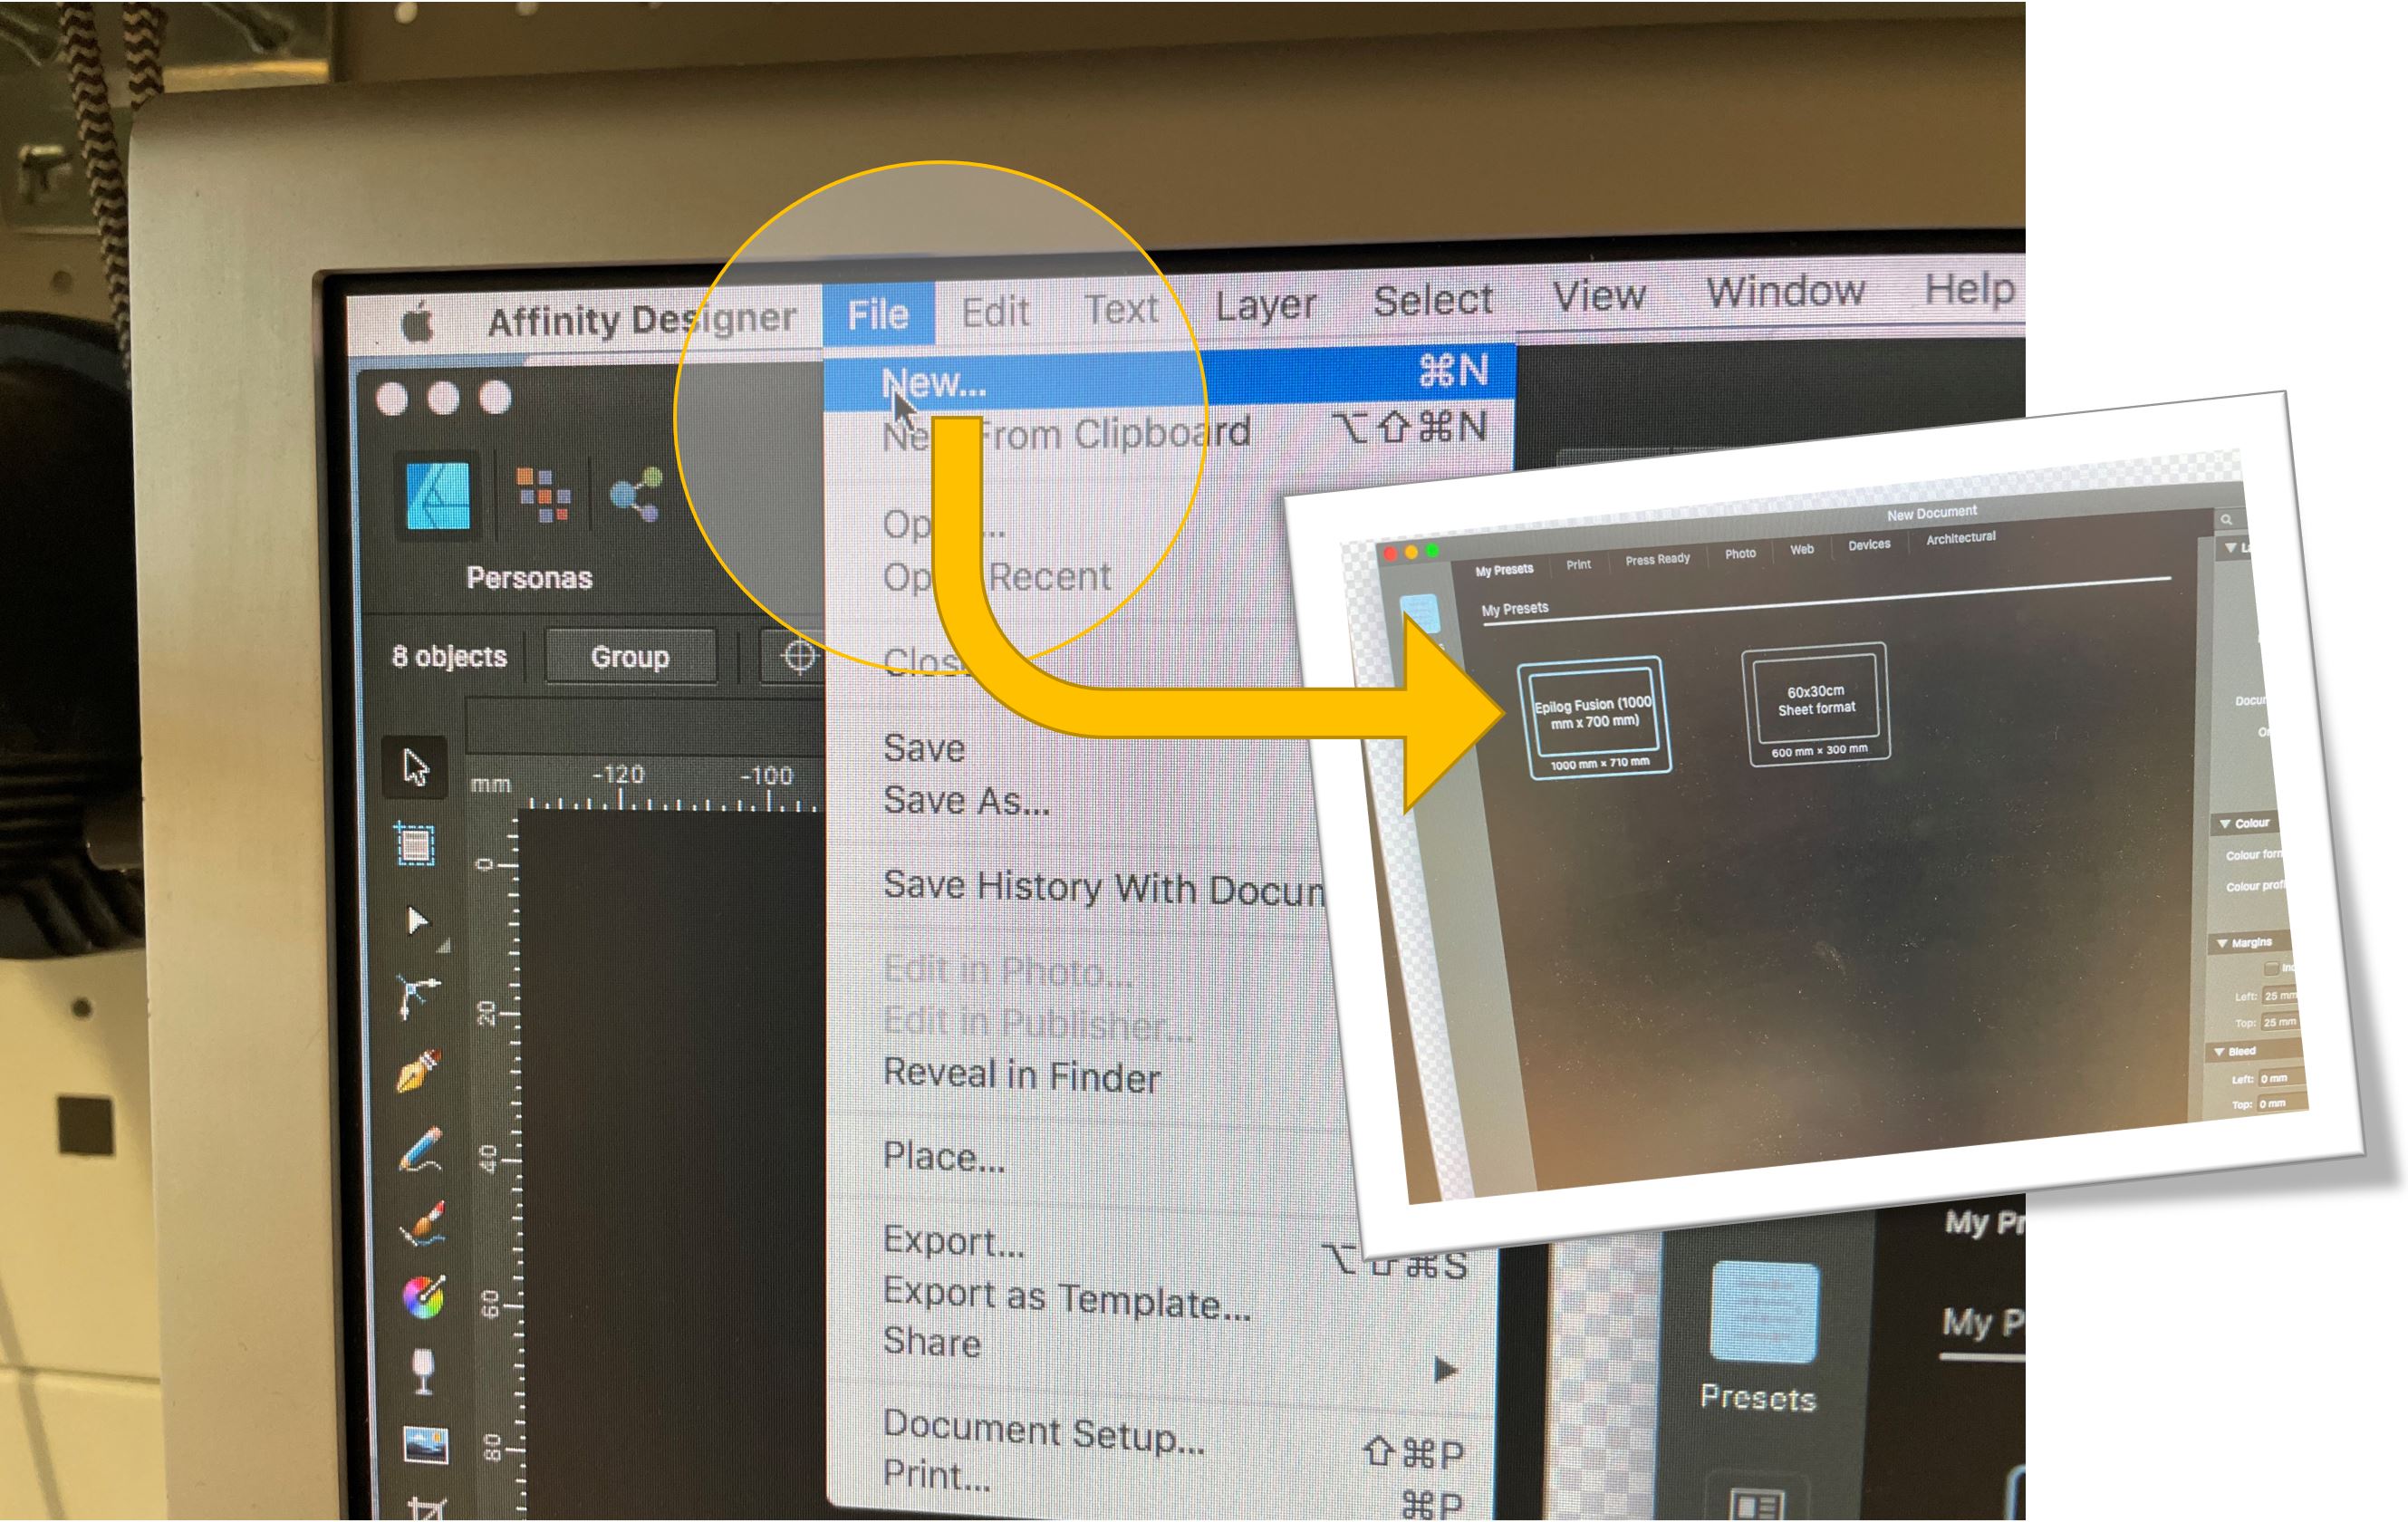
In the upper menu: click on “File”-> “new” and select “1000x700” (Laser bed size) or alternative
|
|
4c |
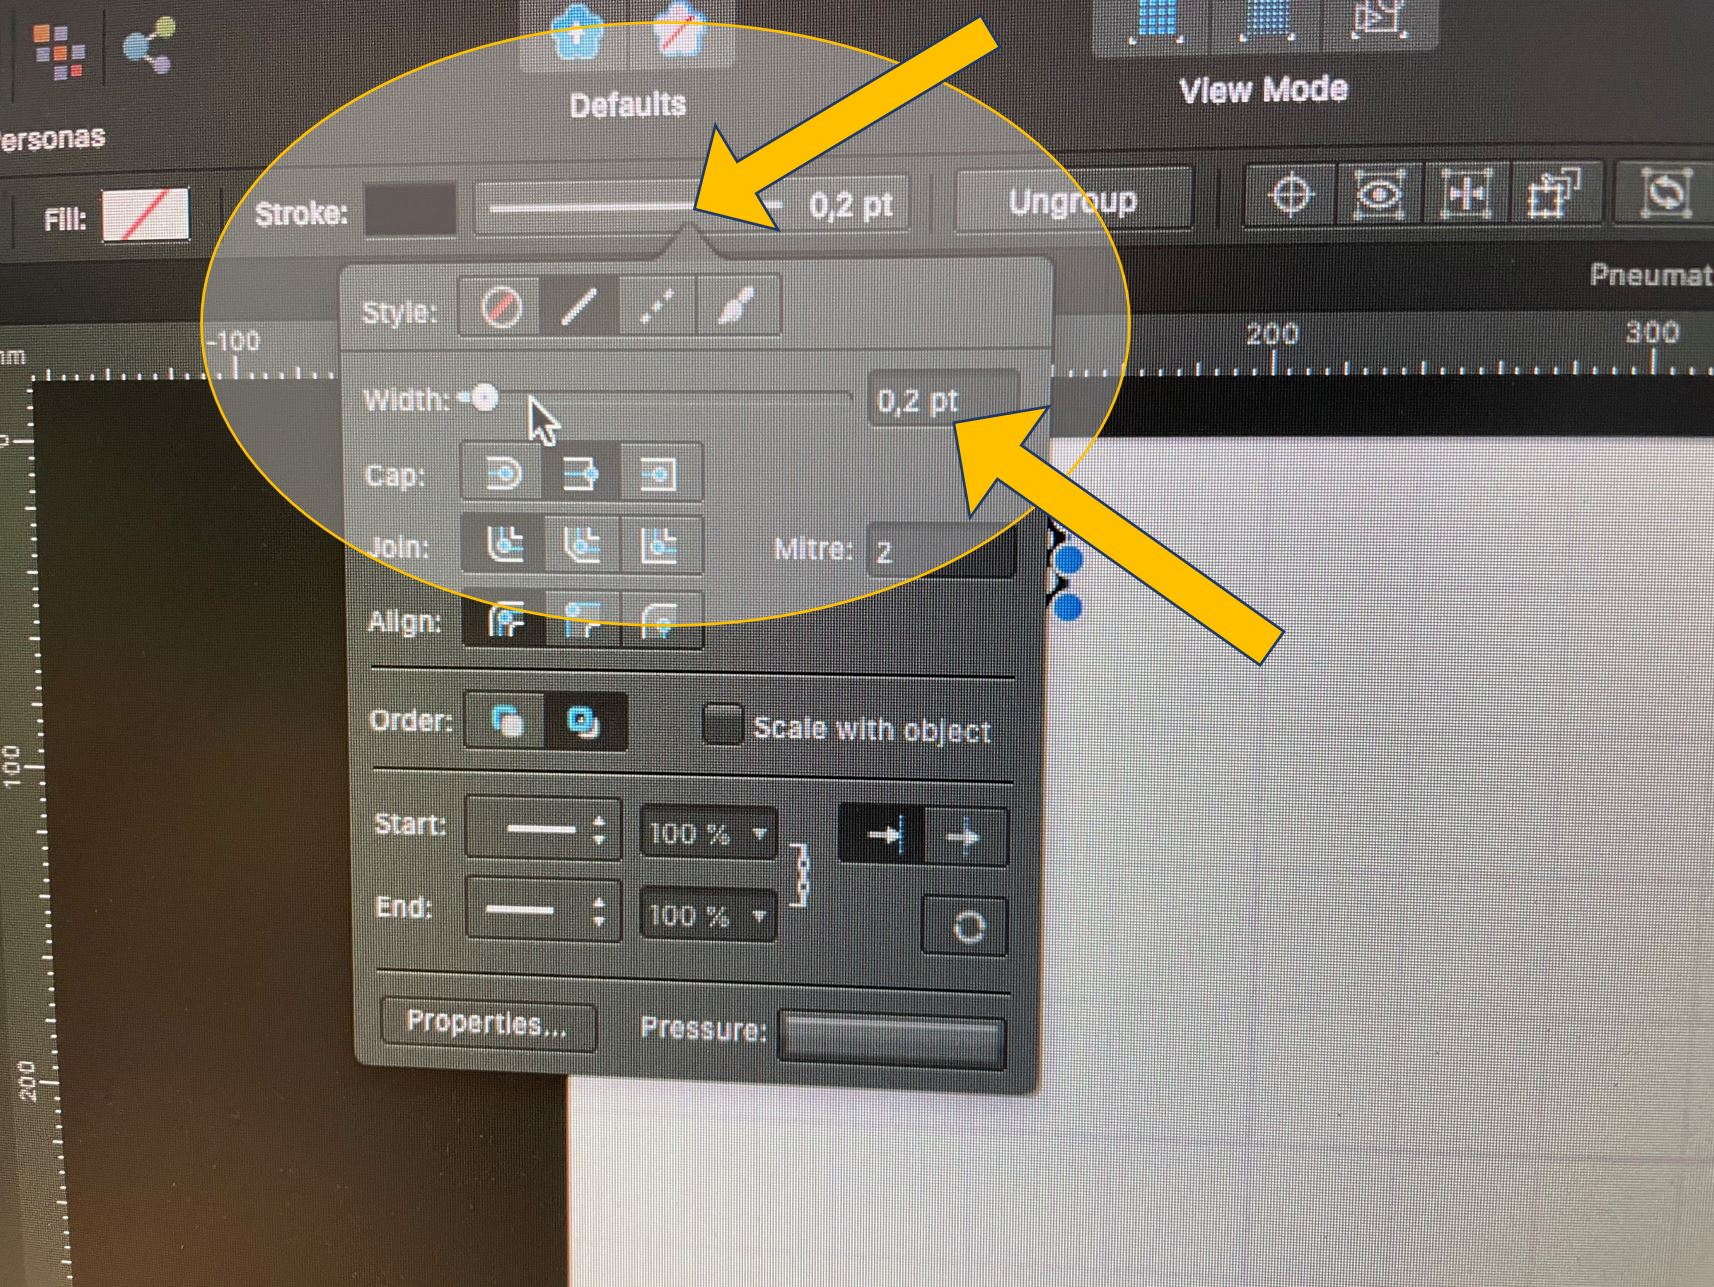
In Affinity Designer either import your SVG or pixelgraphic file (e.g. a JPEG) over “File”->”Place”->now choose your file and click on
|
|
4d |
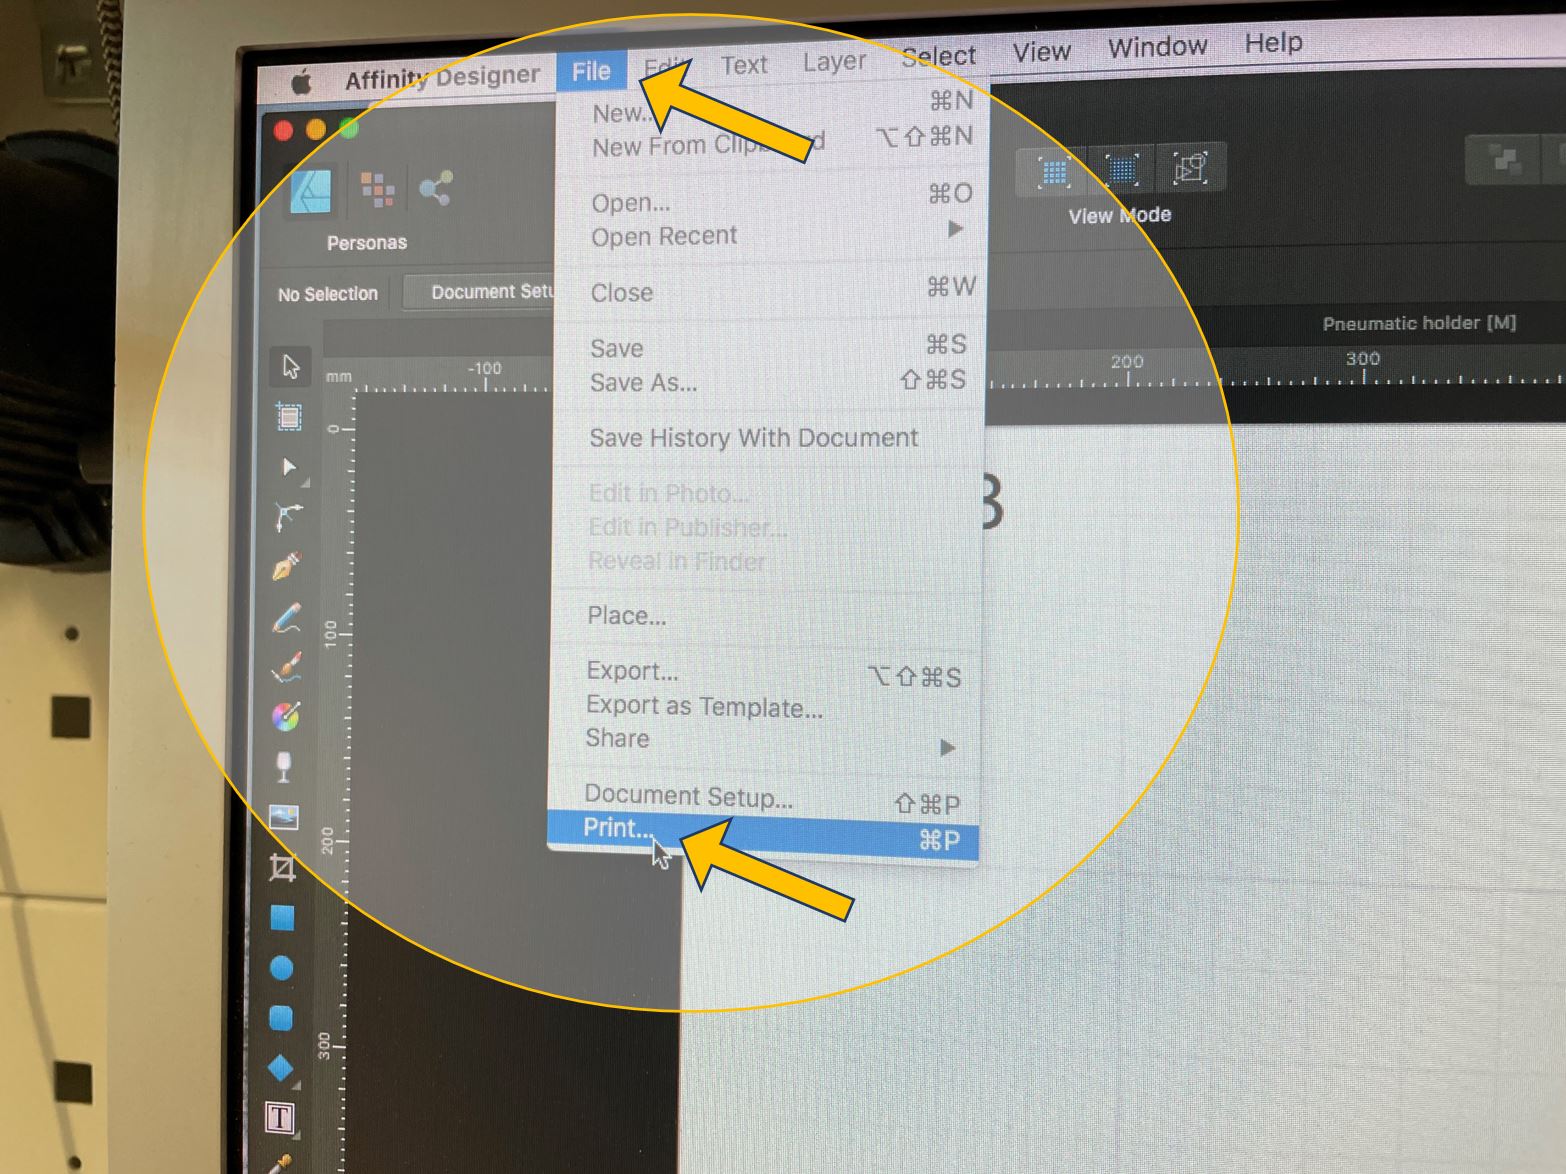
Design ready? Click on “File”->” Print” and select “Epilog Fusion” (usually already pre-selected).
|
|
4e |
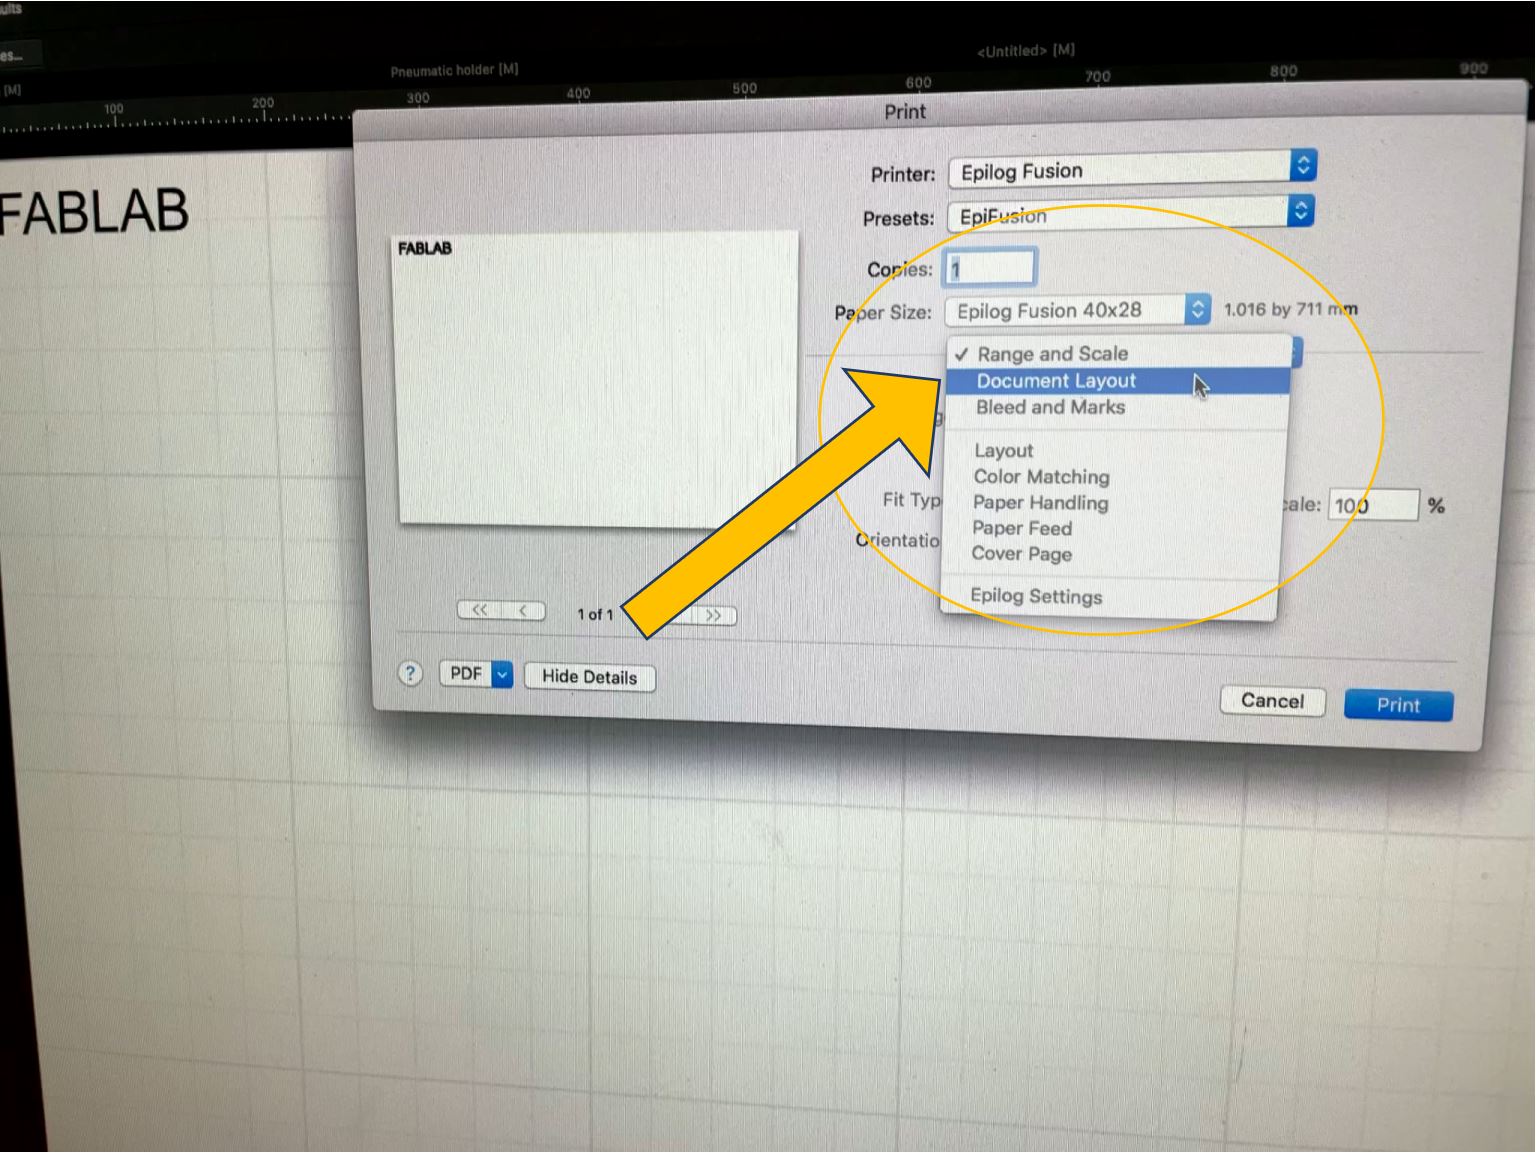
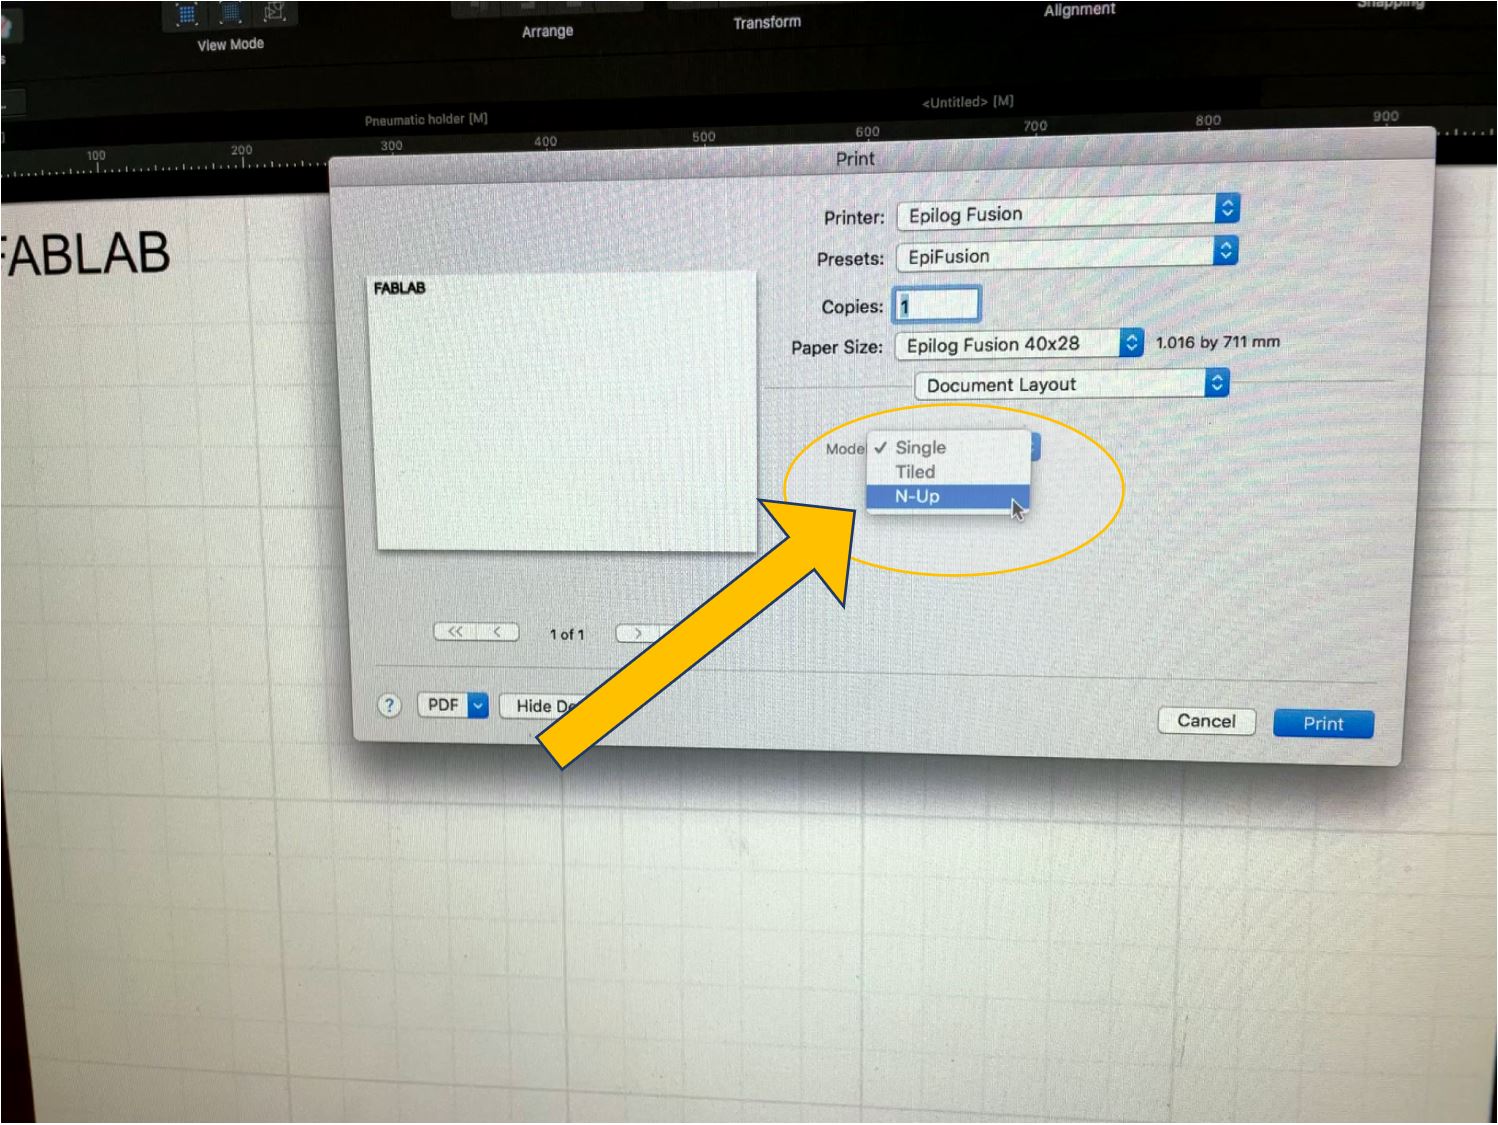
Click on “Range and Scale” -> “Document Layout” and choose “N-UP”. It's necessary to receive the right zero position
|
|
4f |
Now click on “Print”.
|
|
5 |
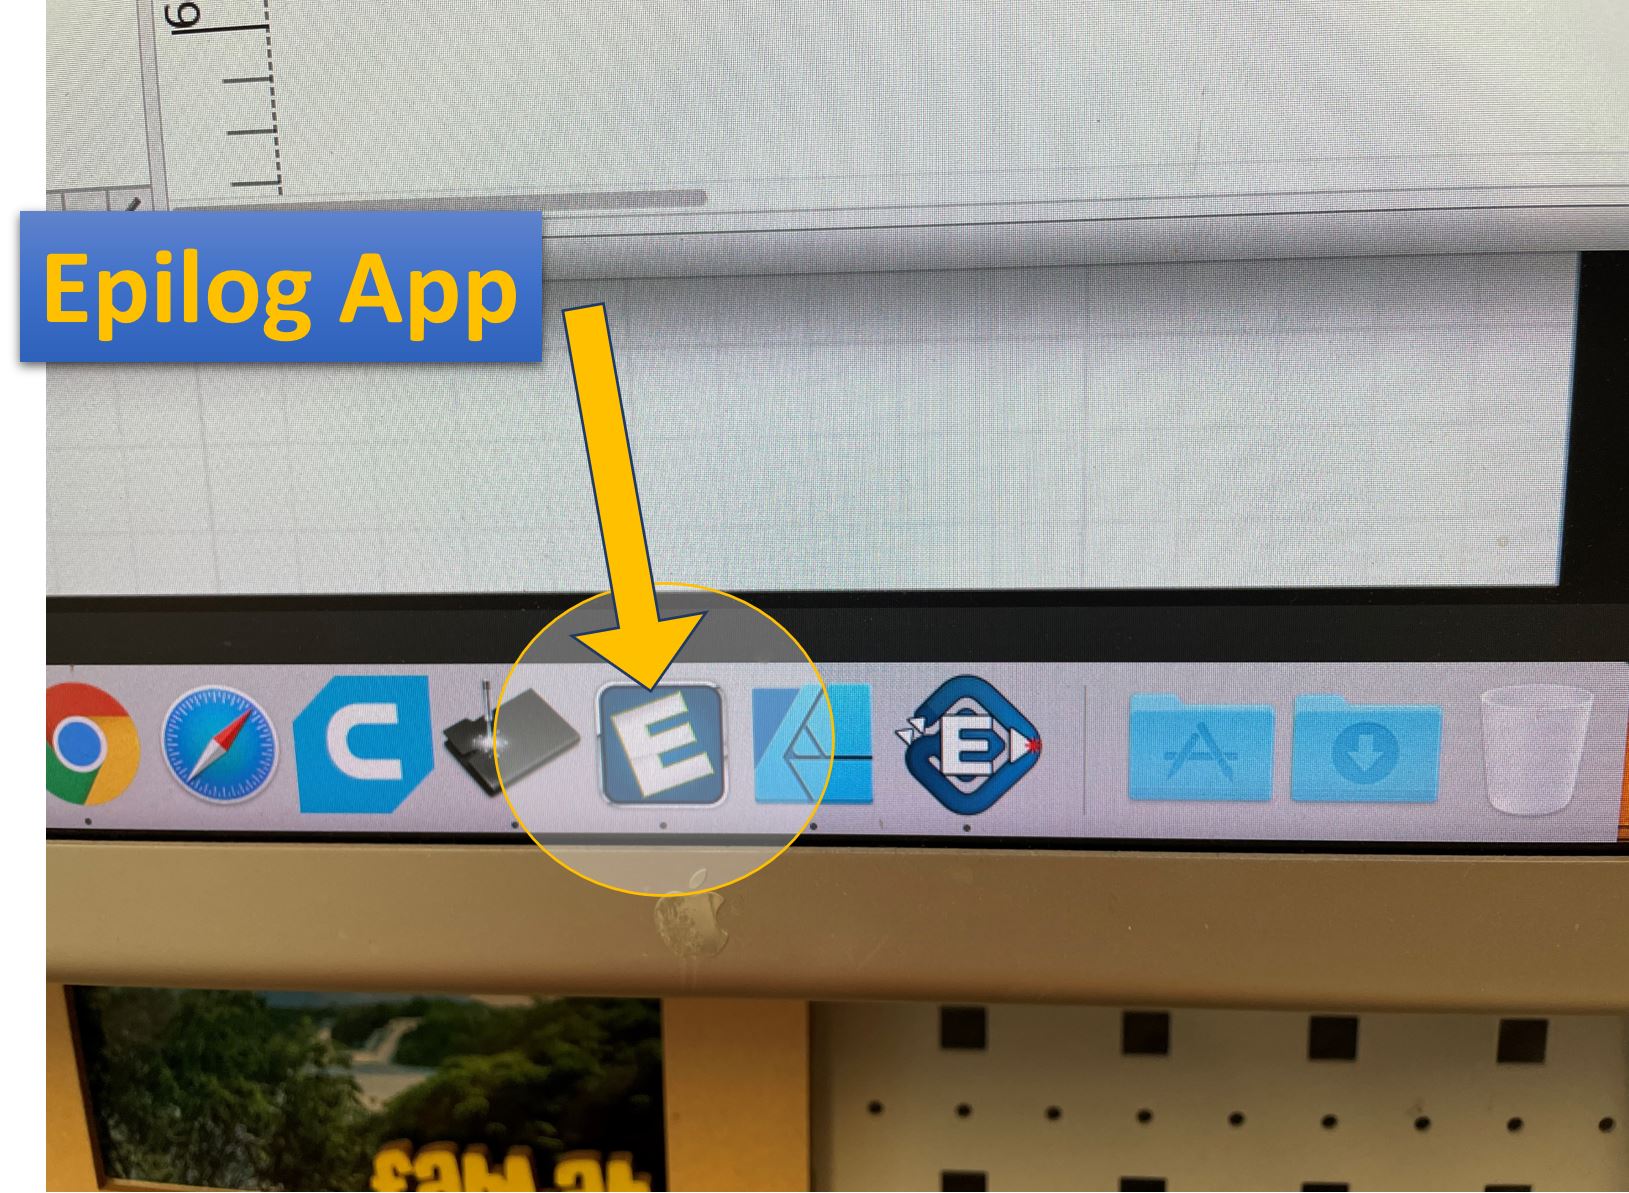
Open the “Epilog App” The Epilog app should now receive the "Print-job"
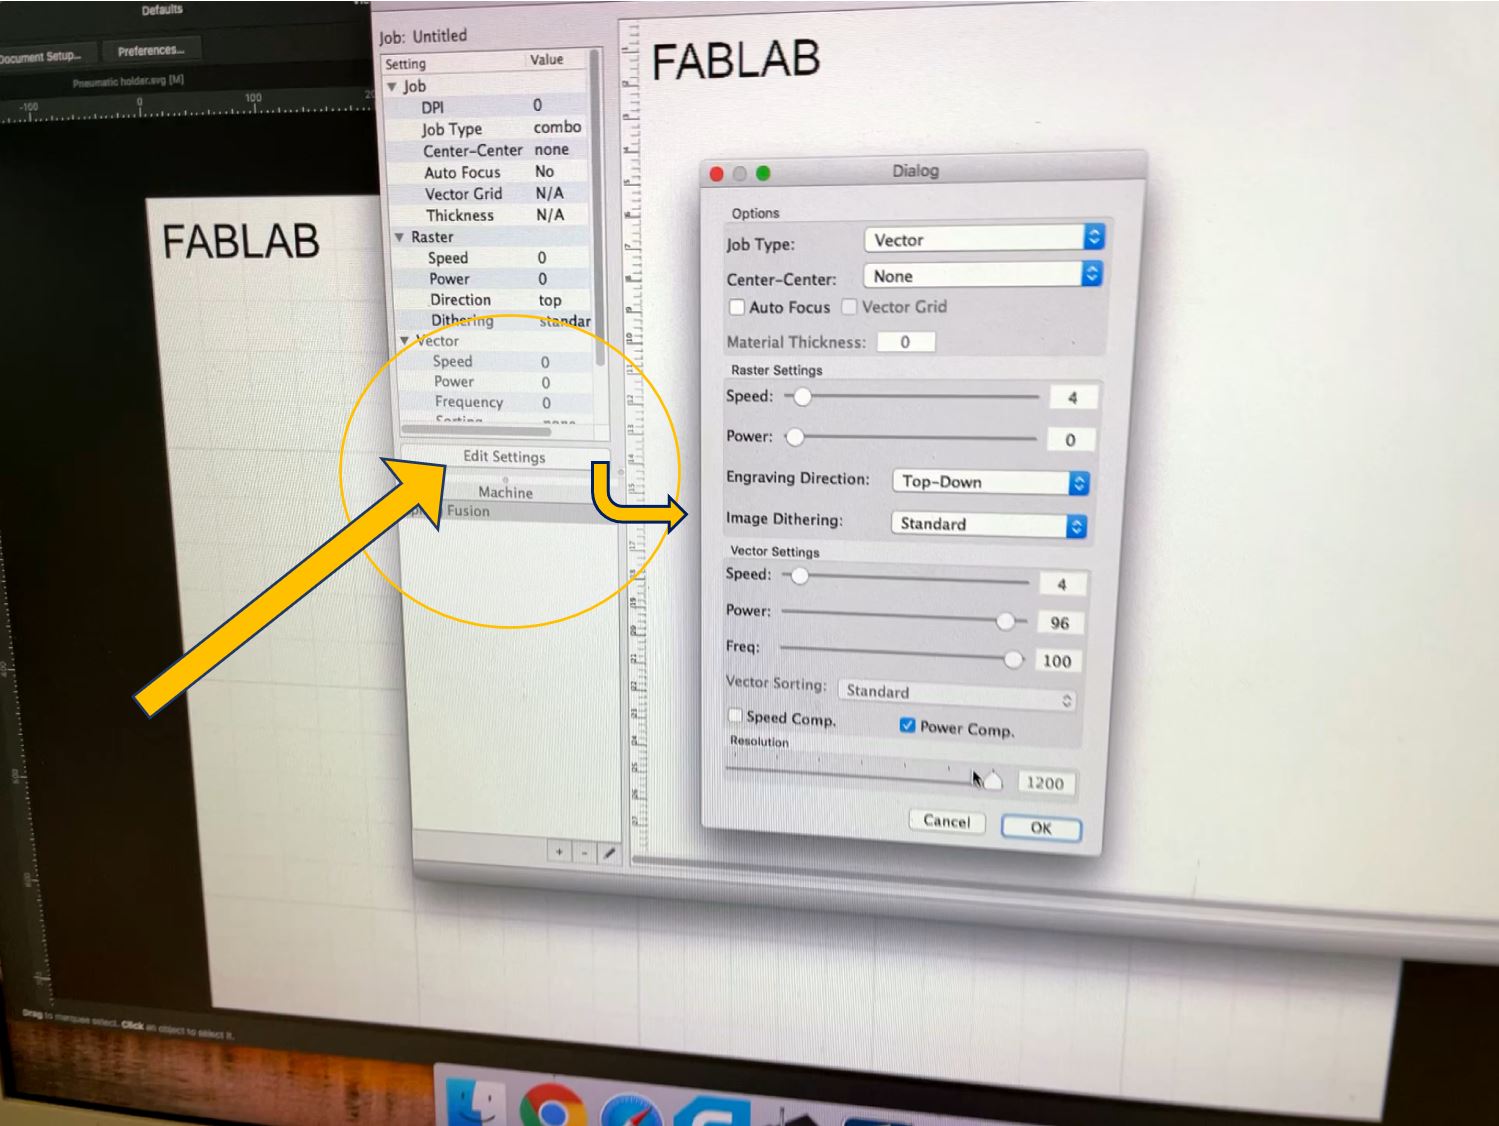
Click on “Edit Settings” to do the laser settings.
|
|
5a |
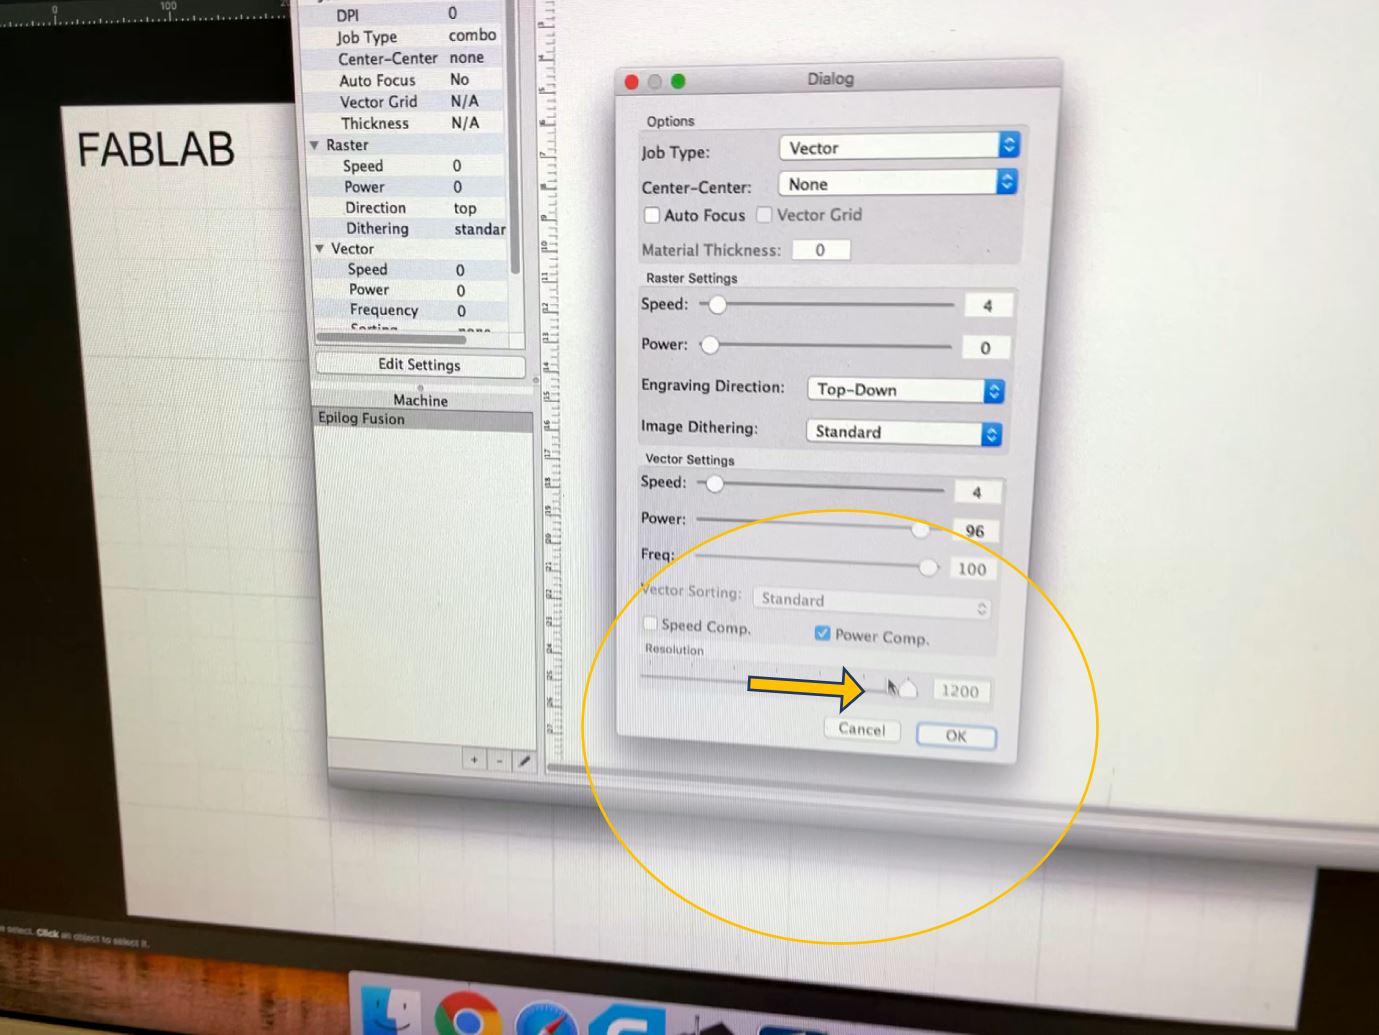
set the "Job Type" to "Engrave" or alternatively "Combined" in case of dual (for cutting-> see the other tutorial for "Cutting with the Laser Cutter"). Go in the settings table to “"Raster Settings" and set the Laser power and moving speed according to your material selection. For example, a combination for engraving wood can be: Laser power =70%, laser speed 40%. in the line “Speed” set the moving speed for the laser beam.
|
|
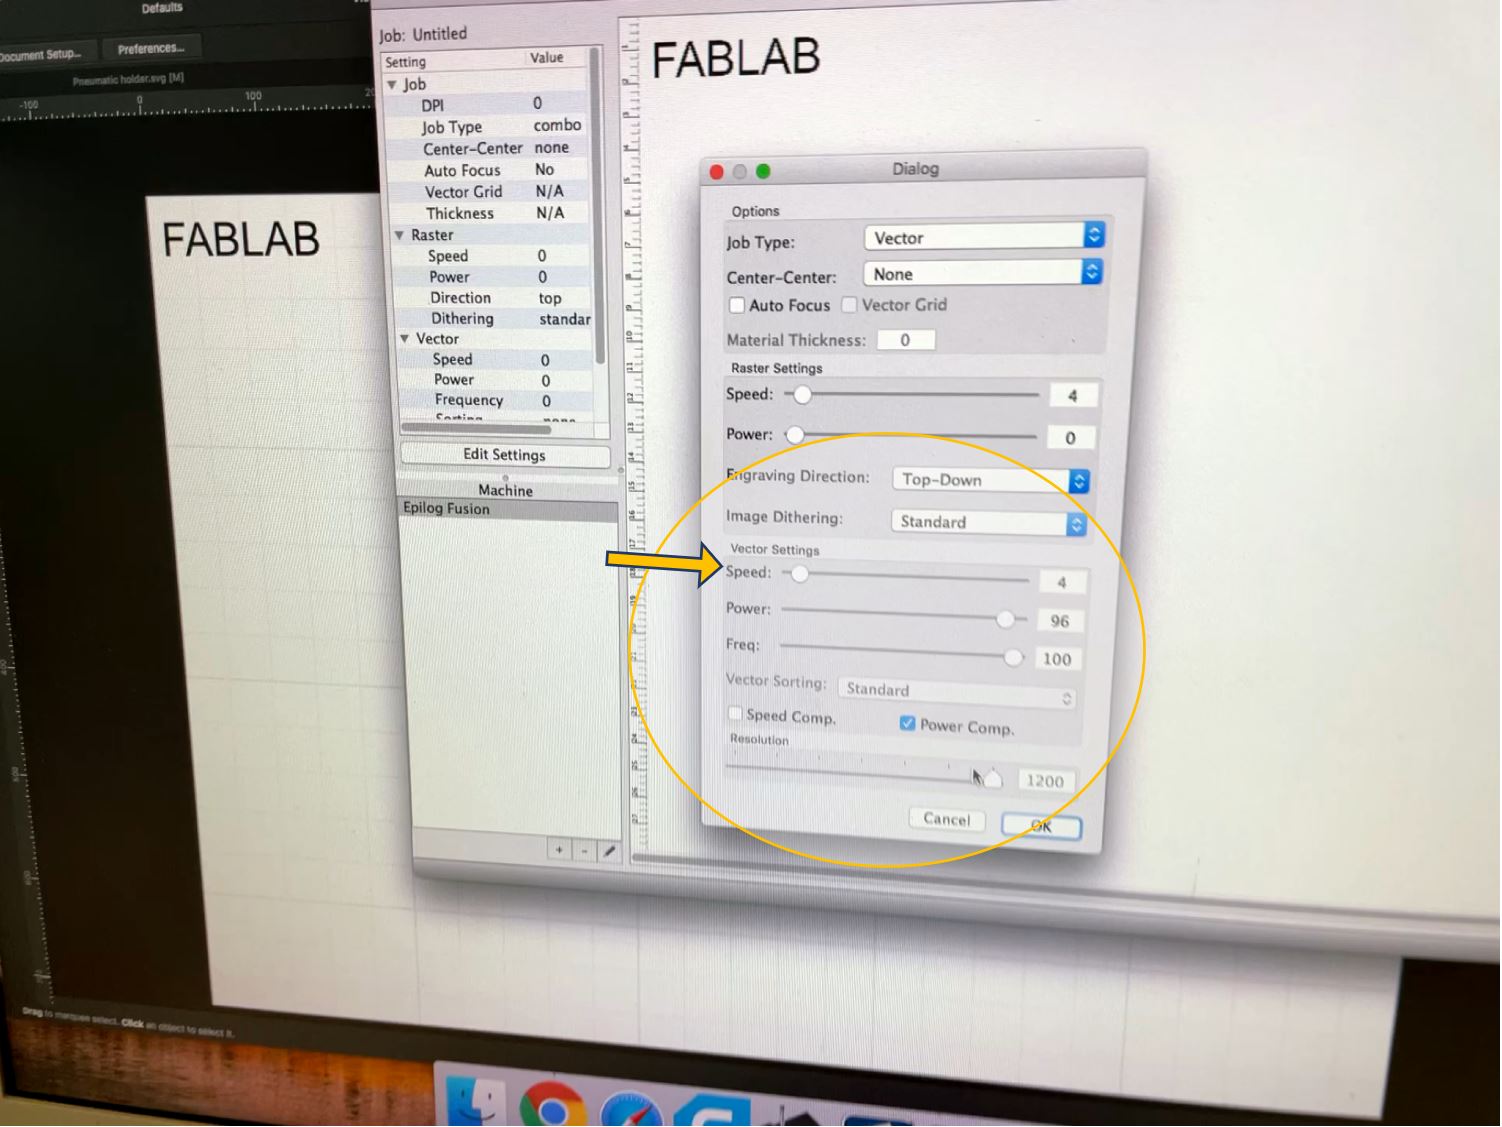
5b |
in the line "Power” set the power of the laser beam
|
|
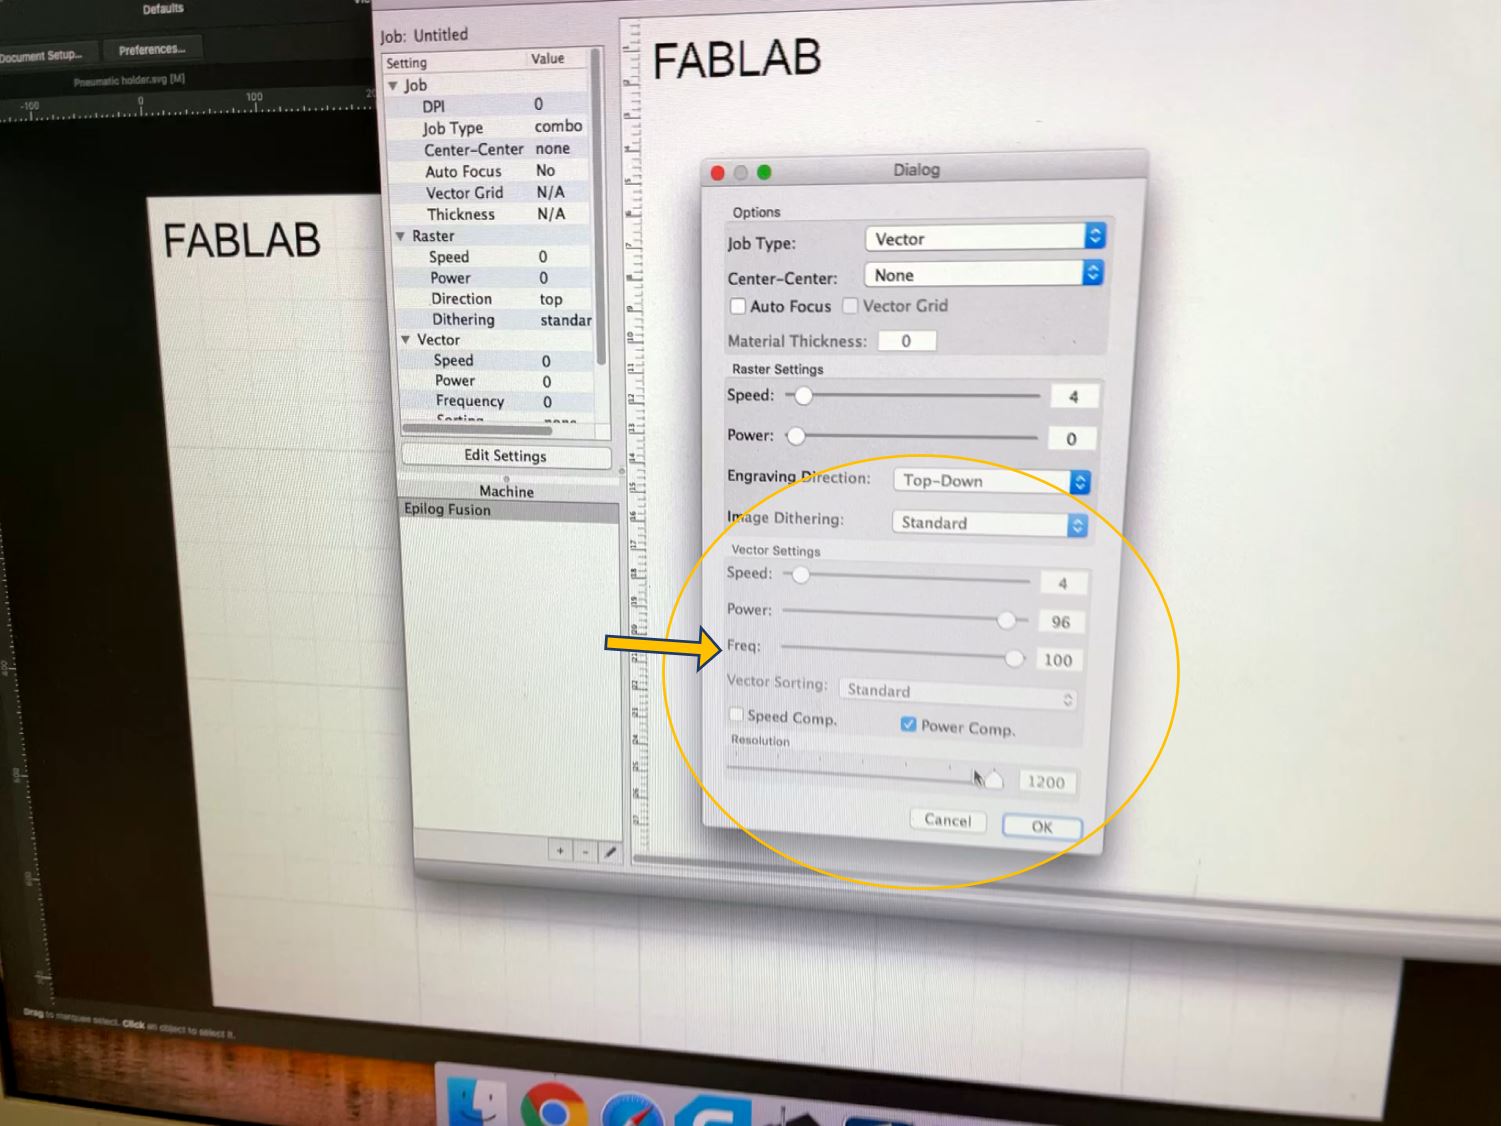
5c |
Go to “frequency” and set it to 100%.
|
|
5d |
And the last setting: at “resolution” move the “DPI - resolution” slider back and forth and set it e.g. to 1200 dpi. confirm everything with “ok”. *This step is necessary due to a bug
|
|
6 |
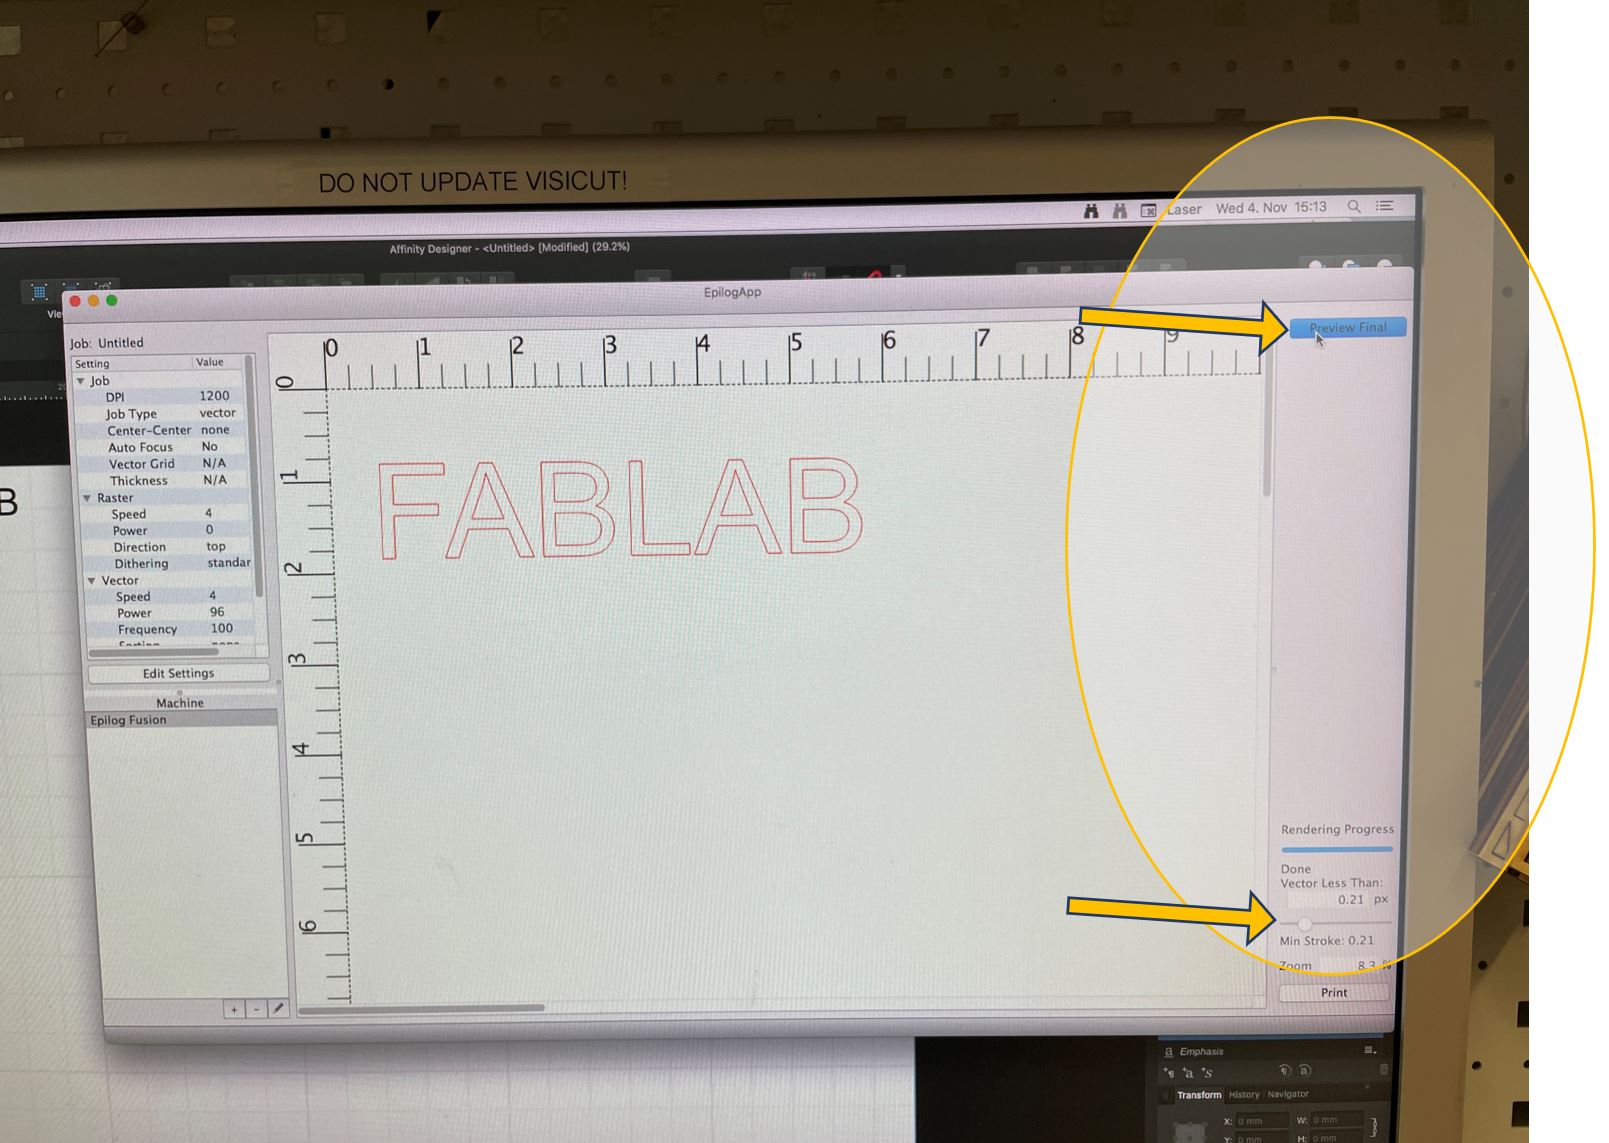
Click on> “preview” (on the right-hand side of the program window). The cutting lines Adjust the setting at the bottom right (via the slider) to set the threshold of the line thickness differentiation between cutting and engraving.
|
|
7 |
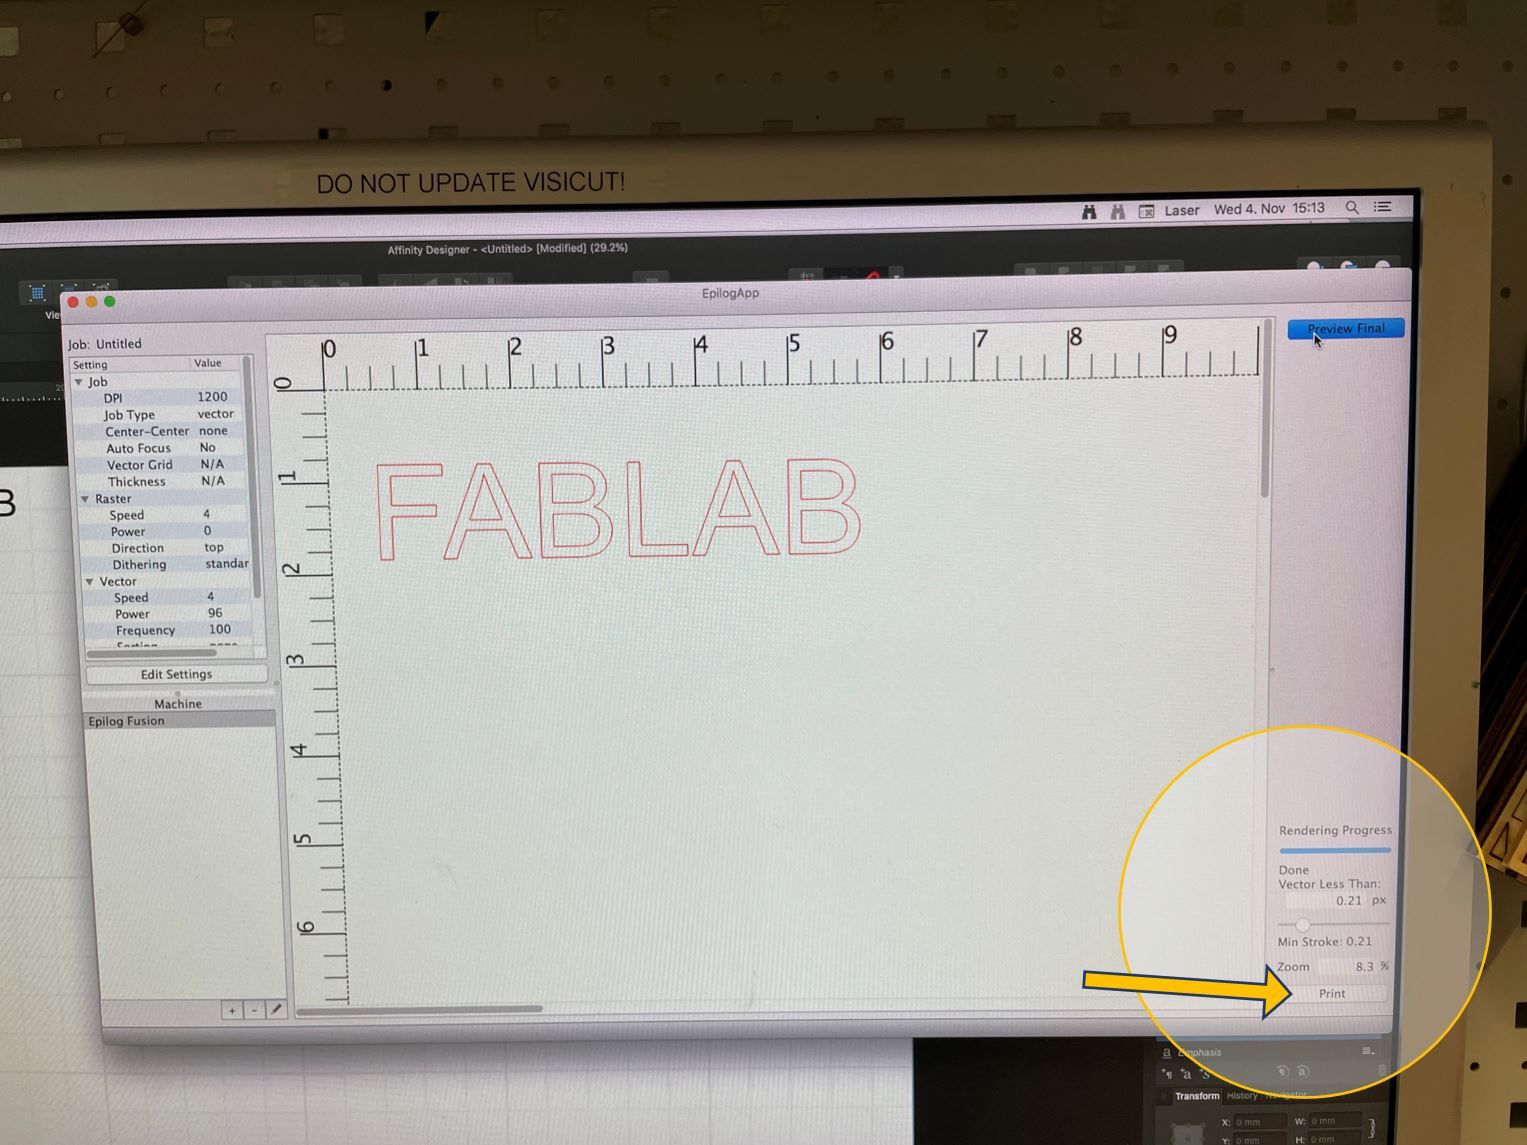
Finally, click on “Print” to send the job to the cutter. The cutter receives the job and indicates the reception on
|
|
8 |
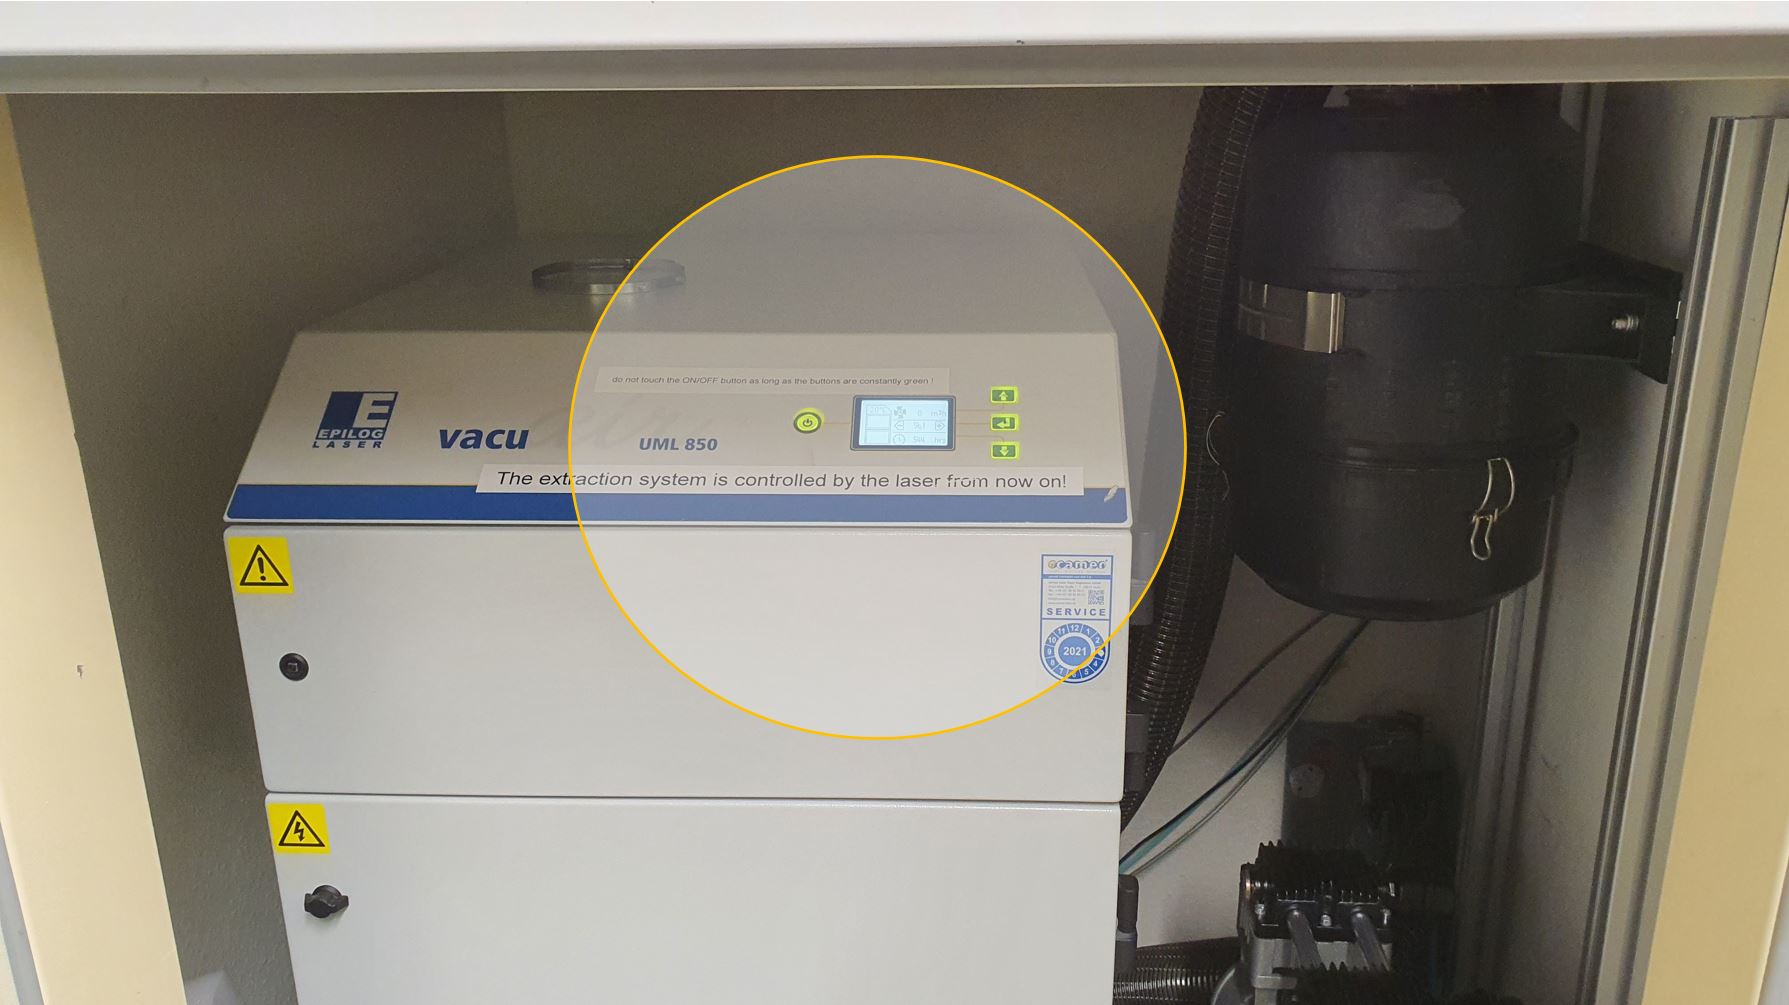
Check that the buttons of the exhaust extraction system are showing green light!
|
|
10 |
On the laser cutter press “Start" to run the laser process for your file! Your laser job starts immediately and is now running! You can now enjoy how the robotic laser machine brings your artwork into reality! 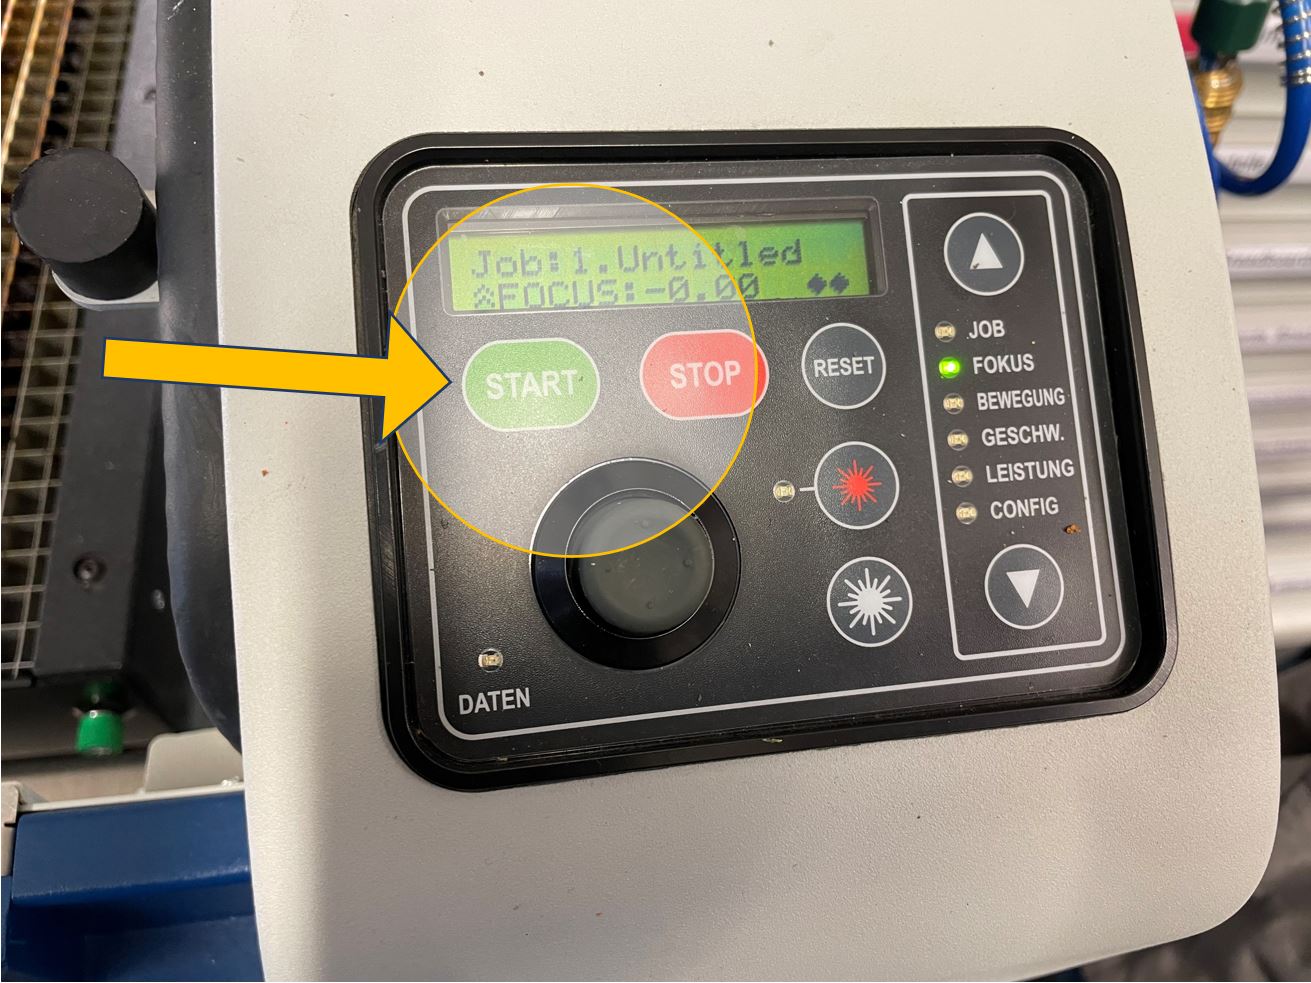 |
|
11 |
Finished? turn everything off! Go reverse in everything you turned on
|