TimeStamper
This is a simple hack to log the current time in a text file while doing other tasks in macOS Mojave (10.14). I wrote it to create time stamps while recording a screen cast using QuickTime Player, so that it's easier to go back to important moments in the recording later. It also plays a sound each time a timestamp is added. This makes it easy to find the time stamps again in a video recording later even just by looking for the characteristic spike in the audio waveform in apps like iMovie or ChronoViz.
Note that this doesn't add time stamps or chapter markers to a movie file; it just saves the current time in a separate text file.
Creating the Script
To set it up, first create a "Quick Action"-type workflow in Automator as shown below. I called it "Log Time Stamp". It just runs the shell script code shown that first logs (appends) the current date and time to a text file, and then plays an audio alert to let you know that it worked:
date +"%Y-%m-%d %H:%M:%S" >> ~/timestamps.txtafplay /System/Library/Sounds/Glass.aiff
You can change the file name and the date and time formatting to your liking (try "man date" in Terminal to see more formatting options), and it's easy to pick another of the built-in system sounds as an alert if you want (they're all stored in the same directory).
The sound is also very helpful when syncing the time stamps to a recording later: Just create a first time stamp shortly after you start recording, and you'll know later what movie time corresponded to what real time because you can hear the first bing in the movie. It works like a clapperboard when recording movies.
If you don't want to type in the shell script code yourself, download Log-Time-Stamp.workflow.zip, double-click to unpack it, and double-click it again to install it as a service. If you want to see the code before installing, open it in Automator first.

Adding a Global Keyboard Shortcut
Once you saved the workflow in Automator, it's available from the Services submenu (under the first menu next to the Apple menu) in any app on your Mac. But to make it really useful, you can now create a global keyboard shortcut for it from System Preferences, as shown below.
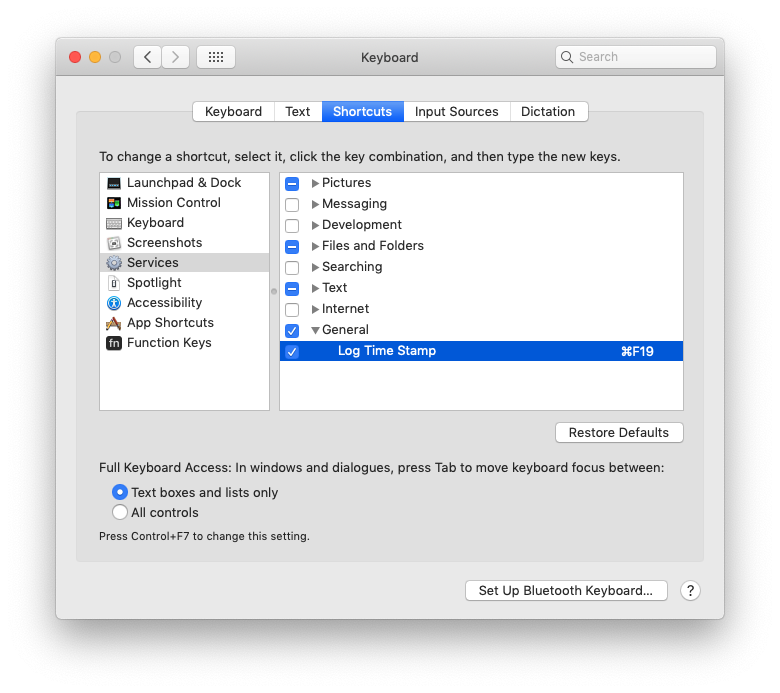
I used F19, the rightmost function key on my external Apple keyboard. Note that I wasn't able to tie it just to the F19 function key (it would work in some apps but not in others); I had to use the Command key modifier with the F19 key together.
Recording Time Stamps
Whatever you are doing on your Mac, if you hit Command-F19, you should hear a 'ping' sound, and a line with the current date and time is added to the file you specified in the script ('timestamps.txt' in your Home folder by default). If you are currently recording your screen or a meeting or something, the 'ping' will also be clearly audible in the recording. Rename or move the timestamps.txt file somewhere else when you're done recording, and the next time you hit F19, a new timestamps.txt file will be created for you.
Using Time Stamps to Navigate a Recorded Video
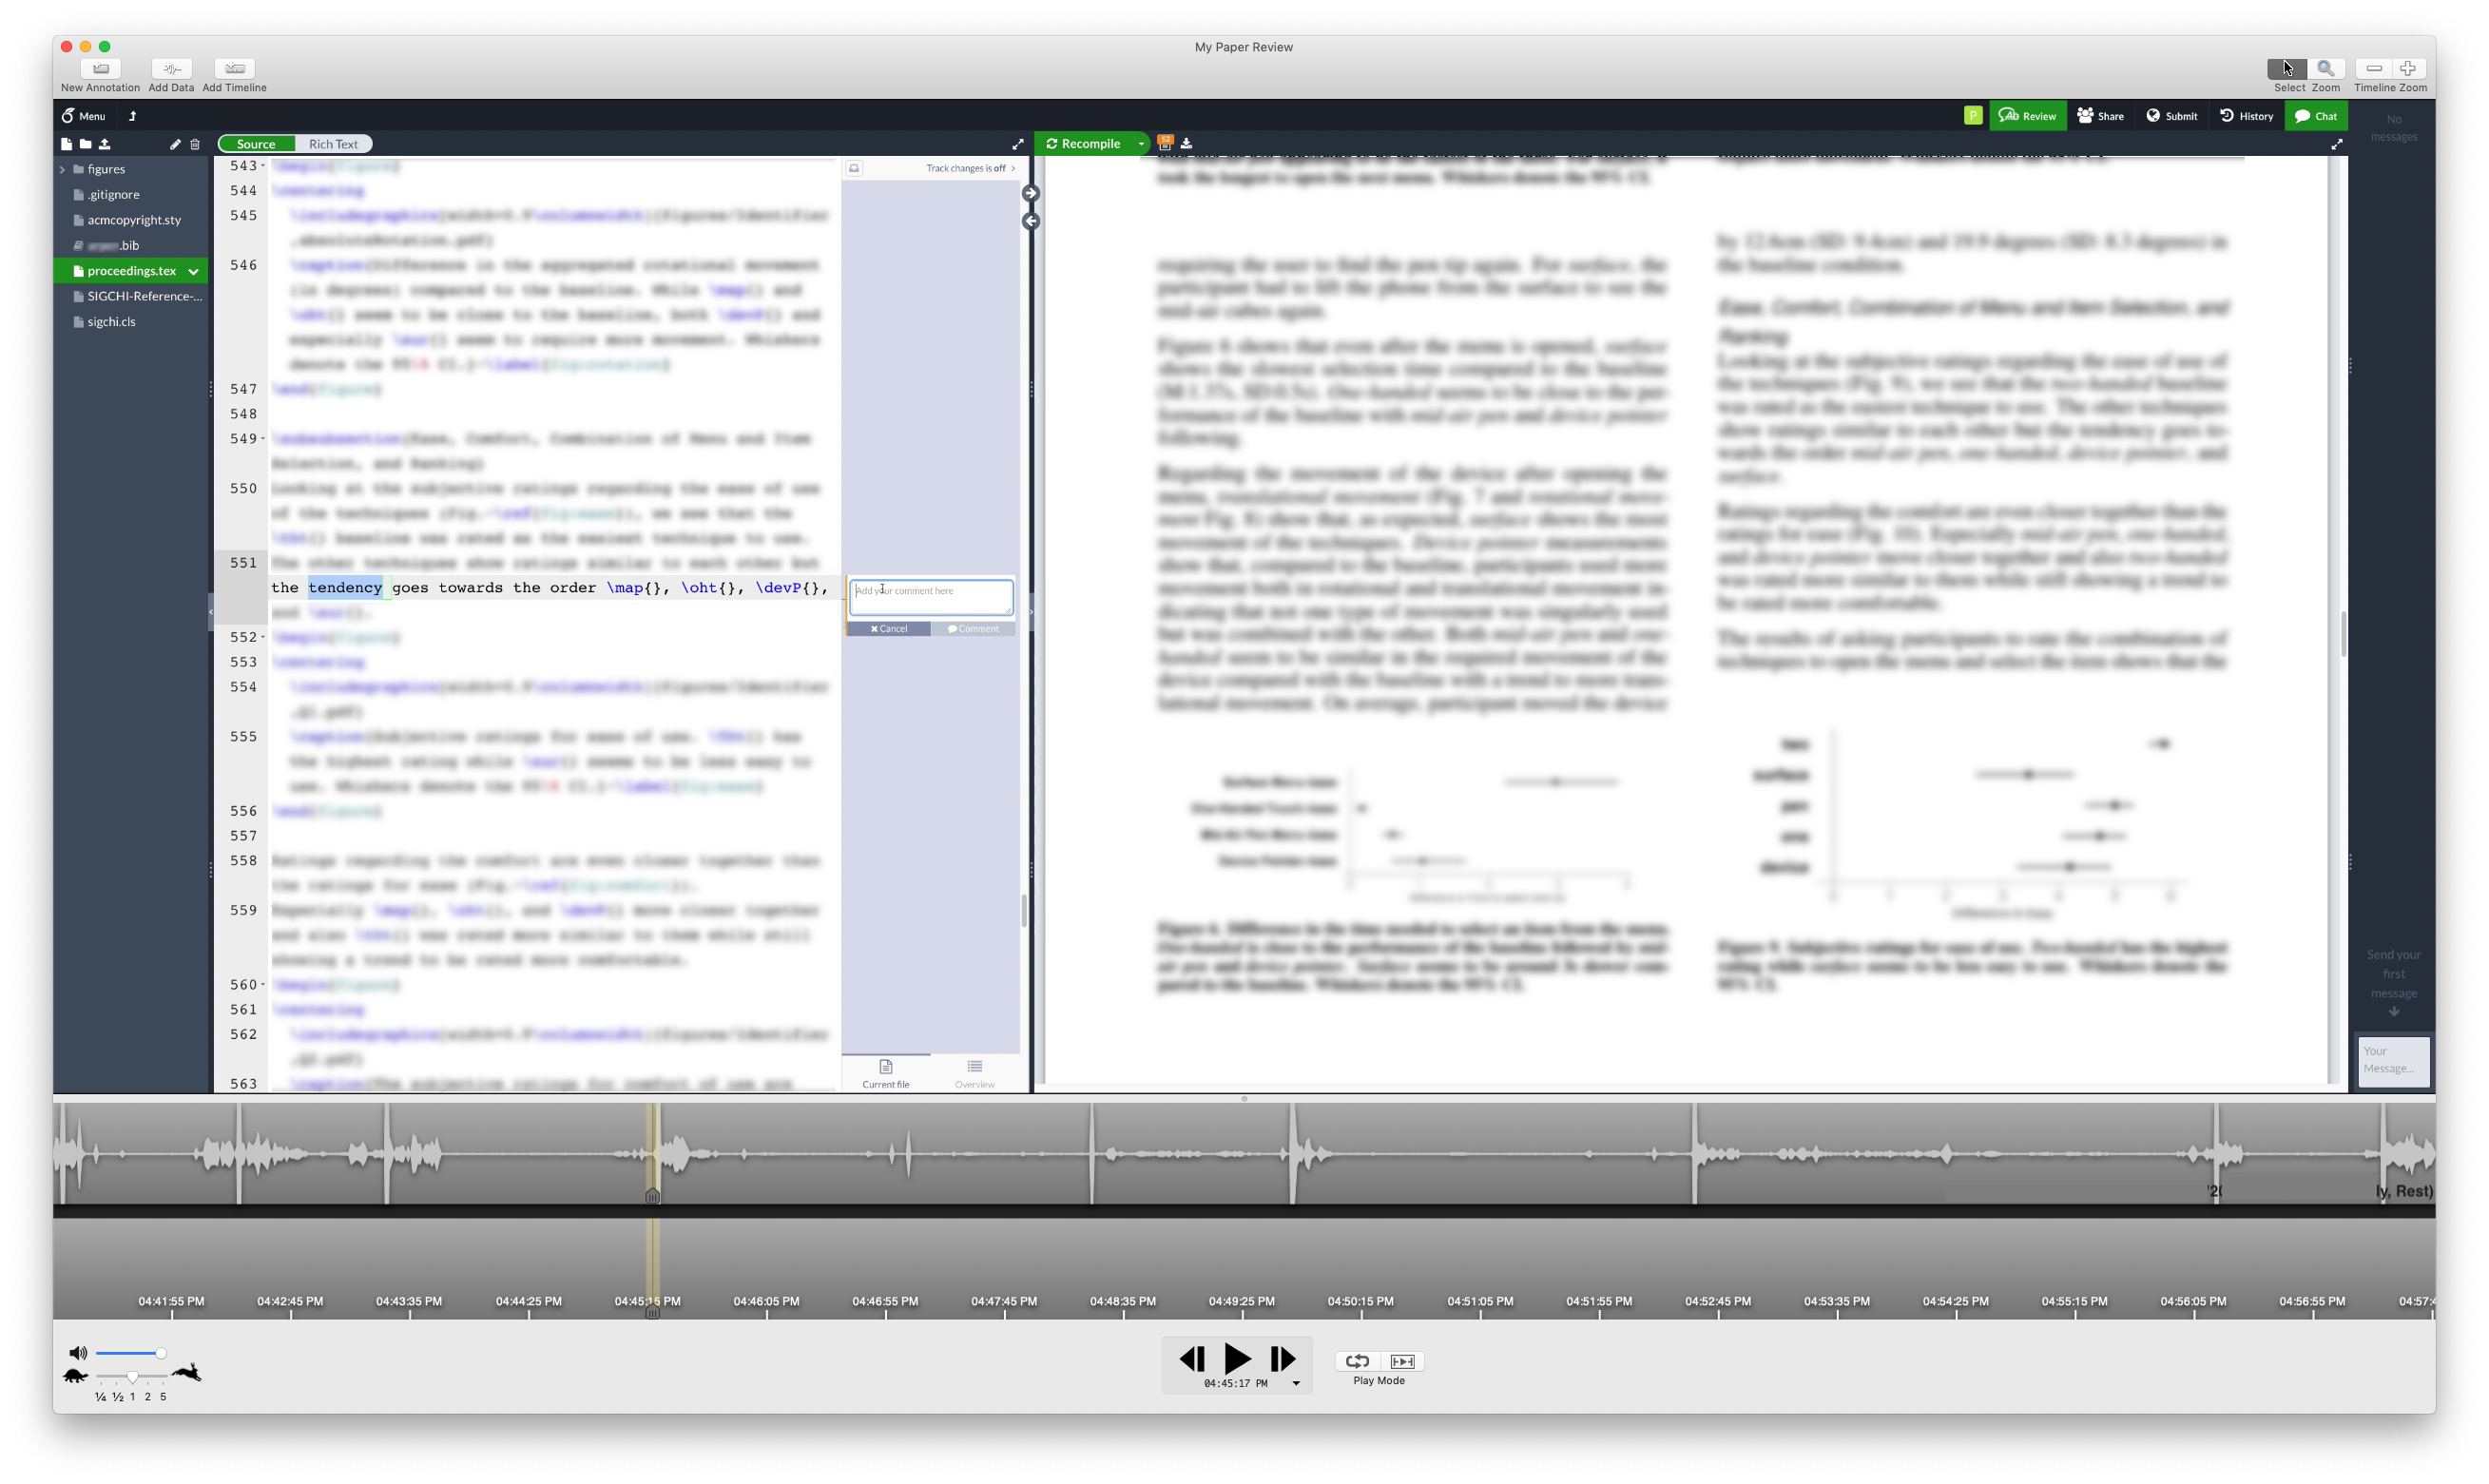
The best free software I've found to navigate to those time stamps later is ChronoViz (see screen shot below). It was designed for this kind of task. Just load the movie file into ChronoViz, then choose View: Add Timeline: Audio Waveform from the menu bar. Now you can jump to each annotation because it's clearly visible as a peak in the audio waveform. From the overall waveform, you can also see if there is some audio not to miss right before a time stamp, or in other places in the file. (We are not even using the text file with the time stamps here, although I'm sure you could do that in ChronoViz too.)
If you prefer, use the drop down menu beneath the main Play button in the bottom center of the UI to switch from relative to absolute movie time (when it was recorded).
Using iMovie
Apple's iMovie also works, but it's harder to see and navigate to the time stamps (drag the clip into your new project at the bottom, then turn on Waveforms from the View menu).
If you normalize the audio level in the file (in iMovie, double-click the clip, select the Audio tab in the Inspector, then click "Auto"), then the commentary is easier to see and hear.
Happy stamping!
— Jan Borchers