LPKF Pick and Place Machine
Machine status: Currently not in use
The LPKF ProtoPlace S can be used to place SMD components onto PCBs. It can also dispense solderpaste.
Our PCB mill, can directly dispense solderpaste as well, and it does so with high precision. Therefore it is recommended to use the mill for dispensing. For small or quick and dirty boards, or if the dispense process of the mill didn't quite work out, you can follow the dispensing tutorial below.
The second function of the ProtoPlace is placing smd components. This works best if solder paste is already applied, as the components then stick to the pcb. You can use any components down to 0201 chip components, but bigger components are easier to place.
Preparing the Machine
First turn on the green compressor below the ProtoPlace by turning the red knob clockwise towards the "AUTO" position (see picture). Be sure to also turn the compressor off after you used the ProtoPlace.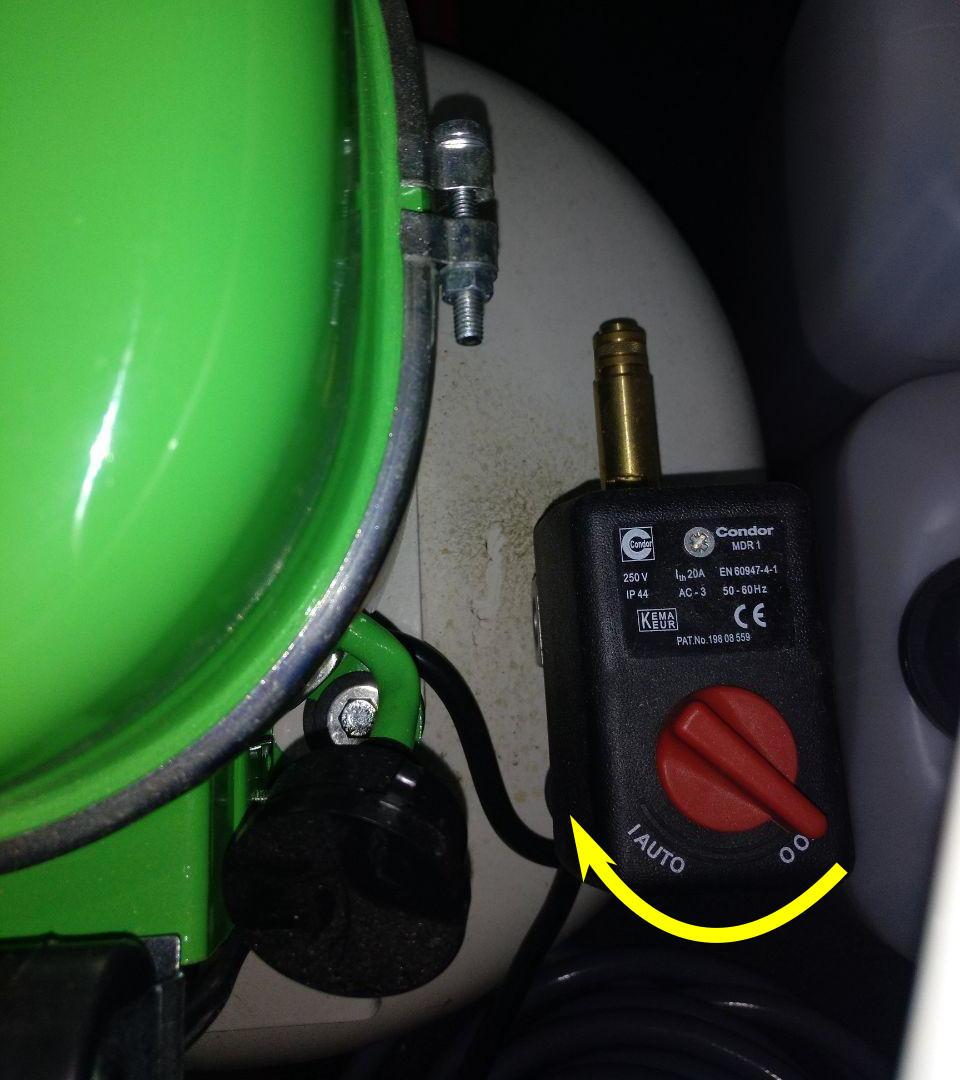
Then you can turn on the ProtoPlace with a switch on its rear side.
Your PCB can be mounted with the vice of the machine (see picture). Just loosen the knobs of the right vice jaw, put your pcb in (give it some pressure to be held tightly) and tighten the jaw again.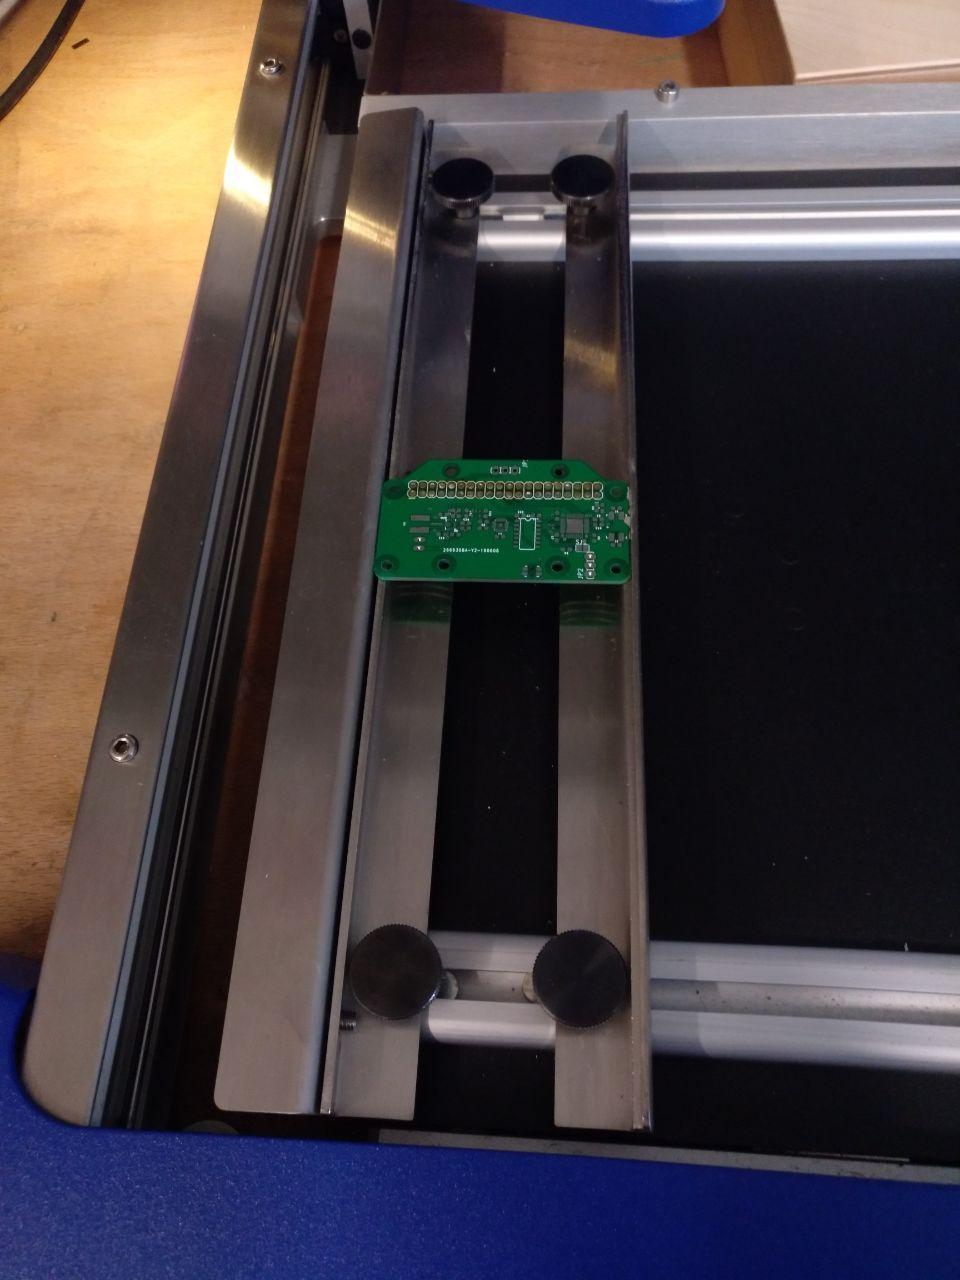
Dispensing Solder Paste
Mounting the Dispenser
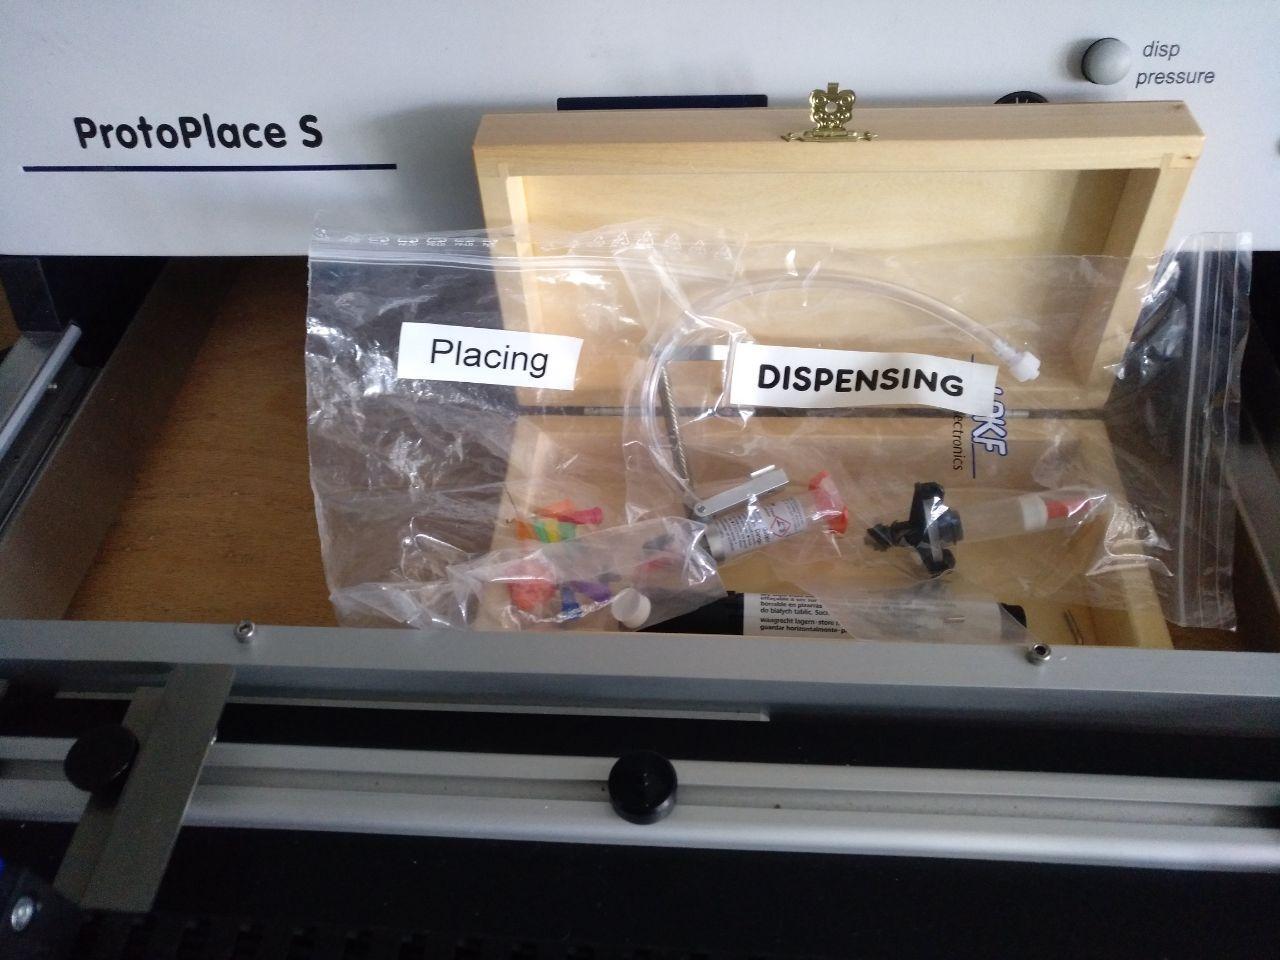
For dispensing solder paste, you'll need mount the dispenser onto the ProtoPlace. You can find it in a plastic bag labeled "Dispensing" that's in the wooden box by the ProtoPlace (see pictures). 
You can mount the dispenser by following the steps below. There is also a video provided, showing how to perform the steps.
- First, you have to take off the camera and unplug it. Then you can pull of the placing needle. Store these parts somewhere safe.
- Assemble the dispenser by connecting the pneumatic tube to the solder paste cartridge.
- Mount the dispenser by inserting the aluminium rail into a slot close to where the placing needle was.
- Put the far end of the steel spring over the knob that held the camera.
- Connect the pneumatic tube to the ProtoPlace by screwing it into the connector on the rear side of the carriage (carriage = the thing that moves around).
- Screw off that orange safety cap of the solder paste cartridge and replace it with the dispensing needle (needle is also found in the "DISPENSING" bag).
- Thighten the screw on the near end of the spring if the cartridge holder won't stay upright.
Please excuse my heavy breathing 😁
Dispensing
Now that the dispenser is mounted, you can set the correct mode via the little keypad (see picture). Set machine to "Dispense" by pushing the up arrow, and then to "Man" by pushing the right arrow.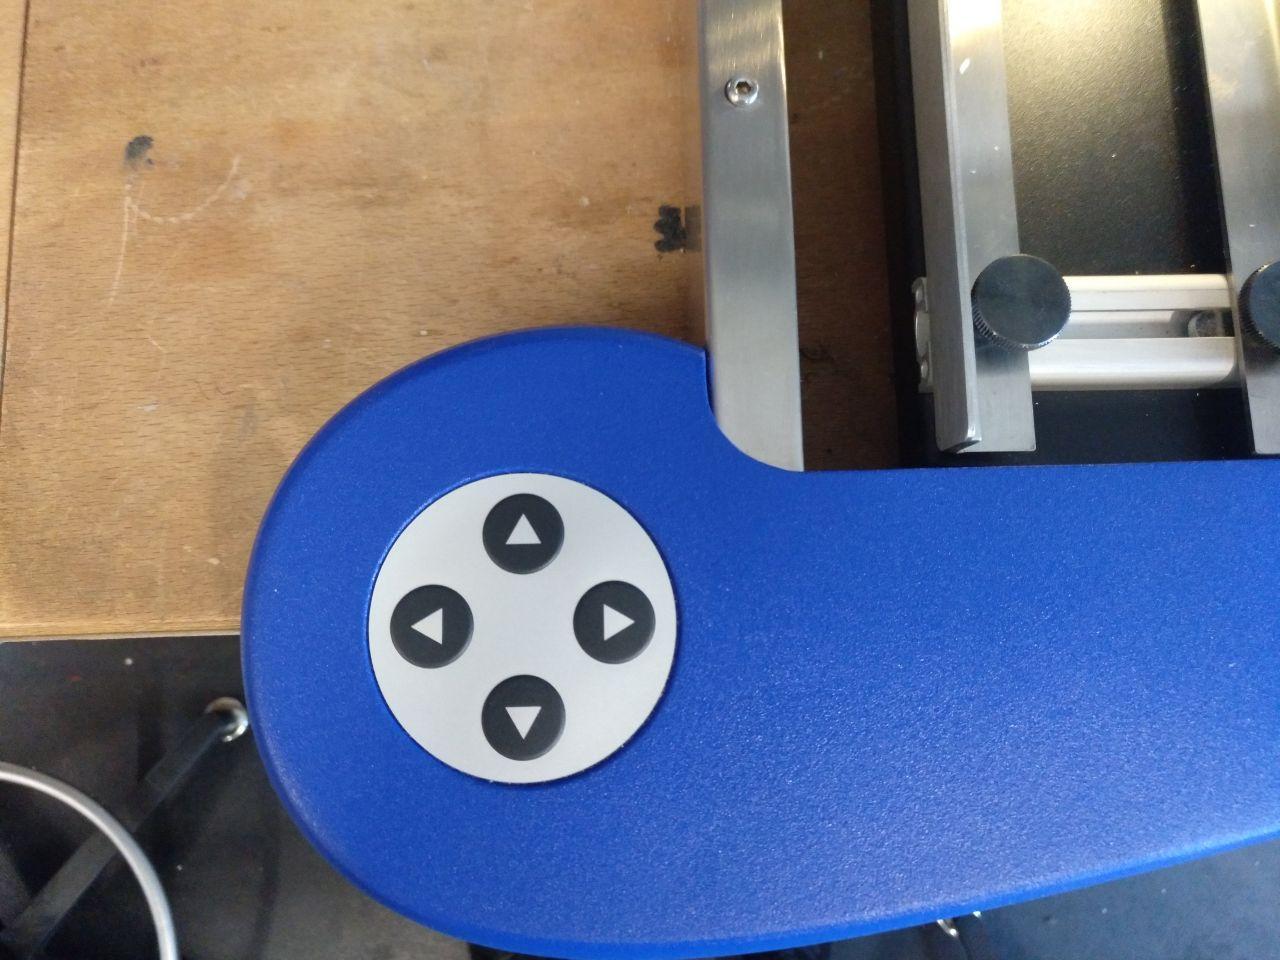
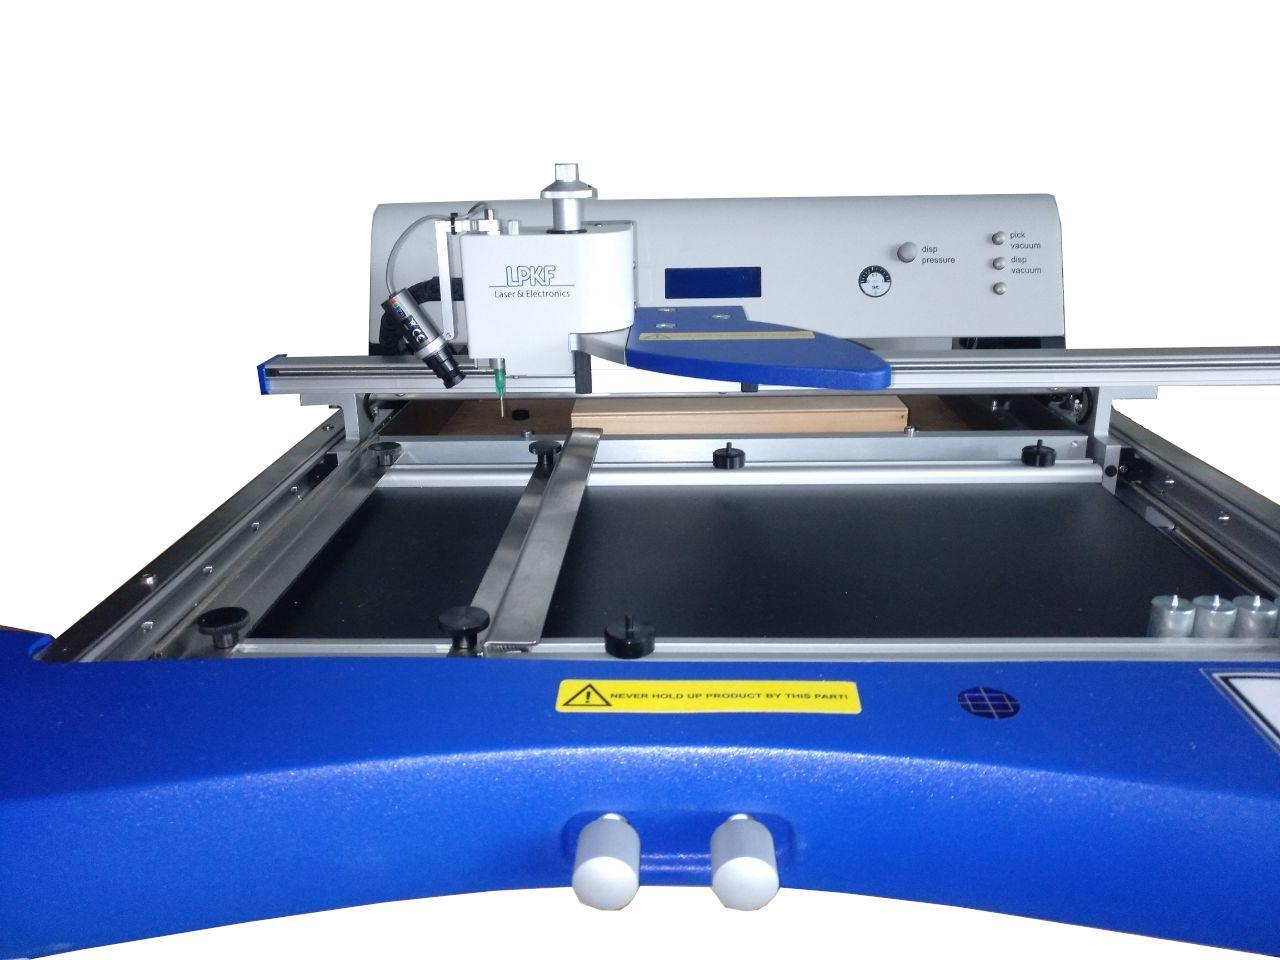
The setup is now complete and you can fixate your pcb in the vice and start using the machine. To dispense solder paste, move the carriage so that the dispense needle is roughly above a pad and move the needle down until it almost touches the pad. Then, use your other hand to click on the right arrow to activate the brake on all axes. This keeps the carriage fixed in place. You can do fine adjustments in the X and Y direction by rotating the knobs at the front of the machine (see picture). 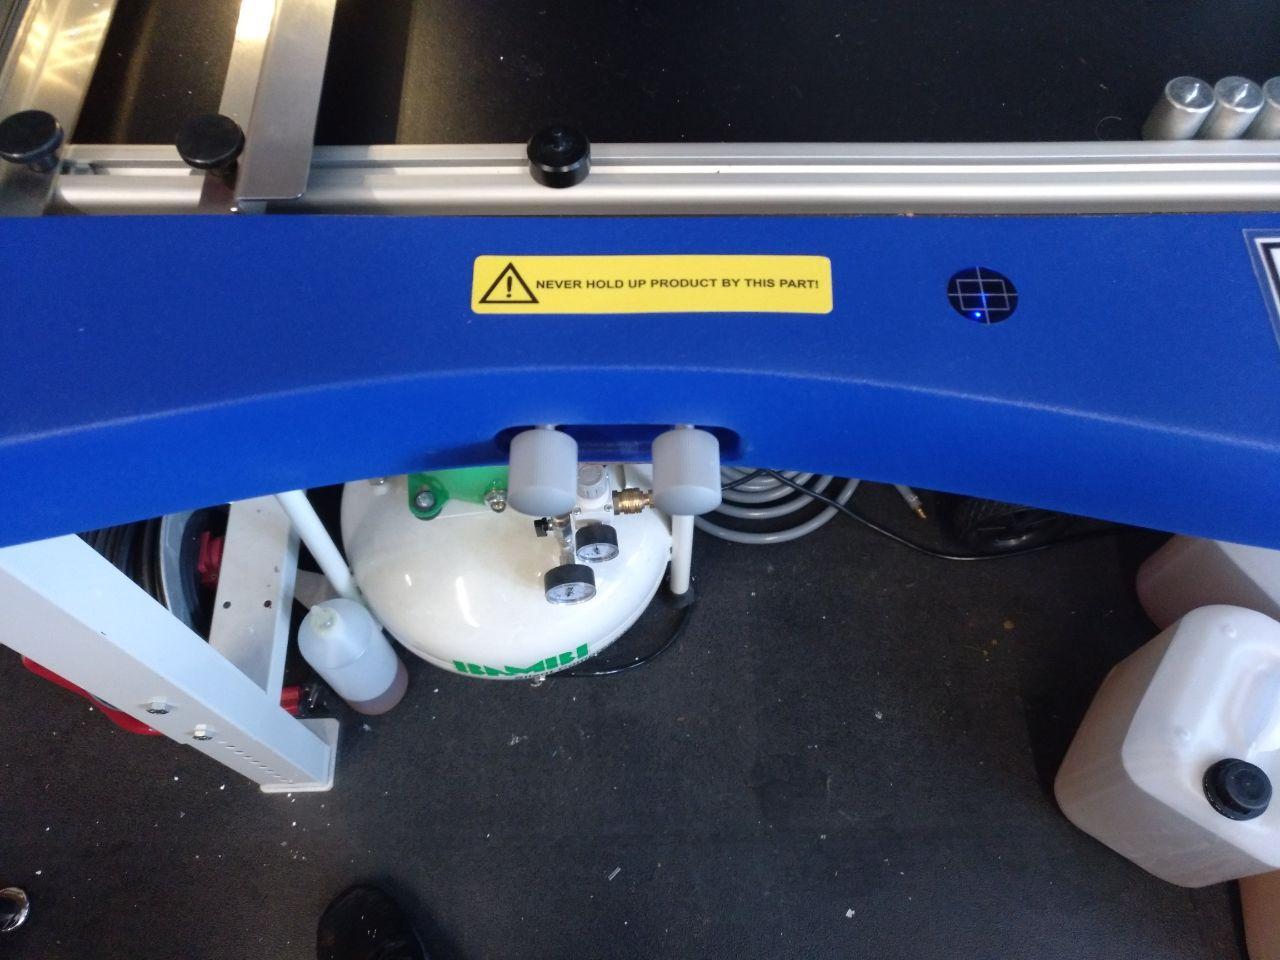
When you're happy with the needle position, activate the footpedal to extrude some solder paste. Yay!
When you're finished, please remove the dispenser again, and put the camera and the placement needle back on the machine. Then turn off the compressor and the ProtoPlace itself.
Pick and Place
By default, the configuration on the ProtoPlace should be correct for picking and placing. We leave the yellow placing needle inserted that should work with most components. If you need a different needle because your components are unusually big or small, you can find differently sized needles in a bag labelled "Placing" within the small wooden box.
If you want to use the camera, just turn on the screen next to the proto place and it should display the camera image automatically.
Use the keypad (see picture) to set the machine to the correct mode. Therefore press the left arrow to go into "Dispense" mode, and then press the up arrow to select "Auto".
The should now audibly start sucking air through the needle. You can place your SMD components in the white tray and pick them up from there by movin the needle above them and then pressing down the cylindrical thing on top of the carriage. This lowers the needle towards your component until it is sucked up and held by the needle.
After you grabbed a component, you can place it by simply moving the needle to the correct spot and pushing the component on the correct spot. If you need more precision, you can hover the needle roughly above the correct spot and then press the right arrow key on the keypad to activate the break for all axes. You can then do fine adjustments in X and Y direction by rotating the silver knobs at the front of the machine (see picture). When you are happy with the position, push the down arrow key to place the component.
When you're finished, please turn off the screen again, and put the regular placement needle back on the machine (if you changed it). Then turn off the compressor and the ProtoPlace itself.