Using the UV Printer
There are two major steps to printing on the uv printer:
- Mounting your material and calibrating your machine to the material dimensions.
- Setting up your print job on the MacBook
If you encounter any problems, you might want to take a look into the troubleshooting section below this tutorial.
Step 1: Mounting the Material and Calibrating the Printer
- Push the power button on the control panel of the machine. (the one a the bottom of the panel)
- Turn on the ventilation system below the printer by flicking the green POWER switch.
- When the machine is done with starting up and the display shows "setup media" you can open the cover and insert the material. Use some crepe tape to fixate it somewhere on the bed.
- Close the cover.
- You can now start calibrating the machine for your material. This is done in a specific order and the process is not intuitive, so please follow the next steps meticulously:
- Push the "SETUP" button on the control panel.
- You will first have to set the bed height. You can raise and lower the print bed as well as moving it forward and backwards with the respective buttons on the control panel.
Lower the print bed until your material easily fits below the bar at the back of the printer (see picture)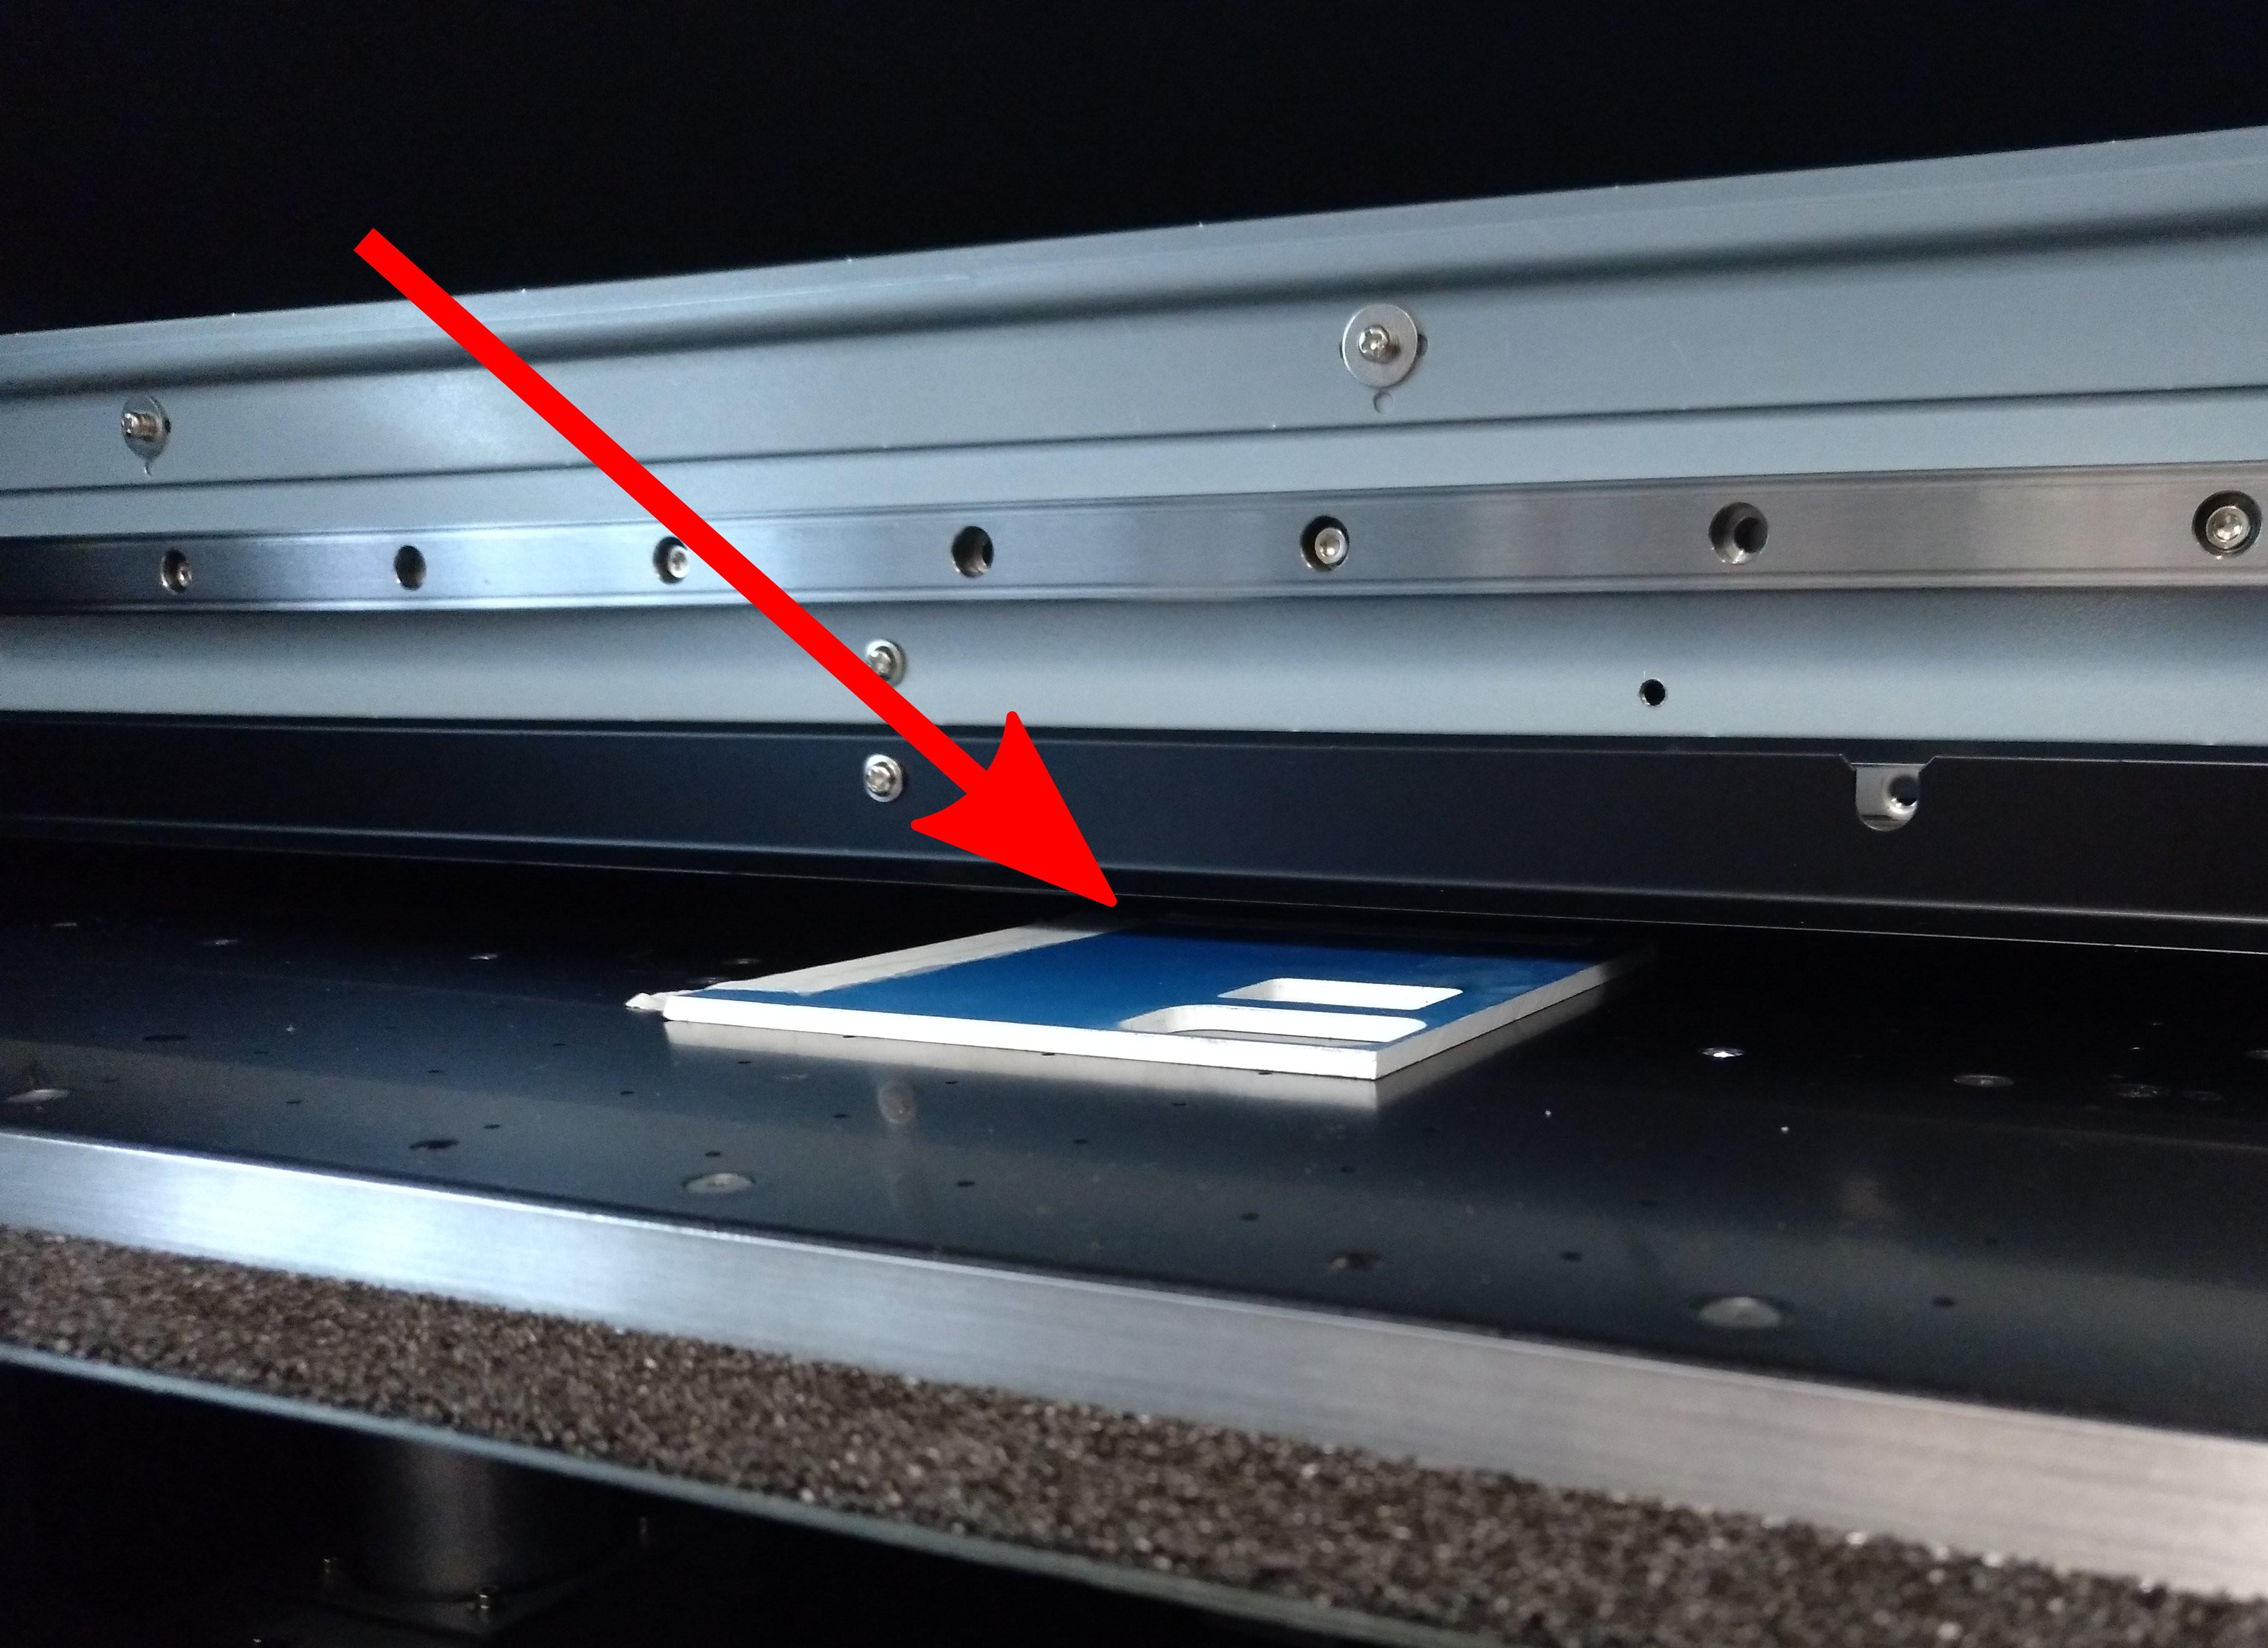
- Press the right arrow on the control panel and the display should show "AUTO DETECTION". Then press the ENTER button.
- Wait for the machine to find the correct height.
- The Display should show values for SCAN and FEED. These represent the position of the lower right corner of your material. We will adjust these values to your specific case. Push the left arrow button on the control panel to start setting these values. The print head will now move onto the print bed and shine a laser pointer onto the bed. (If your material is transparent, the laser might be hard to see, so turn off the light in the lab).
- Move the laser pointer to the lower right corner of the material using the arrow keys on the control panel.
- Press the ENTER button on the control panel.
- Now you can set the WIDTH and LENGTH of the material and these values corespond to the upper left corner of the material. Press the left arrow to start setting these values like you did before with FEED and LENGTH.
- Move the laser pointer to the upper left corner of the material using the arrow keys on the control panel.
- Press the ENTER button on the control panel.
- After performing these steps, the uv printer turns on a yellow lamp to show that it's ready to receive print jobs.
Step 2: Setting Up the Print Job
- Put your image on a usb stick and connect it to the MacBook.
Notes:- Your image should be provided as a .tif (TIFF) file. JPEG and eps might also work, but they often cause problems when importing, so it's recommended to convert your pictures to .tif files (e.g. using GIMP).
- White areas will be printed as transparent.
- Start the program VersaWorks on the MacBook through the desktop shortcut.
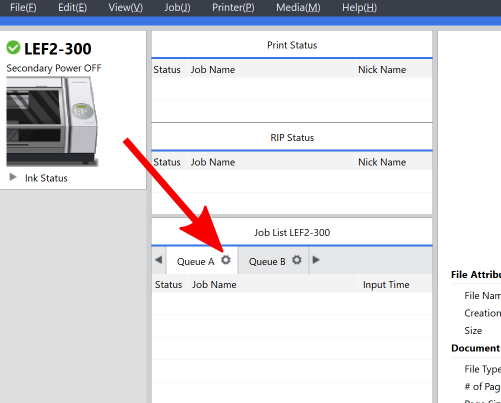
- Click on the little gear next on top of the Queue A tab (see image) to open the queue properties and click on "Get Media Width" (see image)

- Click on "Ok"
- Import your image by clicking "File -> Add Job to Queue -> Queue A".
- Setup you layout by clicking on the gear at the bottom of the Queue tab (see image) and then configuring it in the upcoming "Job Settings"-Panel.
Please make sure that you won't print on the print bed itself and only on your material!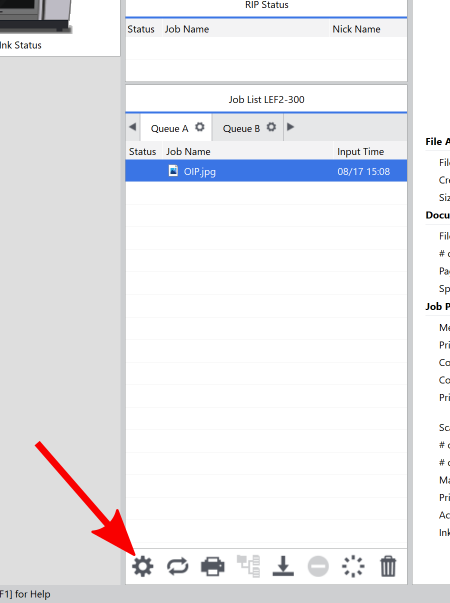
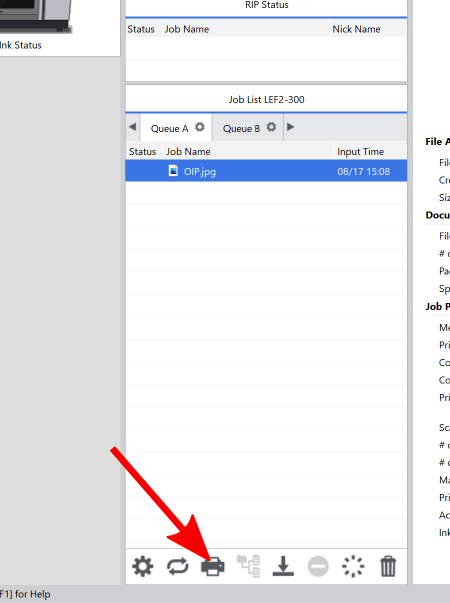
- When you're done with your layout, click on "Ok". You can start the print by clicking on the little printer icon (see image).
When you're done printing, please turn off the printer and the ventilation system via their power buttons!
Troubleshooting
- If the uv printer doesn't show "Setup Media" and the yellow light on top of it turns on from the start, a previous calibration setup is still loaded. You can unload that calibration by holding the SETUP button or by turning it off and on again.
- If VersaWorks doesn't start, you can try fixing it with the "Initialize Application" Program. You can find it by searching in the Windows menu.
- If VersaWorks tells you that your file is corrupted, it usually really is a problem with VersaWorks. Try to reduce metadata and file options like including layers within your file. GIMP lets you choose many options when exporting, so the usual workaround is opening you file in GIMP and then exporting it as *.tif file with all options disabled and no compression.