Creating stamps on the lasercutter - with CorelDraw (Windows)
Back to lasercutter page
If you want to make a stamp with the lasercutter just follow this description carefully.
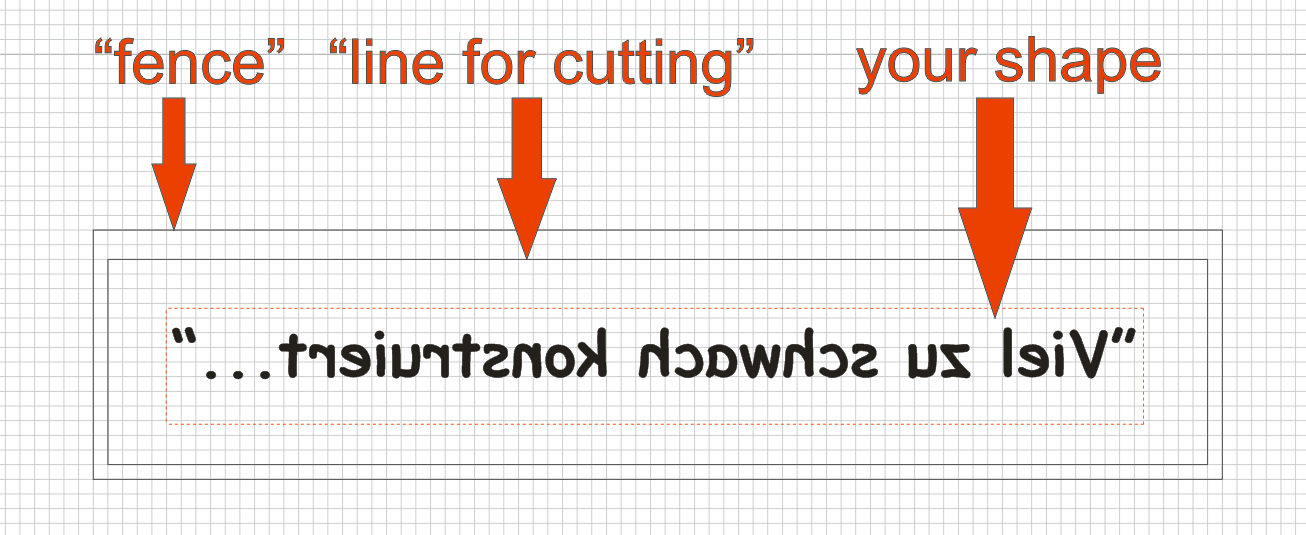
- Create your shape in CorelDRAW. It can either be a picture or something you write using the text tool. Make sure there are no "Hairlines" in the shape, otherwise the lasercutter will cut them out.
- After creating the shape, you have to add a rectangle or circle (hairline) around it. The laser will cut the material there.
- Create another outline around the shape. This can also be a rectangle or a cirlce. The laser will engrave away everything thats inside. This outline is called the "fence".
- Now you have to mirror the whole drawing!

- Select "Print" (Make sure to print your selection and move it to the top left corner) -> Epilog Engraver Win32 Zing -> "Properties..."
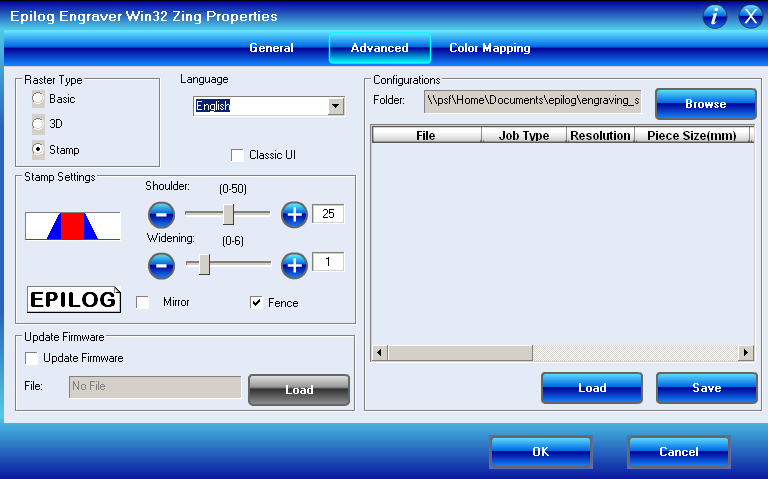
- Goto "Advanced" and select "Stamp" as Raster Type. "Shoulder" should be 25 and "Widening" should be 1. Mark the "Fence"-Button.

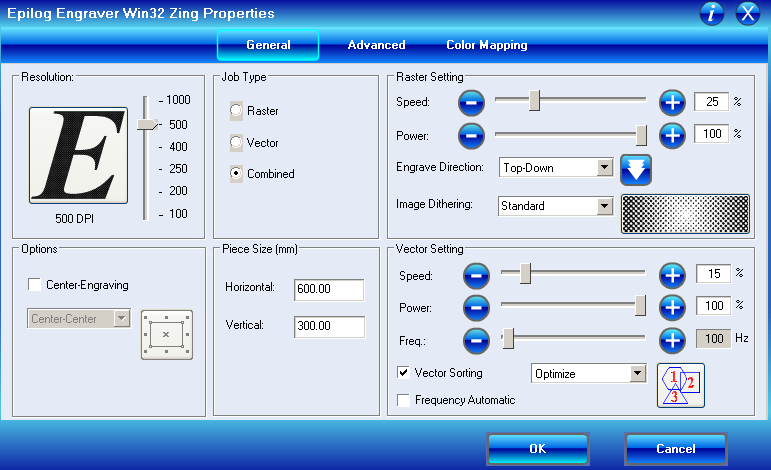
- Go back to "General"-Settings. Resolution should be 500. Raster settings: 25% Speed, 100% Power. Vector settings: 15% Speed, 100% Power, 100Hz

- Put the rubber stamp inside the cutter, focus the laser and start the printing.
- After you finished, put some Aceton on the stamp surface to get rid of the dust. Do this outside the building!
- Get some "Moosgummi", grab yourself a cutter knive and cut it in the shape of the stamp.
- Attach the "Moosgummi" to the back of the stamp.
- Build yourself something to improve the usability. There is a very basic handle shape saved under "C:\lasern\Hendrik K\stamp_handle.cdr". You can cut it out of Finnpappe and attach it to the "Moosgummi" as well.
- Congratulation! You made a stamp!

