Rostock Mini

We have a Rostock Mini at the fab lab.
The Parts are mostly designed by Brian Evans and were printed on our Dimension Elite.
Update Blog:
- The printer now uses an upgraded Sanguinololu with ATmega 1284p
- A new heated build platform was designed in out lab
- A modified Bowden Extruder was designed
- An spool holder was designed and mounted on top of the printer
Current Hardware
- The plastic parts can be found on thingiverse
- We use the Sanguinololu with Atmega 1284 to control the printer
- Four stepper drivers: Pololu clones with heatsinks
- Mechanical endstops (switched) on all axes
- Makergear Hotend for 3mm filament
- Modded Airtrippers bowden extruder
- Rounded printbed v1.0
- IKEA Mirror and Kapton on top of the heated build platform
Current Software
- Firmware: Modified Marlin Firmware *experimental*
- Use this client software: Repetier-Host - for Mac and Windows
How to use
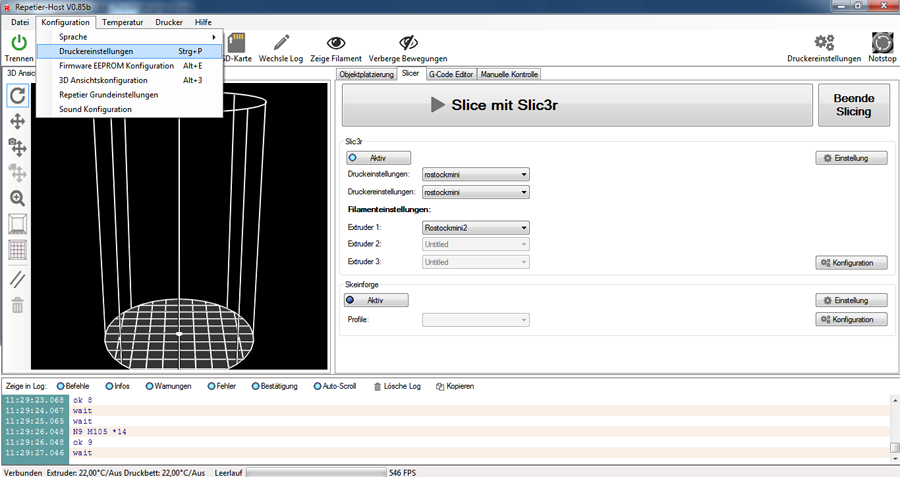
Our current setup uses Repetier Host V0.85b (V0.56 for Mac). If you open the software, you will find the following screen:
1. Printer adjustment
You need to adjust the printer Konfiguration to match the following settings:
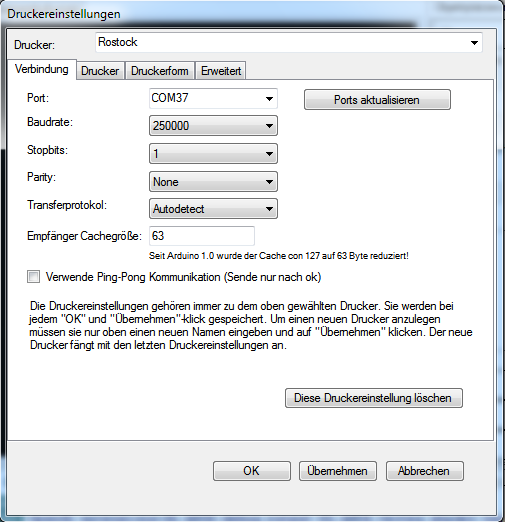
Port: The port where you have the printer connected to
Baudrate: 250000
Stopbits: 1
Parity: None
Transfer potocol: Autodetect
Receiver Cachesize: 63
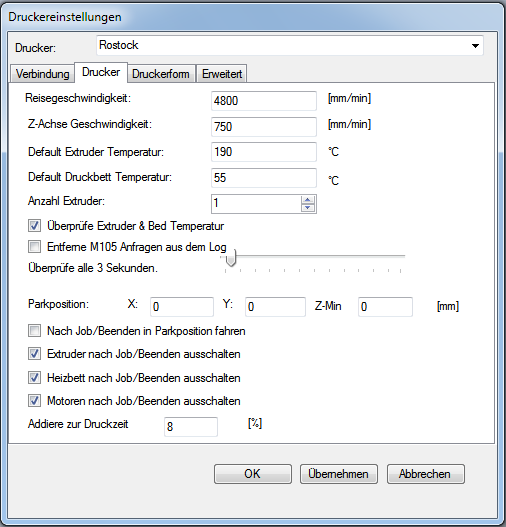
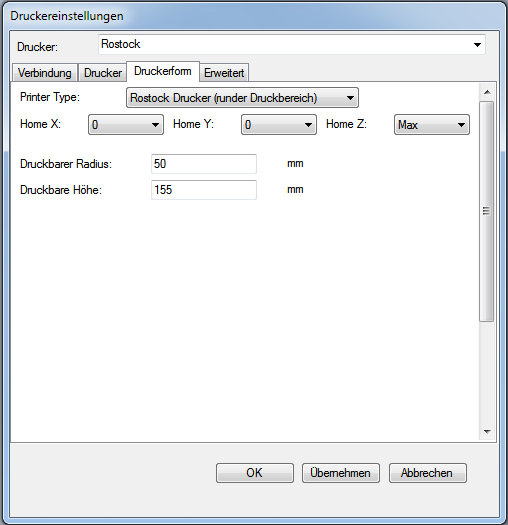
For the other settings, see the follwing pictures.
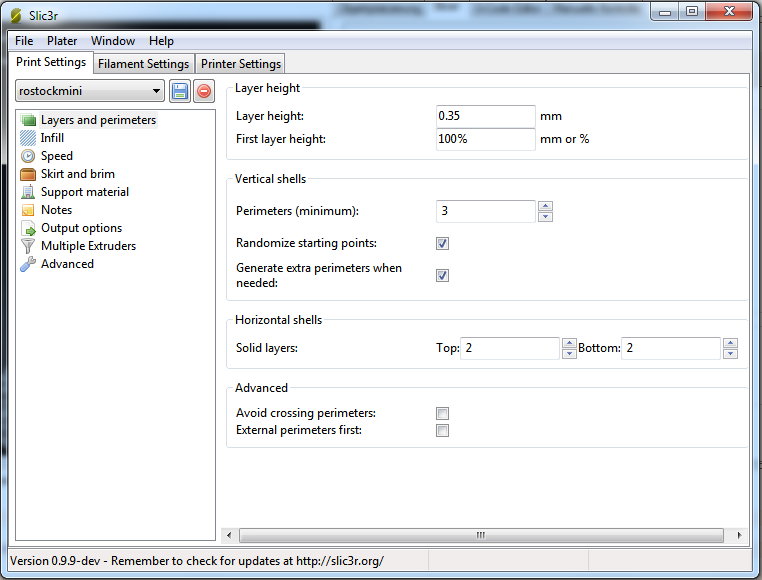
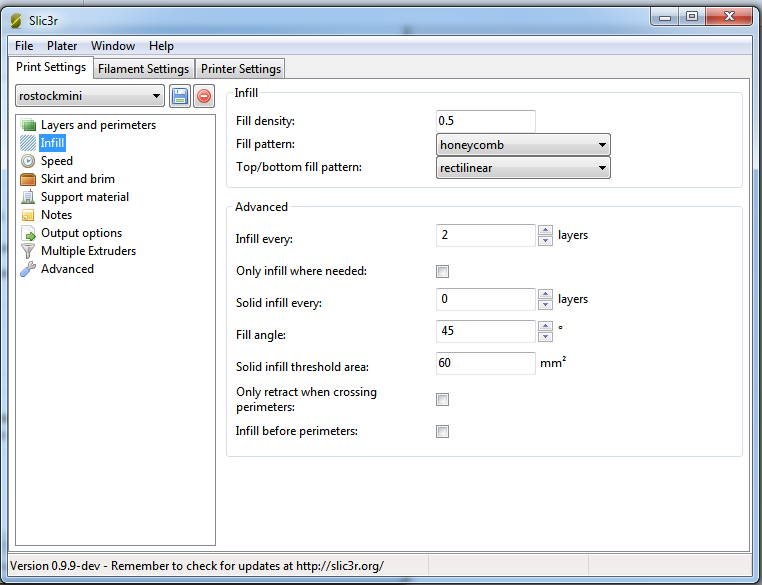
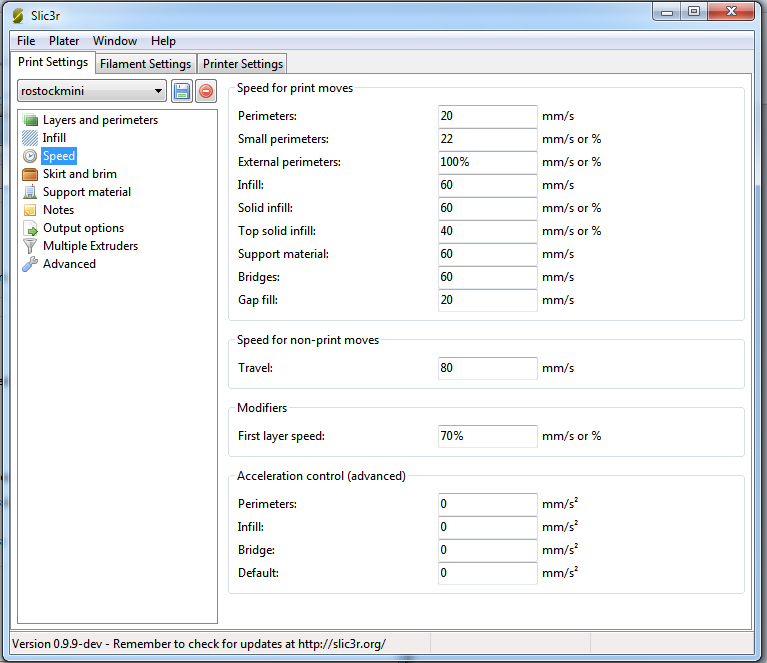
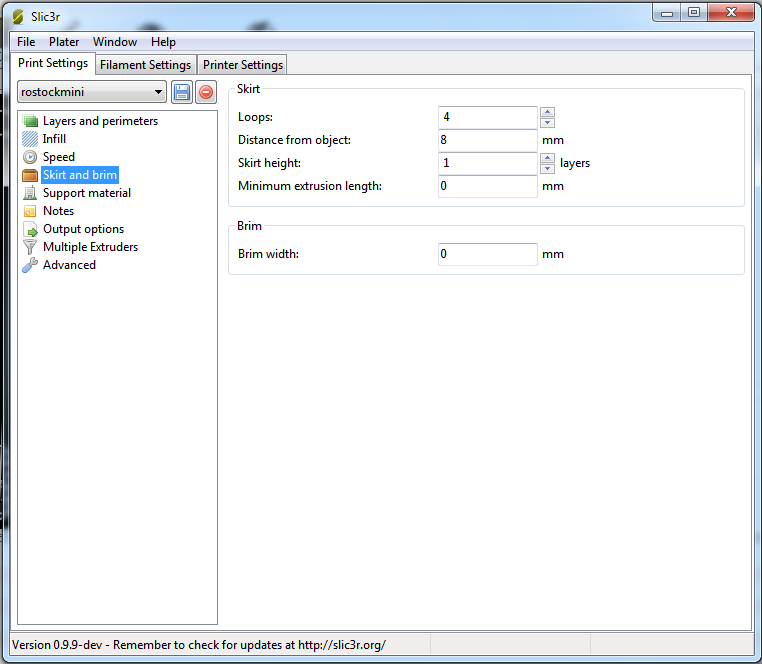
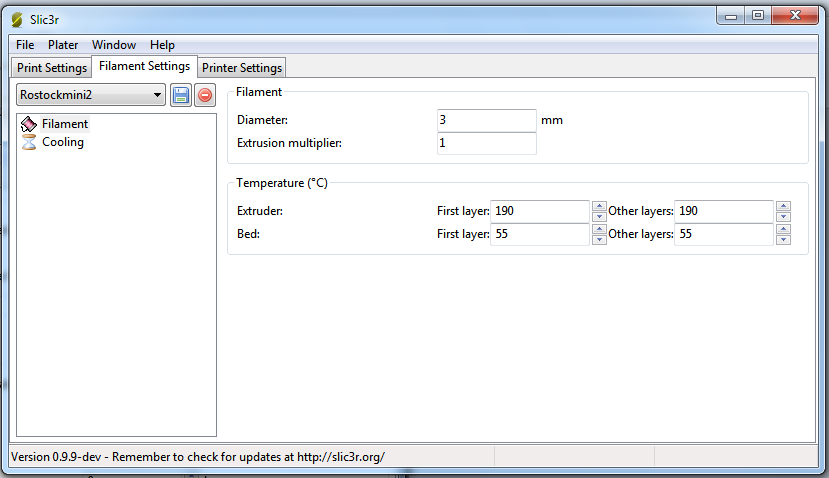
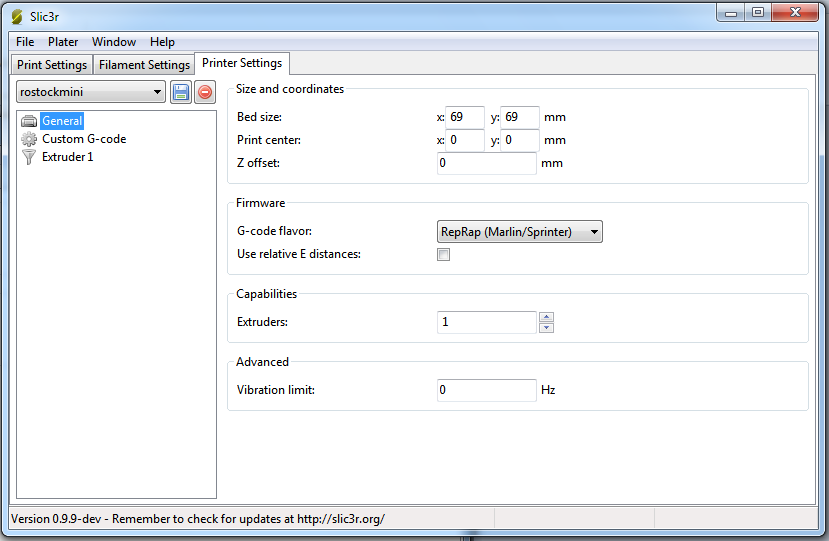
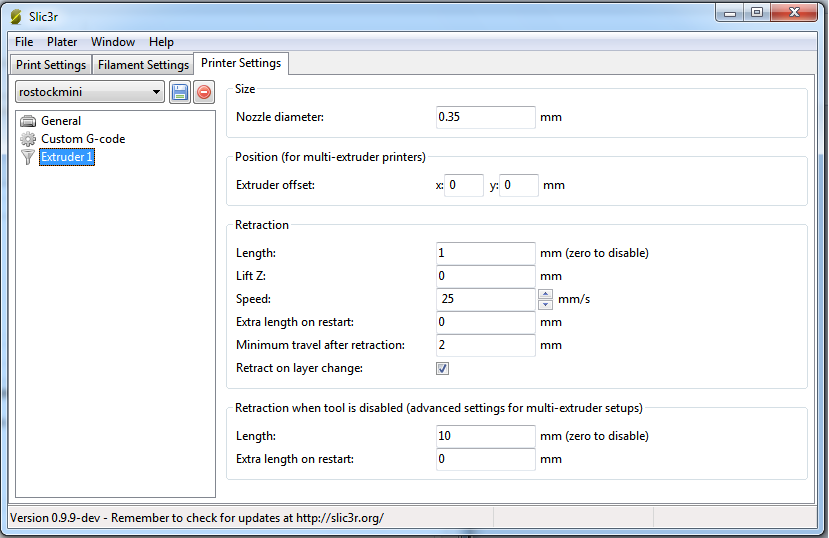
2. Edit the slic3r settings
Next thing you have to do, is to change the slicer settings to match the Rostock printer
You can do this by selecting the "settings"-button in the slicer field.
I would strongly suggest to save the profile using a name such as Rostock_PLA or similar to avoid later confusion.
We got good results with the following settings:
(Note: We use PLA on this one, ABS settings may vary)
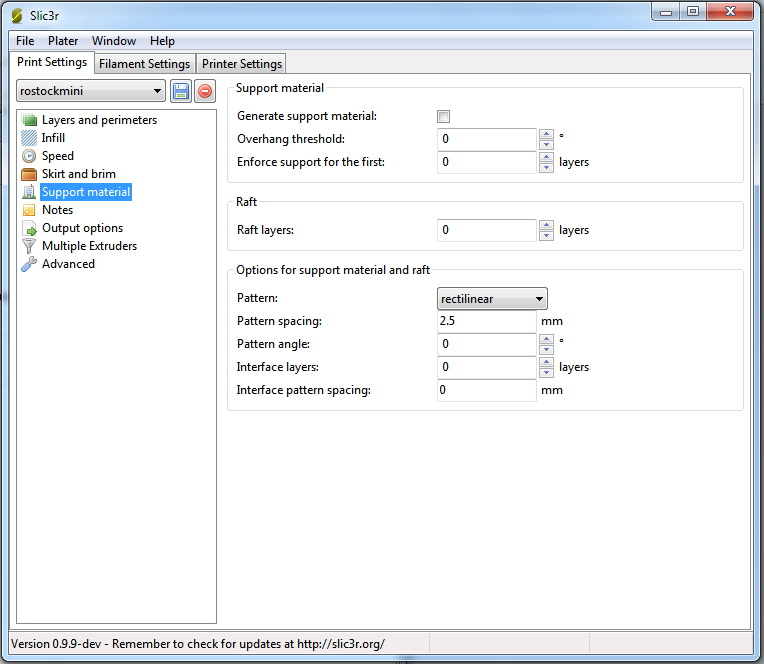
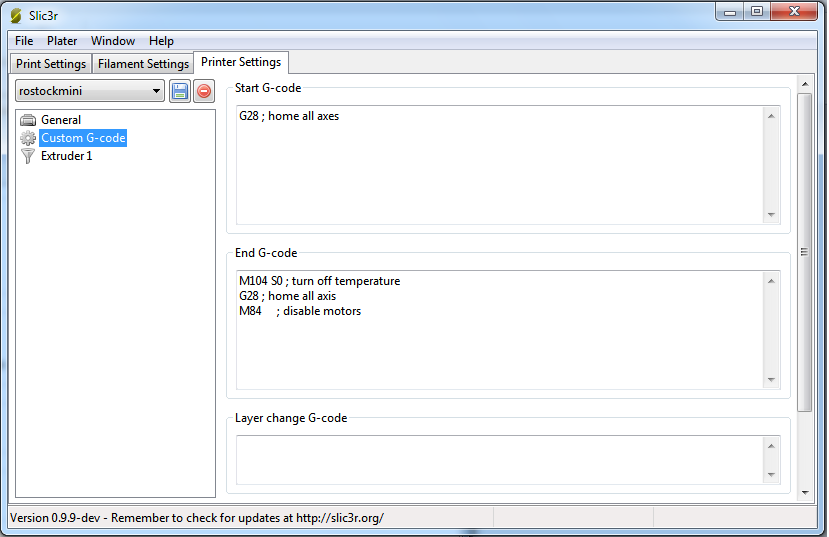
READ THIS CAREFULLY. Change the default "G28 X0" command to "G28", otherwise the printer will crash after finishing your part.
3. Test the printer
Once you finished i suggest to preheat the hot end to 190°C and the platform to 55°C since this needs some time.
Go to "manual control" and enter 190°C in the extruder field and 55°C in the heated bed field.
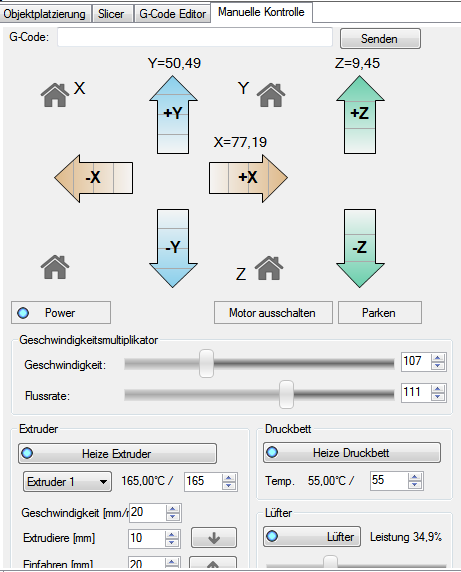
You can also select the small house symbol to home all axes. This is useful to see if all motors are working.
If you reach the temperature you can click the "arrow downwards"-button to do a test extrusion.
If everything works, go to step 4.
4. Insert your *.stl-File
Drag and Drop the object you want to print on the virutal print bed. Go to the Slicer menue and hit the big "Slice with Slic3r"-Button. The menue will now show you the Gcode of your object. If you don't have any object there, use our Turtle Test G-Code and copy-paste it in the Gcode field.
5. Start your print-job
Click the "Start Job''-Button. While you are printing, you can adjust the speed and the flow rate "on the fly" by moving the slider bars in the manual control box. Most of the time you get better results if you reduce the printer speed to 90%.
Note: It needs some time for the printer to heat up, so don't worry if you hit the button and nothing happens at first. If you have a major malfunction unplug the power chord and fix the error.