RepRap
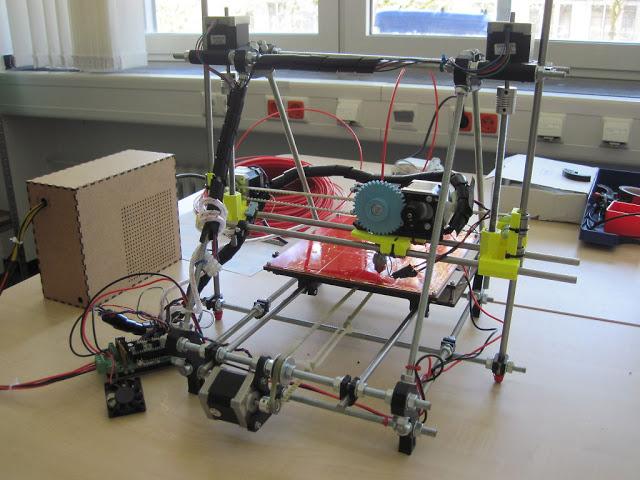
We have one RepRap Prusa Mendel at the fab lab. Jan built it during the first meisterklasse.
The Parts are mostly Iteration one (black parts), printed by Josef Prusa.
The printer was updated in winter 2012/2013:
- The PLA bushings were removed and replaced by LM8UU linear bushings
- The plastic drive gears were replaced by metallic ones
- The z couplings were replaced by metallic ones
Current Hardware
- The black plastic parts were printed by Josef Prusa.
- The yellow plastic parts were printed in the Fablab, these are iteration 2 prusa mendel parts
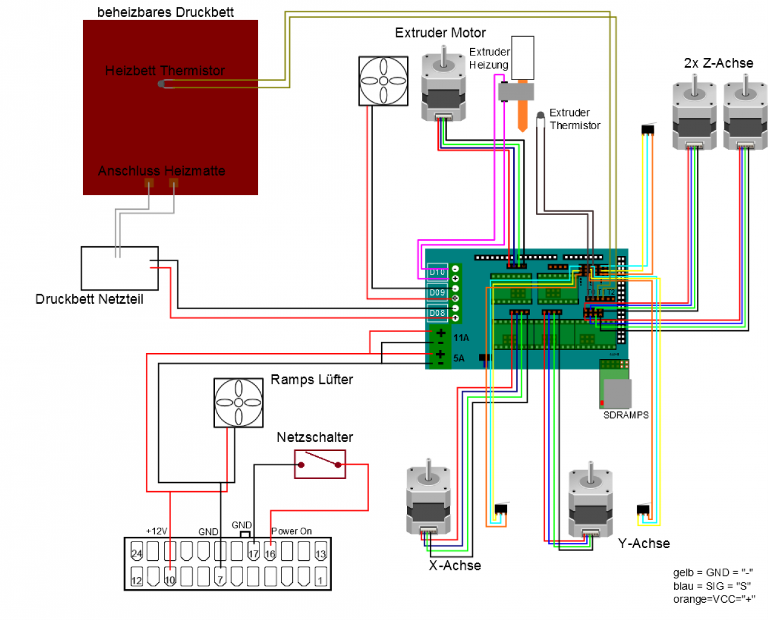
- Arduino MEGA 2560
- RAMPS 1.4
- Four stepper drivers: Pololu clones with heatsinks
- Mechanical endstops (switched) on x, y, and z axis
- Makergear Hotend for 3mm filament
- Wade's Extruder
- Heated Build platform
- IKEA Mirror and Kapton on top of the heated build platform (not in the picture)
- Modified y-Carriage
- Ramps Holder Ramps Holder
Current Software
Firmware: Repetier 0.82.2
Use this client software: Repetier-Host - for Mac and Windows
How to use
Make sure the power supply is switched off as long as you don't have a conenction via USB. Otherwise you may break the Pololu's!
- Download latest Repetier-Host Software. We use Version 0.85b which works like a charm.
- Start Repetier-Host.
- Connect your Laptop to the printer via USB. Go to "Configuration" -> "Print settings". Select the usb port and change the baudrate to 250000.
- Click "Connect" in the Repetier-Host Software.
- If the connection is established, switch on the ATX power supply.
- Heat up the build platform, since it takes a while. Goto "Manual control" in the Repetier Host software and select "Heat printbed". 90° should be fine.
- Drag and Drop your stl file on the platform window.
- Goto the Slic3r Menue and change the slicer settings according to the screenshots below.
- Click "Slice with Slic3r"
- Start the print by clicking "Start job".
Always watch the printer during the process! Sometimes z-axis needs to be adjusted a little bit at the start.
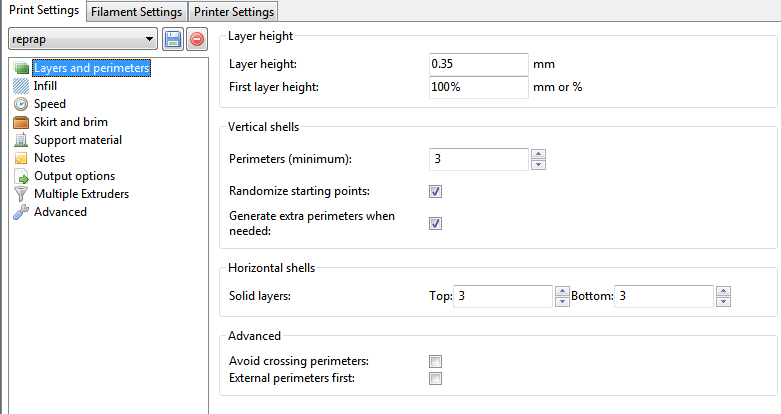
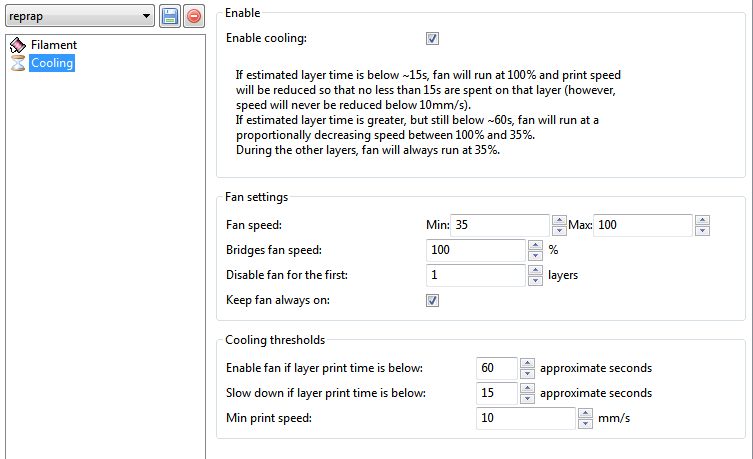
Slic3r Settings
The following Slicer settings worked gave us good results. Keep in mind that you need to modify these settings depending on your object. Slic3r Version 0.9.9.
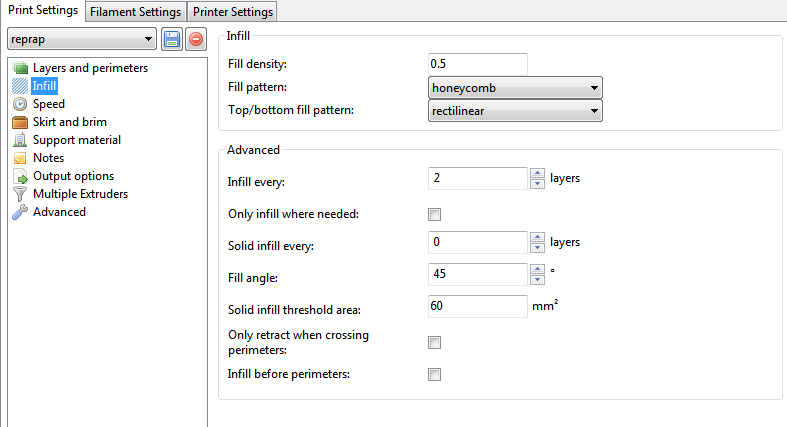
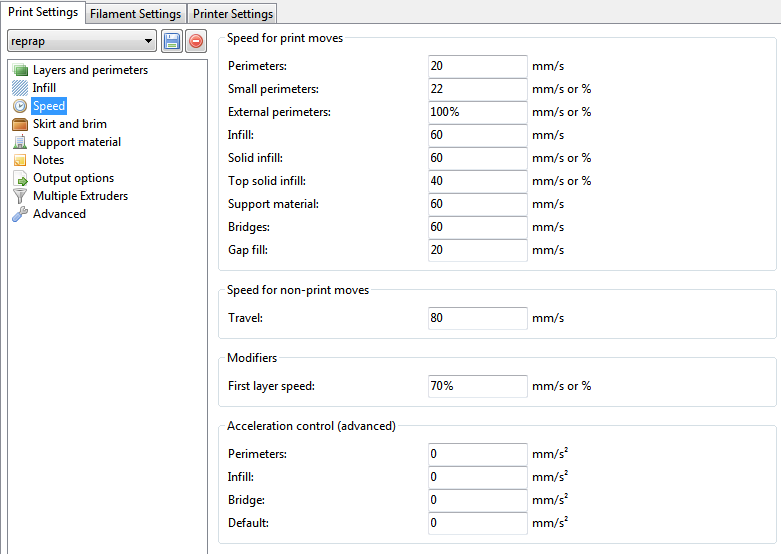
Print settings:

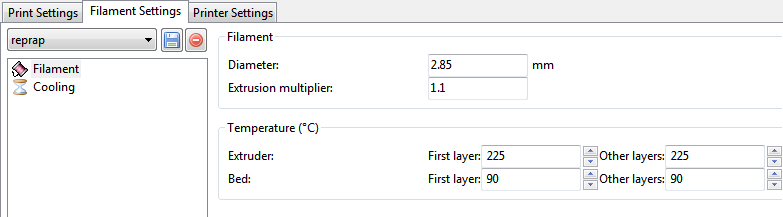
Filament settings:
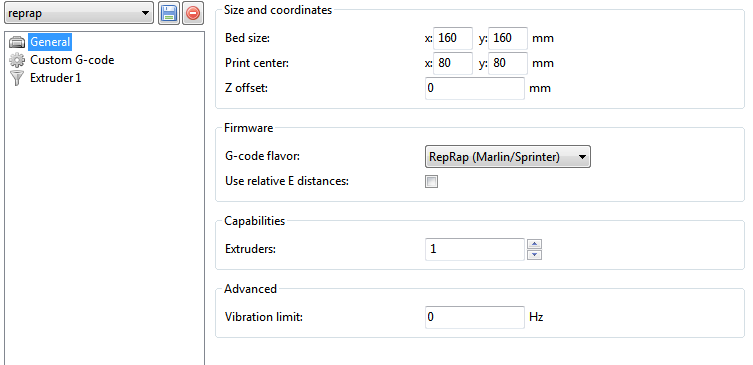
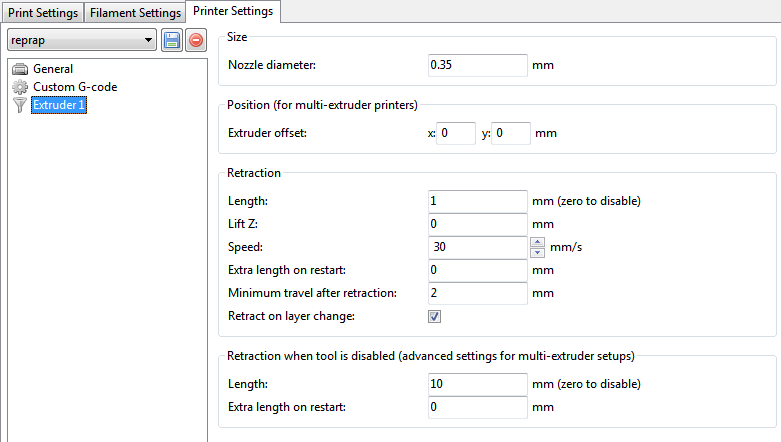
Printer settings: