Intel Galileo 1: First Impressions
Update for Galileo Gen 2 below
January 21, 2014
Today Intel delivered 40 free Galileo 1 boards for our lab. These boards run Linux, which (among other things) emulates an Arduino in software, and provide pin-compatible headers for Arduino shields, but also ethernet and lots of other connectors. Time for a little hands-on then. Here are my initial thoughts:
The packaging looks impressive. The board itself also appears very professionally made, as befits Intel—except for that weird green bare chip in the middle (which turns out to be the Quark processor—even smaller than an Atom, get it?), which emulates the Arduino in software and runs the Linux kernel. The board is also significantly larger than your standard Arduino Uno. This will get interesting when it comes to compatibility with enclosures, breadboard holders and such. But you quickly recognize the Arduino-compatible headers, cool. There's also a power supply in the box, hmmm... makes me wonder: do you actually need that all the time? Ours came with plugs for any power socket in the known universe—nice, and while not really necessary, it probably simplified worldwide shipping.
The included leaflet looks like a mini user guide... but far from it: just safety warnings in some 3,000 languages. Too bad. The only exciting news in there is about a real-time clock. Cool! That's something I've needed in a lot of projects. Now where's the battery?... Oh, none included. So let me just pop in one (if I can find the right size in my junk drawer)... wrong again, because not even a battery holder is on board, just two pin headers. Oh well. SparkFun does a better job here, even with their simple RTC modules.
So on to the URL glued to the inside of the packaging like an afterthought. Not outside, not on the board, not in the leaflet. It's maker.intel.com—"Galileo" shows up nowhere in the name. Was Intel planning on keeping this URL secret?
Once at that URL, I don't get a "Getting Started Right Now" page, but instead there's some makers-are-great-we-too marketing blurb that I click through to the "Learning Center", then on to "Tutorial 0", and then... the first real showstopper: "Use with power supply only, otherwise you may DAMAGE your board when plugging in USB!" How is this supposed to work in any classroom?
A USB cable is not included, btw. Would have been nice for a quick start, and there's definitely room in the packaging. I suspect the lawyers intervened, because then you could plug in that USB cable first... So I dive into my junk drawer once more for a cable. Showstopper number 2: The port is not the beginner- and kid-friendly, robust full-size USB port as with all Arduino boards up until the Uno, which you can even use to *hang* a prototype from in a pinch (and which I have dozens of cables for), but the more modern, but mechanically more fragile Micro-USB. After digging through my boxes for fifteen minutes, I end up with a handful of Mini-USB cables, and finally also a Micro-USB one. The source: A $9(!) Leonardo-compatible Kickstarter kit from Borderless Electronics. How bizarre.
It takes a full seven seconds for the board to boot and turn on its "USB ready" LED, only after which you're allowed to insert the USB cable. Is anyone out there actually going to follow that rule? What if I briefly kill power to reset the board? Always unplug and re-plug everything?
Let's take a look at the board labeling... the labels for the headers (that you constantly plug cables into when using an Arduino) are way too hard to read—too little space around them, smaller font than on other Arduinos, partly hidden beneath components, and some pins are even connected to their labels with a line around several corners. Not beginner-friendly; workshop drama is a given with this. I wonder if Intel involved any teachers in the design.
I like the large, well-isolated mounting holes to attach the board to something. Should Intel actually... no, they don't take "ROW" (Intel's abbreviation for "Rest of World", I'm not kidding) that seriously: the distances are in inches. Supposedly you can insert an SD card. Into an "optional on-board Micro-SD card reader". Come on, what's it gonna be, is it included or not? Fortunately I find one on the board. Cool!
However, showstopper number 3 follows: Without an SD card, the board does not store any sketches when turned off! WTF? This means that to use the board in practice you'll also need a Micro-SD card—which is as absent from the box as the Micro-USB cable (of course). Seems like nothing with the prefix "micro" was allowed in the box, not even a microcontroller with integrated Flash memory. Those 8MB Flash memory on the board mentioned in the datasheet appear to be above such mundane tasks.
There's an ethernet port. Nice. Even better for an embedded board, of course, would have been a WiFi adapter, given that being mobile and deployable anywhere is kind of the point of all this, but anyway.
On with the tutorial... next hint: "Please deinstall your Arduino IDE, we need a special version." Not very helpful... why can't I leave my default version next to it on my drive? Is this just a Windows problem? I try just renaming my existing Arduino IDE, which works fine. Next step in the instructions: "Install drivers"... however, the download is just an obviously patched version of the Arduino 1.5.3 IDE. Huh?
I launch the patched IDE. Thanks to Mavericks, I first have to install Java for that. But that's Apple's fault, not Intel's.
Select board and port, I know that part... hold on: on the Galileo you have to select the cu port, not the tty port! Also, all other Arduino boards appear to be unusable with this IDE. Strange. Does that mean I'm supposed to deinstall and reinstall the IDE every time I switch between Galileo and other Arduino boards? I'm sure that's not really the case, but if you believe the documentation, that's the implied procedure.
Next: updating the board's firmware... from 732 to 782 or something. The warning dialog that pops up is very reassuring:
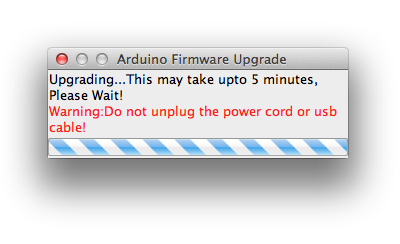
That's OK, but how about a proper progress bar? Can't be that hard to estimate. Also note that after a while, this dialog disappears for about one second—but you're not done yet! If you get all excited and pull the cable, you lose, because the dialog pops back up afterwards. This happens several times.
Five minutes are a long time... however, the instructions do not describe this step as optional. So I update and wait.
For a brief moment, the IDE's file menu shows me nothing but greyed-out entries (hanging due to blocking drivers?), then it comes around. Gotta keep an eye on that one.
What follows in the tutorial is a somewhat haphazard short introduction to the Arduino IDE. No need to read if you know Arduino. The guys at Intel re-gain some street cred with me when their screenshot in "Tutorial 0 Step 4" is actually from a Mac for a change.
Alright, we're on the finishing line... load the Blink sketch, upload... WTF?! The pin 13 LED is miles away from that pin on the board. Like there was no space for such a ridiculously small component anywhere near that pin. Really, guys... ever heard of the Gestalt Law of Proximity? On the Uno and friends, it's a mere 1/4 inch away. Even worse: Seems like there was no space (or money) left to include the RX/TX LEDs. No way to tell if you're actually uploading to the board. But once my upload is complete, at least the nowhere-near-pin-13 LED starts blinking. Success!
Tutorial 1 does sound I/O—cool, although a $6.85 sound sensor (consisting of an electret microphone and an op-amp on a small PCB) seems a little expensive for this. A simple microphone, or another tutorial topic, might be more suitable for beginners. Also, the Linux core does not get used here at all. It's pure Arduino programming. Why not just refer the reader to any of the many excellent Arduino tutorials out there?
Now on to the Linux side of things... Hmmm, where's the documentation for that? I don't find anything in Intel's entire Learning Center. So I download the Getting Started guide. It's very similar to the online tutorial, with some interesting differences. For example, this one lists updating the firmware as optional, only after a careful read you find that they're talking about a manual update (not using the IDE function which has since replaced this procedure). Why, then, is that information still in here?
On the plus side, there's a picture of the board with some labels in here. The Arduino reset button, btw., is at maximum distance from the Arduino pin headers. The reboot button right next to the Arduino headers is for the Quark processor. Of course. :)
Aha... here's the info that you're really not allowed to use the tty port. So it's really exactly the opposite of every other Arduino model out there.
Supposedly I have to download another archive to put Linux on the SD card... but don't Linux calls already work? I just download the Linux examples, and lo and behold, they work: In the Linux_SystemTime example, Arduino code is calling Linux system functions to get the current time and to read files. Easy, if you're brave enough to just try.
Thus encouraged, I stick an emtpy FAT-formatted 2GB Micro-SD card from a new Kensington Presenter into the slot on the board, and upload my sketch again. Unfortunately, after power-cycling (I mean, unplug USB, unplug power, plug in power, waaaaaait, plug in USB—let's see how long I can keep this up), the program's still gone. Looks like we need some more magic here (which the tutorial should cover).
Browsing the Galileo datasheet, I'm impressed that the Arduino pins on the board can be switched to 3.3 or 5V using an onboard DC/DC converter. Also, in the age of ubiquitous USB power adapters, the Galileo's 5V power adapter input is much more practical than the old 9V input on other Arduino boards, which you can never power from a 5V source other than the USB port without endangering their onboard converter. Arduino could take a page out of Intel's book here.
Finally, I take a look at the hardware overview video, which the website actually recommends as the first place to go to. And my ears fall off. In Megadeth-style distorted audio quality, a small boy tells us what he thinks(!) those components on the board are. Cute, but with quite a few guesses, this is mostly a wonderful way to waste your time if you're one of the few who can stand listening to the entire video. Instead of a kiddie marketing gag, the initial intro video might do better by telling us in a compact and competent way (and with proper sound, light, and production) what the board can actually do...
To sum up:
Some design decisions in the Galileo's first iteration suggest that Intel thinks the Maker community is awesome, without actually quite understanding that community. A board that may blow up if used without a power adapter, an Amnesiaduino that requires a Micro-SD card (sold separately) to remember sketches, and hard-to-read pin header labels may make this board an excellent choice for command-line-weathered hardware hackers, but not for modern makers who gather their knowledge in a modular and agile way from a variety of online sources and just want to get their project running. And countless newbies will be frying their iPhone headphones before they realize that that onboard 1/8" mini-jack socket isn't an audio outlet but actually an RS232 connector.
I'm sure integrating the IDE into the mainstream Arduino distribution is going to happen soon, but meanwhile, recommending to delete the original IDE is not helpful and appears unnecessary (at least on my Mac). The famous MTTB (Mean Time To Blink) of the original Arduino, from unpacking, to installing, plugging in, and uploading your first sketch, isn't there yet.
The Galileo's true power, of course, will only unfold once you kick that Linux kernel into high gear; otherwise you might as well have bought an Uno to start with. So no premature conclusions here. Initial experiments suggest that accessing Linux functions from your Arduino code is surprisingly painless—in a way, Linux is there for free, when you need it.
A Micro-USB cable and a small Micro-SD card wouldn't have impacted cost significantly, and would be a very good investment, especially in such a starter box. I can already see those forum posts asking what Micro-SD cards actually work, which don't, which one you should buy—nothing beginners should have to worry about.
Finally, the question remains: Do You Need This? Undoubtedly, there are countless applications that require computer vision or other heavy lifting to enable entirely new embedded maker projects. However, in the Galileo this power comes at a steep price: increased complexity that is hard to avoid (after all, there's an operating system running here)—and unnecessary design mistakes of an engineering team that was apparently lacking some didactic and design skills, which adversely impact usability. Add to that the unavoidable compatibility issues with the countless Arduino libraries and code snippets out there that will come up with the Galileo before you get to your actual project. For example, the AREF input simply doesn't work; Intel's forum for the board has more examples. In the end, like with the Raspberry Pi the answer is simple: For many simple Maker projects, the OS-free Arduino in its many shapes and sizes will remain the better choice, because it is less complex and optimized for quick project success.
Update for Galileo Gen2
August 6, 2014
We're about to receive some of the new Galileo Gen2 boards, but Intel's website already lists some changes that are related to my review above:
- The audio-looking serial jack connector is gone. Headphones around the globe rejoice.
- The 5V input that I got so excited about seems to have gone back to the standard Arduino 7+ V input. OK, more inline with the rest of the Arduino world. I hope there's still a legal way to power the board directly from a 5V rail that does not require hacking a USB plug.